Showing posts with label pandan. Show all posts

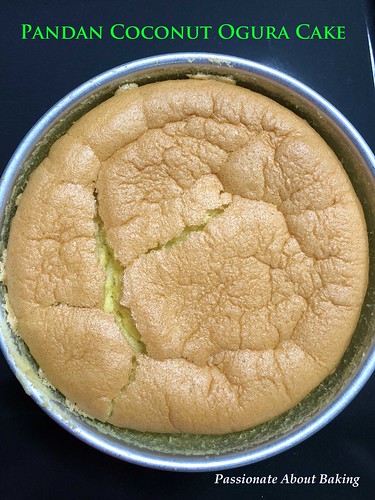
Pandan Coconut Ogura Cake

I have always been a fan of any pandan coconut food - Nonya kuehs, chiffons and Kayas etc. And I get attracted to them easily, whether to eat or to bake or cook. Sometimes, I just have the urge to buy pandan leaves, then decide later what I want to do with it. With abundant leaves and eggs, I made kaya last week. 

With leftover pandan extract, I decided to make Pandan Coconut Ogura Cake. Initially, the cake rose well in the oven, but when removed from the oven, it collapsed. I was worried that my cake will be flat with a layer of kueh structure. Fortunately, it looked quite good after it had cooled although the holes were not even. It was soft and fragrant. Despite having placed a water cup in the oven, the oven was still too hot for the meringue. I shall reduce the temperature further if I bake this cake again.
cake_pandancoconutogura2
Recipe for Pandan Coconut Ogura Cake, adapted from Nasi Lemak Lover.
(Makes a 8"round cake)

Ingredients:
4 Egg yolks (original was 5, I used only 4)
1 Whole egg (approx. 65g)
40g Vegetable oil
80g Coconut cream (I used Kara)
10g Pandan extract
Pinch of salt
85g Cake flour, sifted

5 Egg whites
80g Caster sugar
1 tsp Corn flour

Method:
  1. Line an 8" round cake pan. Preheat oven to 150C. Place a cup of water in the oven.
  2. In a large mixing bowl, beat the egg yolks, whole egg, oil, salt, coconut, pandan extract together till well combined.
  3. Sift in the flour and mix well until no visible lumps. 
  4. In a mixer bowl, add in the egg white and beat till foamy.
  5. Gradually add in the sugar mixed with the corn flour and continue beating till glossy and stiff peaks.
  6. Gently fold in the egg white mixture into the egg yolk mixture in 3 separate portions.
  7. Pour the batter into the prepared cake pan and place on the 2nd rack in the oven. Bake for 60mins.
  8. Remove from the oven and let it cool completely.
  9. Slice after cooled and serve.
  10. cake_pandancoconutogura1

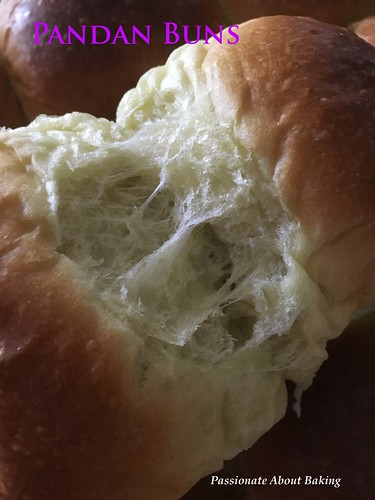
Pandan Buns

It has been a while since I updated my blog. For the past two months, I had been really busy and lazy. My helper had gone back for her home leave during the one month school holiday. On top of it, I was hospitalised for a couple of days due to colon inflammation. It wasn't a "productive" month for me in terms of cooking and baking. I have since recovered and have resumed my normal activities. Life has resumed since my helper is back, school has started and work continues.

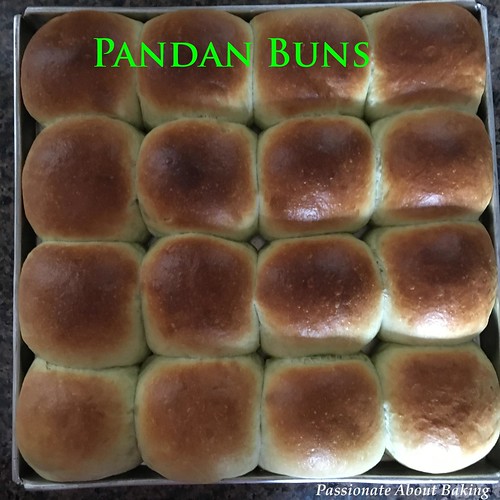
My friend passed me some of her organic homegrown pandan leaves a while ago. Luckily, her leaves survived well in my fridge. I was able to extract them and made them into Pandan Buns. The kitchen was very fragrant when it was baking. The buns were soft and fluffy, but not light though. 

buns_pandan05
Recipe for Pandan Buns, modified from Super Soft Bread from Victoria Bakes.

(Makes 17 regular buns)

Ingredients:

520g Bread flour
6g Instant dry yeast
380g Hydration (28g pandan extract + 25g coconut cream + 140g whipping cream and topped up the rest with full cream milk)
60g Caster sugar
4g Fine salt
65g butter

Method:


1. Mix all ingredients, except butter, together and knead till you get a silky and elastic dough. Approximately 3 mins on low speed.

2. Incorporate butter and knead till window pane stage (crucial). Approximately 8mins on medium-high speed. Test for window pane.
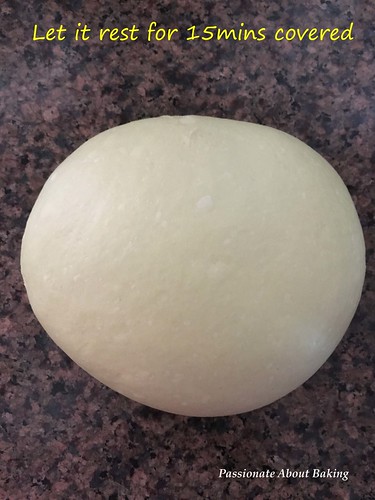
3. Let the dough rest for 15mins on the table top, covered with a cloth or cling wrap.
buns_pandan01
4. Weigh each dough to be 62g (approximately 60-62g). It will yield about 17 pieces.
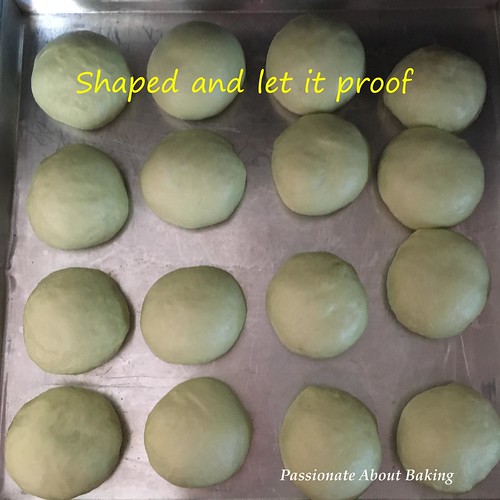
5. Shape it round, and placed in a tray pan, spacing them out.
buns_pandan02
6. Let it proof for about 45mins. 
7. At 45th mins, pre-heat oven to 170C.
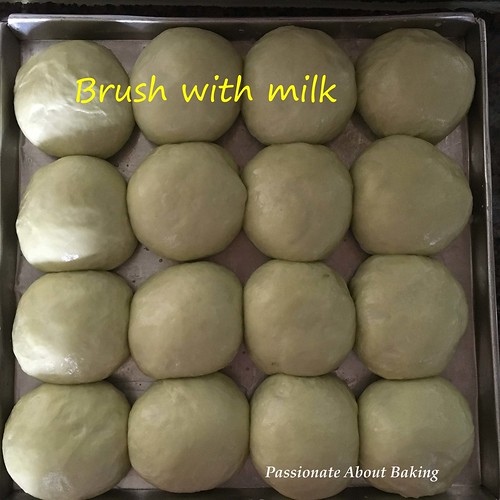
8. Meanwhile, brush the dough with milk.
buns_pandan03
9. When the oven is ready, about 15mins later, bake in the lower rack for 16mins, tenting the bread if needed during the last 2 mins.

buns_pandan04
Serve with kaya or just simply eat it plain.

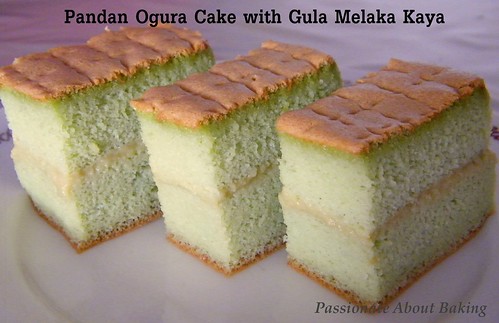
Pandan Ogura Cake (香兰相思蛋糕)

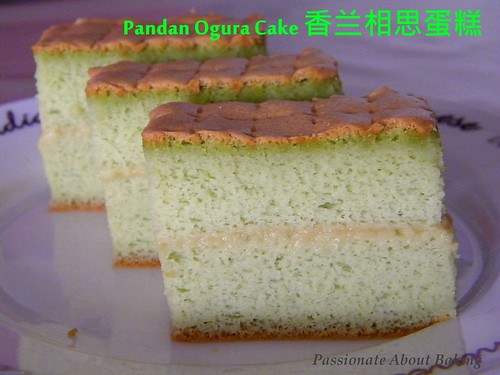
During the last bloggers' gathering, we discuss about this 相思蛋糕 (or known as Ogura cake). Then Rei started baking this, and shared some with me. It was so good I had a few slices at one go! The cake was really light and airy. I also saw many Malaysian and Singapore bakers attempted this cake and they looked really good. You can read more background of this cake from Corner Cafe. If you do a search, you can actually find many recipes now.

Finally, I decided to try this cake since I wanted to use up my eggs. I adapted the recipe from Honey Bee Sweets. After baking, then I saw Sonia's post on her experiences on this "touchy" cake. I'll share my notes below.
cake_ogurapandan1
Recipe for Pandan Ogura Cake  (香兰相思蛋糕), adapted from Honey Bee Sweets.
Makes a 8" x 8" cake (I used 7" x 7" but overflowed)

Ingredients:

Egg Yolk Batter
50g Vegetable oil
80g Coconut pandan mixture (I used 10g Pandan extract + 70g coconut milk)
1/4 tsp salt
100g egg yolk (approx. 6 eggs since my whole egg without shells weigh 45g)
1 whole egg
65g Top flour

Egg White Batter
200g egg white (approx. 7 eggs)
70g caster sugar
1 tbsp corn flour

Method:

  1. In a large mixing bowl, beat the egg yolks, whole egg, oil, salt, coconut pandan milk mixture together till well combined.
  2. Sift in the flour and mix well untill no visible lumps. (set aside and cover)
  3. Line a 8"x8" square cake pan.
  4. In a mixer bowl, add in the egg white and beat till foamy.
  5. Gradually add in the sugar mixed with the corn flour and continue beating till almost stiff peaks.
  6. Gently fold in the egg white mixture into the egg yolk mixture in 3 separate portions.
  7. Pour the batter into the prepared cake pan and bake in the preheated oven of 160C for 1 hour in water bath.
  8. Remove from the oven and let it cool on a rack upside down for 15 mins.
  9. Remove the cake from the pan and continue to let it cool.

Notes:
  • I used a 7"x7" cake pan and the batter was already close to the rim. Probably because I used 7 eggs, which weigh about 220g egg whites.
  • I had overbeaten the egg whites and found it difficult to fold into the liquid mixture. In doing so, I could have deflated the whites, which explained why the holes in the cake was not uniform.
  • I let the cake cooled in the pan. After removing the pan, it caused a dent on the bottom.
cake_ogurapandan2
I would consider this cake not very successful for me since I didn't get the correct texture due to my egg whites. After taken Rei's cake, I already had a "baselined" of how and what it should be. Nevertheless, this recipe is still good and the cake was really soft and light. You can refer to Sonia's thorough write up on this cake. I will probably use hers for other flavours the next round.

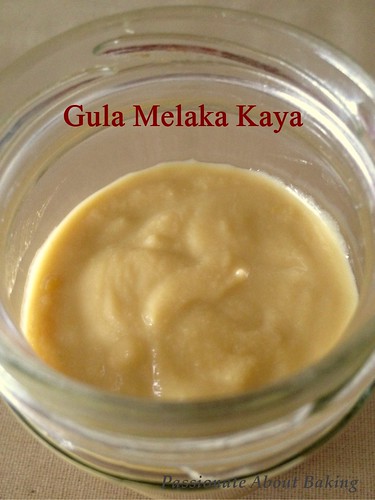
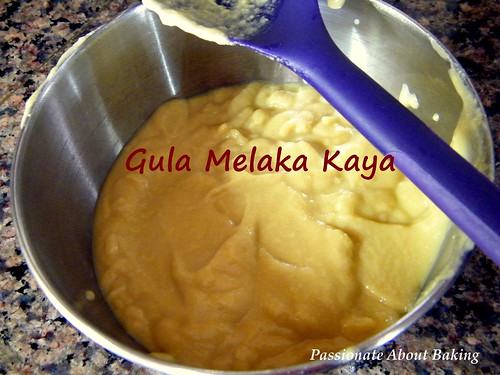
I sandwiched my Pandan Ogura Cake with homemade gula melaka kaya. I adapted this recipe from Kitchen Tigress.
kaya2
Recipe for Gula Melaka Kaya (Palm Sugar Coconut Egg Jam), adapted from Kitchen Tigress.
Makes 1 cup (approx. 200g)

Ingredients:
45g Gula Melaka, chopped
30g Sugar
200g Coconut cream (I used Kara)
4 Pandan leaves (I omitted this)
4 Egg yolks (the yolks I had was small, probably will use 5 next time)

Method:
  1. Cook gula melaka, sugar and coconut cream in a pot over medium heat. Bring it to a gentle simmer.
  2. Slowly stir half of the coconut mixture into the egg yolks. Mix well.
  3. Pour the egg mixture back into the remaining coconut mixture in the pot.
  4. Continue stirring until it thickens.'
  5. Reduce the heat to low and stir till the mixture coats a spoon thickly.
  6. Discard the pandan leaves if using.
  7. Let it cool completely before bottling, then refrigerate.
  8. Use it to spread on your Ogura cake. Enjoy!

Note:

  • The coconut jam was a lumpy after it cooled down. I sieved it to get a smooth texture.
kaya1

Pandan Chiffon Cake

After making the pandan coconut steam cake, I still have pandan juice and coconut cream in the fridge. I decided to bake the most classic cake - Pandan Chiffon! Once a while, I still like to make the most basic bakes - pound cakes and chiffons. It's a good way to practice the basic techniques. I can't believe the last time I baked a pandan chiffon was a year ago!
Anyway, using the same recipe I used last year, I reduce it slightly for my biggest tube pan. Here is reproducing the recipe from ieatishootipost.
Recipe for Pandan Chiffon Cake, modified from ieatishootipost.
(Makes a 23" chiffon)

(A)
4 Egg yolks
55g Caster sugar

(B)
77g Corn oil
94g Coconut milk
1 1/3 tbsp Pandan juice
1tsp Vanilla extract

(C)
133g Top flour (or cake flour)
1 1/3 tsp Baking powder
A pinch of salt

(D)
6 Egg whites
68g Castor sugar
3/4 tsp Cream of tartar

Method:

  1. Cream (A) until light using a hand whisk. Alternatively, you can use an electric mixer to cream till light and fluffy.
  2. Add in (B) gradually. Mix well.
  3. Sift (C) into the mixture and mix well. Leave aside.
  4. In a mixer bowl, beat the egg whites until foamy with a whisk.
  5. Add in the sugar and cream of tartar gradually.
  6. Continue beating until soft peak. Soft peak is when you lift the whisk off the egg whites, the egg whites are able to fall back and form a "C" shape, not a "U" shape. If it is "U" shape, it has not reached soft peak yet.
  7. Using a spatula, add one third of the egg whites into the yolk mixture and fold to ensure that they are mixed thoroughly.
  8. Then pour this mixture back into the egg whites, and very gently fold the batter into the egg whites. Do this gently but swiftly.
  9. Before you pour the mixture into the tin, give your batter tin a few knocks on the table. This will get rid of the big bubbles before you pour into your tube pan.
  10. Pour the batter into your tube pan slowly and in one direction. Do not grease your pan.
  11. Bake it in a pre-heat fan oven of 160C for 50mins.
  12. Once it's ready, overturn the cake on a bottle top and let it cooled completely.
For me, I'm still trying to master my skills in removing chiffons from its pans. You can see my removal skills is completely hopeless!

Steam Pandan Coconut Rice Cakes

This week is totally out of work for me. I had scheduled for an operations for my precious daughter. When she was born, she had lower eyelashes growing inwards. The medical term is called Entropion - is the turning in of the edges of the eyelid (usually the lower eyelid) so that the lashes rub against the eye surface. Long term, it will cause cornea dryness and irritation, which may increase the risk of Cornea abrasions, Cornea ulcers and eye infections. One of the treatment is to have surgery to correct the position of the eyelids. A couple of years ago, she was referred to KKH Specialist for her eye condition. The doctor did mention about the operation, as an option, to us though. However, at that time, she was still very very young, we didn't want her to go through the operation.


Then early last year, when she entered primary school, the health check referred her to Refraction Clinic. After the check in Refraction Clinic, she was highly recommended to wear spectacles. When we brought her to an optometrist, he strongly encouraged us to send her for an operation. He told us that her cornea has been very badly scratched, if  such continue, she might go blind in her later years. That scared us! The seriousness of going blind wasn't mentioned to us when we brought her to KKH. And for her condition, the optometrist had to prescribe a transition lens. Her astigmatism was over 300 degrees. He said that under such condition, she will be very sensitive to lights, therefore, it'll be better for her to wear transition lens. A letter from the optometrist had to be given to the school for her to wear transition lens as mandatory, and not for beauty purpose.


Since then, we made appointment to go back to KKH to review her condition and requested for an operation. The date had been scheduled, and finally, she undergone the operation. She was put through the general anesthesia. I hope that after the operations, her eye problem will be a history. I shall spare the details of the operations.


On the 3rd day, the stitches actually came out itself...notice the yellowish "thread"?
Since I was home for the past two days, I decided to steam some cake. After I bought the "Magic Steamed Cake" by Alex Goh, I've not tried any of the recipes. So this is the best opportunity to do some steaming instead of baking. I decided on the steamed rice cake. However, since I still have my pandan leaves and coconut cream, I made Pandan Coconut Rice Cakes. I found that the coconut was a tad too faint. The taste was rather subtle. I will like it to be richer though. I will increase the coconut cream by at least another 50g in future.
Recipe for Steamed Pandan Coconut Rice Cakes, modified from "Magic Steamed Cake".
(Makes approx. 18 regular cupcakes. Mine was of various sizes)


Ingredients:
195g Rice flour
80g Plain flour
50g Pandan juice
80g Coconut cream
200g Water
30g Brown sugar
80g Fine sugar
3 tsps Baking powder


Method:
  1. Mix all the ingredients together. Mix well till no lumps.
  2. Pour into the cupcake mould till about 90% filled. You may lined the cupcake moulds. For me, I brushed the moulds with oil.
  3. Steamed on medium high for about 23mins.
The day before my daughter's operation, it was a public holiday. In order to avoid crowded places before her ops, we spent a lazy day at home. I made dinner for my family. The dinner include tomato rice wrapped in omelette, grilled cheesy dory fish and spicy fries. Besides the store-bought spicy fries, the rest were specially cooked by me. Though there were quite a fair bit of work, the healthy combination was truly worth the effort!

Pandan Chiffon Cake

I hasn't been quite successful in chiffon cakes..at least not yet. Therefore, when I saw that ieatishootipost posted up his analysis on the Panda Chiffon Cake that he baked, I was determined to followed his recipe and try it out! It's truly not easy to master chiffon cakes. I personally like chiffons because they are so light and I could have a few pieces at a go!

I decided to give it a try on Saturday as I have pandan leaves in the fridge for quite a while. I bought it a week ago, wanting to try it last week, but I didn't get the chance to. Since I don't have any commitments for baking yesterday, I might as well try out the pandan chiffon cake.


I was rather nervous while baking this cake. On one hand, I wanted it to succeed very much, on the other hand, I was worried it won't turn out well. Life's just ironical sometimes. I followed almost according to the recipe and the steps. Finally, it was baked, and cooled. When I cut the chiffon, I was rather happy at the results. Even though it didn't browned too much at the top, sides and bottom, at least the holes were rather uniform, despite having some extra large holes. The chiffon was very light and tasted very good. However, I realised that my chiffon was a bit too moist.

I analysed it and learnt that I should have baked it longer since I only baked it for 56mins at 140C fan oven. I was rather careful with the temperature of my oven as I found that it's hotter than other oven of the same temperature. Another thing to improve is the folding of the meringues as there was some streaks of whites in the chiffon. Overall, it was pretty good-tall, soft and fragrant! I think anyone who likes chiffons (like I do) should try this recipe.


After baking this chiffon, I decided to try another new thing - Chee Cheong Fun. After learning this chee cheong fun last week, I thought it wasn't too difficult to attempt, so I went ahead to buy the necessary materials-cloth, tray and aluminium steamer. Then I started preparing the batter. Cut the necessary ingredients- char siew and spring onions. Then proceeded to make them. Alas, they didn't turn out well! It was either too thick, or they were all broken up while I tried removing them! It wasn't in one piece! Feeling disappointed, I decided not to finish the batter, and stopped after more than an hour struggling with it. By then, I had made quite a number of rolls already. And since I thought it was still edible, I distributed some to my sisters and parents, and kept some for myself. [My family members are very forgiving and they don't mind trying as long as it's edible. That's what families are for! :p]

The next day, Sunday, I decided to pan fried the chee cheong funs. Added some sauce, and topped it with spring onions, fried shallots and chilli sauce. With the condiments and chilli, it tasted rather good though. I was pleasantly surprised! Hmm... I think, sometimes, even though the main dish is not very good, with the addition of condiments or good chilli sauce, it did make the dish taste reasonably good! Therefore, I feel that sauces play an important part in most dishes. They can help to enhance the food, cover up the taste of the food or make the food taste differently, don't you agree?

Pandan Coconut Cake

My hands are itching to do some baking. I've not baked in my oven for more than a week! The days have been really very busy since last week. This week, the days are equally bad. My days are filled with meetings that lasted till later than my office hours. By the time I reached home, it was late already.

Cannot take it any longer, I decided to do some simple baking this evening, even though I was home much later than usual. Pulling out Alex Goh's Creative Making of Cakes, I've decided to bake Pandan Coconut Cake, just to satisfy my craving for bakings.


Pandan Coconut Cake, extracted from Creative Making of Cakes
Ingredients
(A)
270g Butter
200g Sugar (original was 230g)
(B)
5 Eggs
60ml Coconut milk
3 tsp Pandan essence
(C)
240g Plain flour
25g Custard powder
30g Desiccated coconut
1 tsp Baking powder

Topping
40g Butter
35g Icing sugar
55g Desiccated coconut

Method:
1. Cream (A) till light and fluffy.
2. Add (B) a little at a time and cream till smooth and light.
3. Fold in (C) and mix till well blended.
4. Pour it into 10"x10" cake pan. [Original was 10" round cake pan. I used 10x10 cake pan because I want a flatter cake.]
5. Mix all the ingredients of topping and sprinkle on top of the cake.
6. Bake at 175C for 45mins.
7. Cooled and serve.

"HUAT" Ahhh...

Last weekend, my parents-in-law (PIL) gave me a big sieve, a cake pan & a cane "basket" for baking. It all started when we discuss about steaming "ji dan gao". So since they have stopped baking long ago, they decided to give me their "inheritence" so as not to go waste. For me of course I'll gladly accept. Anything to do with baking, I'll be glad to be "garbage" collector!

I remembered I had a recipe of the Pandan Delight Fatt Koh from Yochana. So I decided to steam this tonight, so that I can give my PIL tomorrow when they drop by. I had a packet of HK flour which I didn't use since the last time I made pao! This recipe was pretty easy and nice. I hesitated for quite a while, don't know if I should use muffin trays for smaller Fatt Koh or the cane basket. Finally, I decided to use the cane basket. I lined it with baking paper, and steam it in the wok. It took much longer than what is in the recipe because mine was a big basket, about 7". However, I was very happy with the result when I opened the wok cover! My Fatt Koh "smiled" at me!! Yippee!! But I steamed until my wok was dry, lucky it was ready!!


The nice green was from the pandan leaves. There was no colouring added.


While waiting for my Fatt Koh to proof, I did up the Almond Cream or Frangipane for my Strawberry Tarts. Baked the tart crusts last weekend, but haven't filled them up yet. I wanted to fill them up so that I can finish them. I filled them with frangipane, and had Strawberry Frangipane Tarts!


Pandan Kaya Bread Loaf

I wanted to try a different bread on Sunday. So decided on Alex Goh's Pandan Kaya Bread Loaf. This were the various steps I took.

After mixing the ingredients and kneading it, I left it to proof. This is the size before proofing.

This is the size after a trip to & fro the airport. About 3 hours.

This was further proofing after the shaping.

Brushed it with egg, then topped with dessicated coconut & crumbs.

Baking in the oven.

Fresh from the oven, the whole Pandan Kaya Bread Loaf.

Close up look of the browned top with coconuts & crumbs.

Cross section of the bread.

Close up cross section of the bread.

Recipe extracted from Alex Goh's "World of Breads", page 44.

Pandan Chiffon III

I am on child medical leave today as Anders was having fever. Hubby is outstationed. I'm a "full-time" housewife, sending children to & fro school, and taking care of a little sick boy. Had some time in the evening, so I tried to bake a simpler cake-Pandan Chiffon again.

Different size of the chiffons.

The shape of a Mickey Mouse head.

Cut them up and have a view of the cross section. Smell good due to the strong coconut taste. Anyone wants to have a slice?

Up close with a mini pandan chiffon cake.

Pandan Swiss Rolls

Wanted to bake some simple cake to eat. So decided on Pandan Swiss Rolls so as to use up my coconut cream.

Pandan cake sheet.

Pandan swiss rolls with whipped cream.

Side view of the swiss rolls.

Recipe modified from my baking school's swiss rolls.

Pandan Kaya Cake

My hubby likes to eat Pandan Kaya Cake (from Bengawan Solo). Since I've learnt this from my baking school when I attended their Basic Cake Baking course, I thought I'll try baking this (on Saturday) with some modification.

This is my Pandan Sponge cake (with a waistline!!)

Layering the cake & the pandan kaya custard.

The completed Pandan Kaya Cake after refrigeration.

Cross section of my cake. Four layers.

Recipe extracted from my basic baking course.