In Collaboration With Floral Garage Singapore

This post is in collaboration with Floral Garage Singapore.

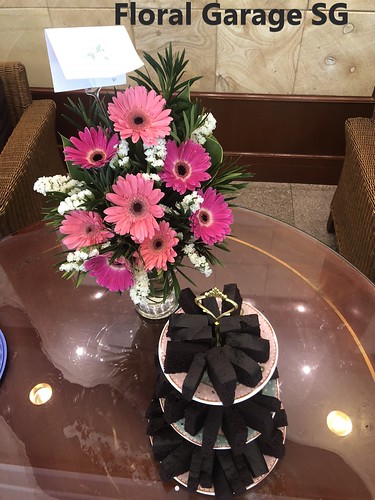
Floral Garage Singapore is an established Singapore florist company comprised of a team of passionate floral hobbyists and professional florists. They offered wide range of flowers from hand bouquets to table centrepiece to standing flowers and even gifts. They also served corporate clients and individuals, and does delivery in Singapore. They are also looking for opportunities to franchise their business.
cake_steamedchocolate03

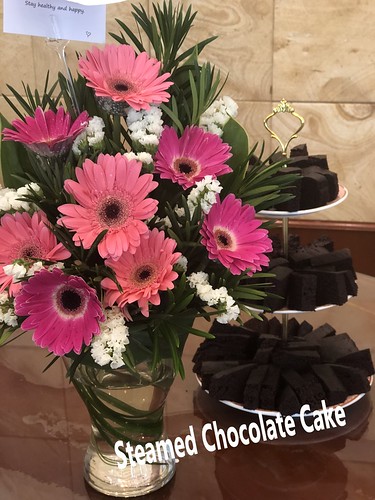
I had the opportunity to collaborate with them recently, using their flower centrepiece to compliment my cake presentation. Their flowers bright and fresh. It made my cake stands out more. The flower display recommended by them is called Martial. Thank you Floral Garage SG for this wonderful opportunity.

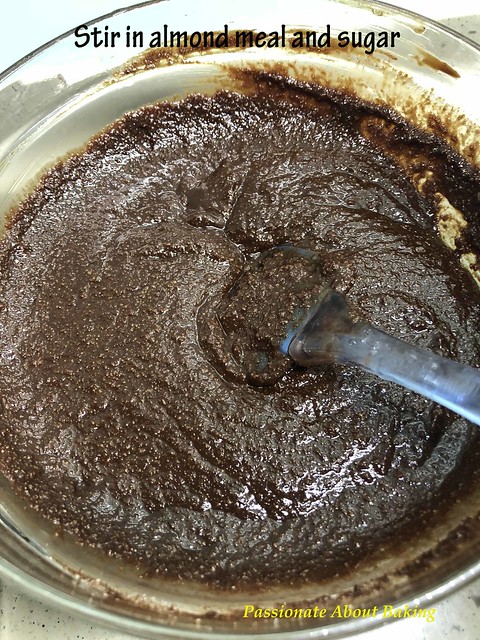
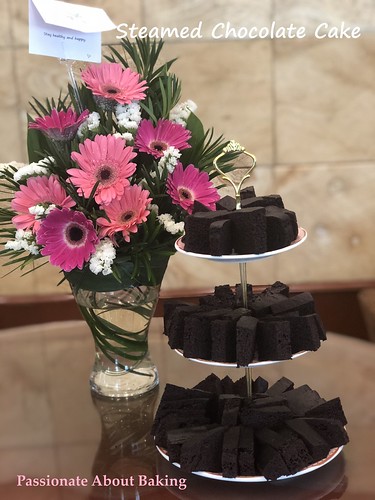
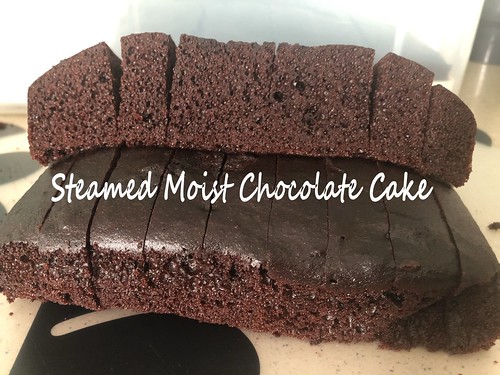
For this function of mine, I made Zoe’s Steamed Chocolate Cake. There were only good reviews on this cake from my guests. For your next function, why not try this combination - flower centrepiece from Floral Garage SG and Zoe's Steamed Chocolate Cake. It is easy to make and taste delicious without frostings.

cake_steamedchocolate01 

Recipe for Steamed Moist Chocolate Cake, adapted from Bake for Happy Kids

(Makes a 10x10 and 6x6, serves at least 60 people)

Ingredients:

200g Unsalted butter
120g Caster sugar
100g Light brown sugar
360g Evaporated milk
4 large eggs, about 70g each with shell and lightly beaten
2 tsp Vanilla extract
200g Plain flour

100g Cocoa powder, preferably Dutch process (I used Valrhona)
2 tsp Baking powder
1 tsp Baking soda
1/2 tsp Fine sea salt


Method:


1. Line the bottom of the square pans with a piece of baking paper. Preheat steam oven.
2. Add butter, both sugars and evaporated milk in a large saucepan. Place the saucepan over a low heat and use a hand whisk to whisk mixture while cooking until sugar is completely dissolved and mixture is smooth.
3. Remove saucepan from the heat. Allow mixture to cool until it is nearly like room temperature or cool enough to touch.
4. Add eggs and vanilla into the butter mixture and whisk until combined.
5. In another bowl, combine flour, cocoa powder, baking powder, baking soda and salt. 
6. Sift flour mixture into the butter mixture and whisk until all are just combined. Do not over mix. Cake batter is runny.
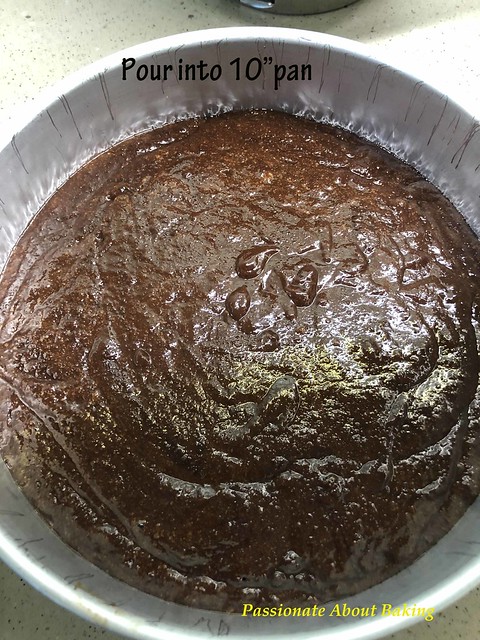
7. Pour batter into the prepared pan and place the pans into the steam oven. Cover pan with a large piece of foil.
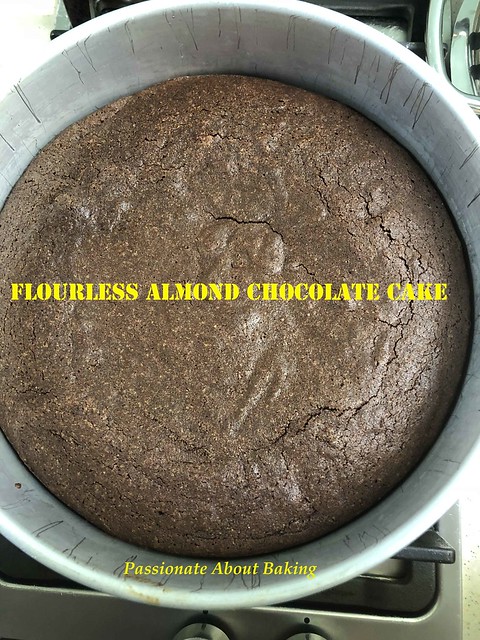
8. Set the steam oven for 45mins at 100C.
9. Remove the cake from the oven and allow it to cool completely in the pan before removing it onto a wire rack. 
10. Slice the cake into 1cm thick and 3cm long each. 
11. Arrange them into the tier cake display, together with Floral Garage flowers.

cake_steamedchocolate04 cake_steamedchocolate02

Vanilla Cheesecake

A modified recipe for Vanilla Cheesecake made for my nephew's birthday. It had been a long time since I baked a birthday cake. I requested to make a cheesecake since fanciful decoration is not required.
cheesecake_vanilla01
Recipe for Vanilla Cheesecake

(Makes a 9″ round cheesecake)

Ingredients:
Crust:
500g Digestive biscuits, finely grind (I finished up the whole packet as I do not want to keep any)
50g Salted butter, soften

1. Mix crushed biscuit crumbs with the soften butter until it resembles the texture of wet sand.

2. Using the back of your fingers, press the mixture into the base of a springform pan until the base is firm and compact.
3. Baked in a pre-heated oven of 160C for 10mins.
4. Remove from oven and let it cool.

Filling:

750g Cream cheese, softened
130g Fine sugar
4 Eggs, room temperature
150g Honey yogurt (or plain yogurt. I used the brand - Thick & Creamy Honey)
1 Vanilla pod, scraped the seeds

Method:

1. Beat cream cheese and sugar in a mixer until it is smooth without lumps.
2. Add eggs in one at a time, beating until well combined. Remember to scrape down the sides of the bowl regularly to ensure an even mixture.
3. Add in yogurt, followed by vanilla seeds. Mix well. 
cheesecake_vanilla02.jpg
4. Pour the batter into the pan. 
5. Bake in the preheated oven of 160C for 60mins on the 2nd rack (lowest 2nd).
6. Once done, turn off the oven and let the cheesecake cool in the oven completely. (I left it overnight.) 
7. Remove the cheesecake from its pan and chill for at least 4 hours.
8. To decorate, sprinkle snow powder. Refrigerate well.
9. Before serving, remove from the fridge and left it outside for at least half hour. Slice, serve and enjoy!
cheesecake_vanilla03

A Detox and Wellness at Amity Wellness

I decided to go for a detox and wellness programme recommended by my sister's friend. She sang good reviews about the place, which tempted both of us to experience it.

The booking of the programme and the accommodation was done quickly, and so we booked an air ticket to Phuket, and off we went.

There was pre-screening of our diets and habits. And before we went, we were to be on a pre-cleansing programme for 14 days, namely to make our body more alkaline by avoiding mostly diaries and meats.

Induction and Consultation
Upon our arrival, we were ushered to a room to do our induction and consultation. Based on the pre-programme screening surveys, we were given a report of our diet & illness and toxicity. From this report, Michelle (the owner of Amity) will advise on the activities which we will undergo as part of the programme, and the diet we should take - four days raw food fast and three days intermittent fast for us. We also took our weight, visceral fats and body measurements during this time.
On the seventh day, we took the same measurements and make a comparision of how the programme have helped us. For me, there was no visible changes. :'(

Amity Wellness Amenities
The villa is not a huge place. However, it has most of the amenities that we required. 
  • Massage room with 2 beds
  • Colema with 4 individual rooms
  • Infra-red Inflammation room with 2 pods
  • Infra-red sauna
  • A pool
  • A bar, where we get our dosage of coconut juice
  • Seating areas around the pool
  • Function room
  • Steam sauna (outside the premise where we can also use)
  • Alkaline water refill points
Amity Freebies - Found in room
Included in our package were freebies from Amity. These include:
  • Notebook
  • Amity Introduction book
  • Pen
  • 1.6L BPA free water bottle
  • Amity Wellness singlet 
  • Thai (yoga) pants

Our room - Superior Deluxe
As there were two of us, we requested for a bigger room. The room has a king size bed, but they added another single bed for us. Upon arrival, we received the freebies on our bed respectively.
We have a kitchenette, where the staff will bring in our foods and placed them in the refrigerator. We also have sofa and table, and dressing table. There is also a tv, dvd player, alarm clock, and wardrobe in our room. There is a patio outside our room with a table and two chairs. There's where usually my sister and I had our meals.

General Activities
A typical day starts with an exercise at 7.15am, either a yoga, a fitness or a walk at the mountain. Following that, will be our daily group meeting, where we are rewarded with super shots and ginger tea. After that, it's our usual hourly activity. Noon time is also a common activity like health workshop, or food demo. After that, it's a trip to the beach if anyone wants to go. Otherwise, it'll be own activity or personal time. Evening time is usually a workshop. Typically, all activities are an hour duration. The usual general activities include:
  • Yoga, health fitness, mountain walk
  • Food demos, health talks, workshops
  • Evening talks and workshops
  • Infra-red Inflammation pod
  • Massage
  • Colema
  • Steam sauna (at another premise)
  • Morning meeting with supershot drinks
Workshops & Talks
Interesting workshops at noon include Human Hormones, Vitamins and food demos. Evening workshops include Reiki, NLP and tuning forks. Although these talks and workshops are organised for everyone, we can have the option not to attend it. These are not compulsory.


Additional Services
There are additional services which one might want to take up during their programme at Amity. These professionals work with Amity for a long time and they engaged only the good ones. For myself, I went for the Body Alignment, Ear Candling and Float. For the body alignment, the therapist did a twist to my right hip, stating that my hips were not balanced. After the session, he showed me an exercise to do everyday to balance my hip.
For the ear candling, it cleared my ear wax and I can actually see the amount being cleared.
The Float was something nice and relaxing. We float in the water of magnesium flakes. This allowed us to take in magnesium through our skin. We slept very well that night.
Other than the paid professional services, we found some time to venture outside the villa to have our mani and pedicures done (at a very cheap rate).

Meals & Supplements
Having said that we were on raw fast for four days, we had breakfast, lunch, dinner and supper. A typical breakfast was granola with fruits. A typical lunch was shredded vegetable with some dressing and similar to dinner. Dessert was raw cake. And our supper was hot chicken broth. The food seems exciting at first, but after three days, my sister couldn't eat anymore. I was still happily enjoying the raw cold food.

However, with the supplements that were given to us, we didn't feel hungry despite having raw food. Supplements are usually in pill forms. They include spirulina, activated charcoal, probiotics, chlorophyll powder, fibre drink and coconut oil. After we started our intermittent fast, we had to take additional turmeric powder and bowel cleansing pills. During intermittent fast, we were not allowed to eat for 16 hours, therefore, we were only left with two meals a day - breakfast & dinner, with hot broth included. Actually with the activities and the supplements, we don't feel hungry. And we drink a lot of alkaline water there.
Amity Wellness_Medium
Verdict
In conclusion, even though I didn't lose what I desired to, I have gained vast knowledge of healthy eating and living. There were a lot of information imparted to us. We were given a USB drive each which contains information which we need to know, and the recipes to the food we consume. The only thing I dislike was consuming the pills. I just couldn't swallow them.

Our favourite activity turned out to be Colema, which is colon cleansing. It felt good to cleanse the colon of the toxins that were built up over the years. The staff at Amity was very friendly and helpful. They knew what we were going through and gave us encouragement. It's not easy not to consume meat or other food stuff over a seven-day period. But we survived. 

This is one trip, where we relaxed, detox and build up our wellness. I will return again some day. Thank you to the wonderful team for a great experience.

[Note: I paid for my experience. This is not a sponsored post.]

Thai Milk Tea Chiffon Cake

I like to drink Thai milk tea. I find that it has very special flavour. I will usually order this tea whenever I visit Thai cafes. However, I find that the Thai milk tea served in restaurants and cafes are very sweet. It caused toothaches when drinking them. 

I didn't think I would want to buy the tea leaves and make it myself though. Fortunately, my colleague brought in a packet of Thai tea leaves one day and gave some to me. I was happy to receive it since I can make for my children and use the tea leaves to bake too.
cake_thaimilktea07
I've seen several bakes with Thai Milk Tea and I'm tempted to try it. Found a few recipes that looks good, like BakingTaiTai and HoneyBeeSweets. However, I decided on a lighter cake - chiffon, from Sumopocky. The recipe was easy to follow, and my chiffon turns out well. The fragrance of the Thai tea during baking smell wonderfully good. The cake also tasted rich with the Thai tea leaves. Next time, I shall try a frosted Thai Milk Tea Cake. :)
cake_thaimilktea08  
Recipe for Thai Milk Tea Chiffon Cake, modified from Sumopocky.
(Makes a 8" tube cake)

Ingredients:
150g Whole milk
15g Thai tea leaves
(yields 95g milk for me)

6 Egg yolks 
40g Caster sugar
60g Vegetable oil
90g Cake flour
1 tsp Baking powder

6 Egg whites
75g Caster sugar
1/4 tsp Corn flour

Method:
1. In a small pot, bring the milk and tea leaves to a simmer. Let the leaves steep for about 10 mins. Leave to cool.
2. In a mixing bowl, beat the egg yolks and caster sugar together.
3. Mix in the vegetable oil.
4. Sieve the milk and thai tea leaves into the egg yolk mixture. Mix in some of the thai tea leaves. I just scrap out the finer leaves from the sieve and add to the mixture. 
cake_thaimilktea01
5. Sift the cake flour and baking powder into the mixture and mix well. Set aside.
6. In a clean mixing bowl, use a whisk, beat the egg whites on medium speed till it gets frothy.
7. Gradually add the sugar with cornflour into the egg whites. Beat until stiff peaks. 
8. Mix in 1/3 of the meringue into the egg yolk batter.
cake_thaimilktea02
9. Add the rest of the meringue and gently fold into the mixture.
10. Transfer to the cake pan. Throw the pan from a height 2x to release big bubbles.
cake_thaimilktea03
11. Bake in a preheated oven at 170°C for about 50 mins. When baked, turn the pan upside down to let it cool completely.
cake_thaimilktea04 cake_thaimilktea05
    cake_thaimilktea06
Note:
  1. I used 60g eggs without the shell.
  2. The batter was full to the rim using a 8"pan. Probably a 9"pan will be better.
  3. Can reduce baking powder to 1/2 tsp.
  4. The egg yolk batter is quite watery as I used up all the milk tea at 95g.

Pandan Coconut Ogura Cake

I have always been a fan of any pandan coconut food - Nonya kuehs, chiffons and Kayas etc. And I get attracted to them easily, whether to eat or to bake or cook. Sometimes, I just have the urge to buy pandan leaves, then decide later what I want to do with it. With abundant leaves and eggs, I made kaya last week. 

With leftover pandan extract, I decided to make Pandan Coconut Ogura Cake. Initially, the cake rose well in the oven, but when removed from the oven, it collapsed. I was worried that my cake will be flat with a layer of kueh structure. Fortunately, it looked quite good after it had cooled although the holes were not even. It was soft and fragrant. Despite having placed a water cup in the oven, the oven was still too hot for the meringue. I shall reduce the temperature further if I bake this cake again.
cake_pandancoconutogura2
Recipe for Pandan Coconut Ogura Cake, adapted from Nasi Lemak Lover.
(Makes a 8"round cake)

Ingredients:
4 Egg yolks (original was 5, I used only 4)
1 Whole egg (approx. 65g)
40g Vegetable oil
80g Coconut cream (I used Kara)
10g Pandan extract
Pinch of salt
85g Cake flour, sifted

5 Egg whites
80g Caster sugar
1 tsp Corn flour

Method:
  1. Line an 8" round cake pan. Preheat oven to 150C. Place a cup of water in the oven.
  2. In a large mixing bowl, beat the egg yolks, whole egg, oil, salt, coconut, pandan extract together till well combined.
  3. Sift in the flour and mix well until no visible lumps. 
  4. In a mixer bowl, add in the egg white and beat till foamy.
  5. Gradually add in the sugar mixed with the corn flour and continue beating till glossy and stiff peaks.
  6. Gently fold in the egg white mixture into the egg yolk mixture in 3 separate portions.
  7. Pour the batter into the prepared cake pan and place on the 2nd rack in the oven. Bake for 60mins.
  8. Remove from the oven and let it cool completely.
  9. Slice after cooled and serve.
  10. cake_pandancoconutogura1

Flourless Almond Chocolate Cake

Happy New Year! 
May 2018 brings you good health, more bakes and more sharing!

This has got to be one of the best flourless chocolate cake I have baked and ate. The cake is chocolaty and soft, without feeling too much of the almond. The texture is smooth with bits of ground almond. This is not those dense thick chocolate kind of cake. It's light and soft. I was really satisfied with this cake. I made blueberry coulis to top the cake. However, my sister commented that she preferred the cake without the blueberry coulis. Nevertheless, this cake is easy to prepare and good to the last bit.
cake_flourlesschoc07
Recipe for Flourless Almond Chocolate Cake, adapted from Food52.
(Makes a 10" cake with 1 1/2" height)

Ingredients:
250g Ground almonds (lightly toasted)
250g Couverture chocolates, 76% cocoa
250g Unsalted butter
140g Caster sugar
Freshly brewed espresso (approx 25g), let it cooled slightly
6 Large eggs, separated

Blueberry Coulis (Optional)
250g Blueberries
2 Tbsp Sugar

Method:
1. Line a removable base 10" round pan.
2. Preheat oven to 150ºC.
3. Place the chocolate in a glass bowl set over a bain marie (double broiler, or a pot of simmering water).
4. When melted, remove the bowl from the heat and add the butter, stirring with a spatula to help it melt and mix. 
cake_flourlesschoc01
5. Add in the cooled espresso and stir well.
6. Then add the sugar and the almond meal, stir to incorporate.
cake_flourlesschoc02
7. Once the mixture is no longer hot, add the egg yolks and stir to combine.
8. In a separate bowl, whip the egg whites with beaters to soft, fluffy peaks.
cake_flourlesschoc03
9. Fold the whites gently through the chocolate and almond batter.
cake_flourlesschoc04
10. Pour the batter into the cake tin, smooth over the top and bake for approximately 40mins or until the top appears dry and a skewer inserted in the middle comes out with a few moist crumbs attached (not wet batter). It is important not to overcook this cake so that it retains its wonderful moist consistency.
cake_flourlesschoc05
11. Let it cool completely in the tin before removing. Dust with powdered sugar (if desired).
cake_flourlesschoc06
12. For blueberry coulis: Cook the blueberries and sugar together in a pot. Let it simmer and stir constantly. Cool slightly before topping on the cake.

Earl Grey Tea Cakes

I baked this a couple of months back. I like to use Nordic wares for butter cakes as I found that they bake well. The shape also came out beautifully when unmould. This is one of the moulds which I like very much - Rose. However, this cake a little to the dry side. Would be better if my earl grey was more fragrant too. Will add more milk in future.
earlgrey04
Recipe for Earl Grey Tea Cakes, from Okashi, adapted from Anncoo.
(Makes 11 rose and a mini loaf)

Ingredients:
150g Plain flour
1/8 tsp Baking powder
150g Unsalted butter, softened
130g Icing sugar
1/2 tbsp Honey or Glucose/golden syrup
3 Eggs (70g each)
1/8 tsp Salt
5g Earl grey tea dust from 2 tea bags
15g Ground almond
1 tbsp Fresh whole milk
Lemon zest from 1 large lemon
(I omitted the lemon syrup)

Method:
  1. Preheat oven to 150C. 
  2. Sift flour and baking together twice, set aside.
  3. Beat butter, icing sugar and honey together until light and very fluffy. 
  4. Gradually add eggs and beat well, then add salt, tea dust, ground almonds, lemon zest and milk. Mix well.
  5. Add flour mixture and fold through completely using a spatula. Surface of batter should be glossy and smooth.
  6. Pour batter into prepared loaf tin and bake for 25 mins or skewer inserted into the center of the cake comes out clean.
  7. Note that the baking time may vary according to your oven and the size of your pans.
  8. When the cake is done, unmould cake and place cake on a wire rack to cool completely before serving.
  9. Enjoy with a cup of coffee.
earlgrey03