Showing posts with label ice cream. Show all posts

No Churn Vanilla Ice Cream

Don't we all get attracted by easy and good recipes? At least I do. No churn ice cream sounds good to me as my family loves ice cream - stick, cone or tub. We usually have some form of ice creams in our freezer to satisfy our cravings.

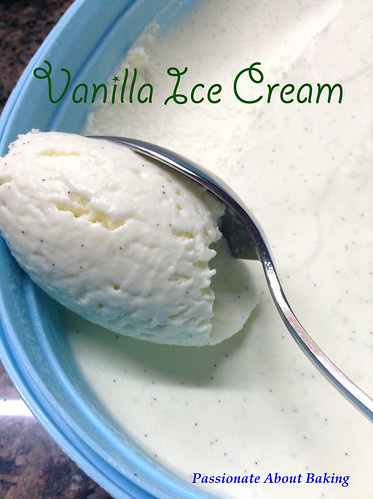
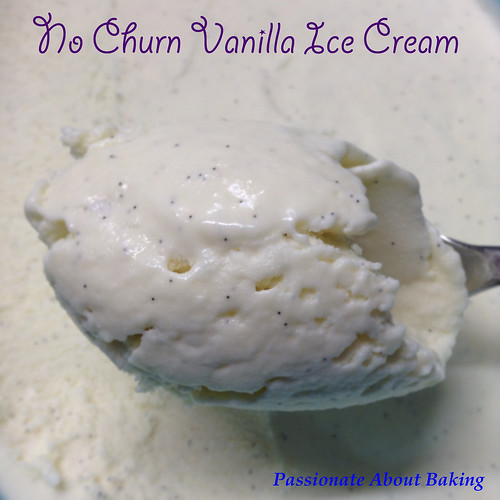
As my fridge ran out of ice cream recently, I decided to make some ice cream. This recipe - No Churn Vanilla Ice Cream, is really easy to prepare. However, it is very sweet even after I reduced the condensed milk. The taste, smoothness was pretty much like a real ice-cream, except it lacks some body. Such ice cream cannot crystalised like the real thing. Nothing can compared to those ice-cream made with custard, this is just a quick fix on ice cream cravings.
icecream_vanilla05
Recipe for No Churn Vanilla Ice Cream, adapted from Baking Bites.
(Makes a 1 litre tub)

Ingredients:
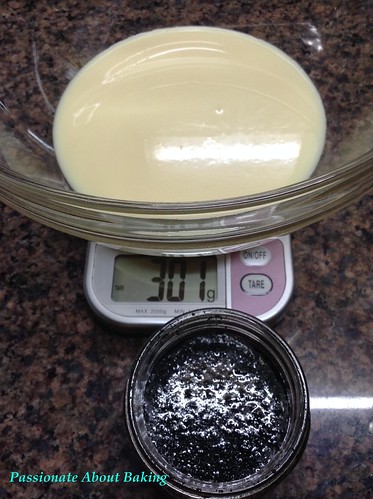
300g  Sweetened condensed milk (Milkmaid)
2 tsp Vanilla beans paste
500g Whipping cream
icecream_vanilla01
Method:

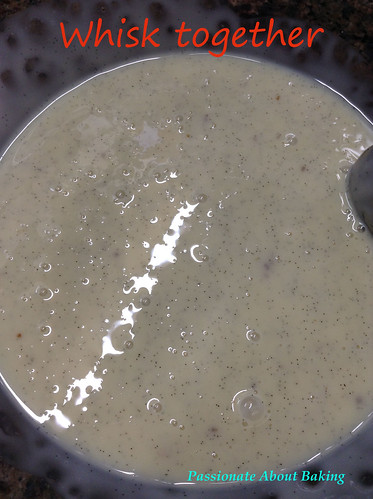
1. Whisk together sweetened condensed milk and vanilla in a large bowl until well-combined.
icecream_vanilla02
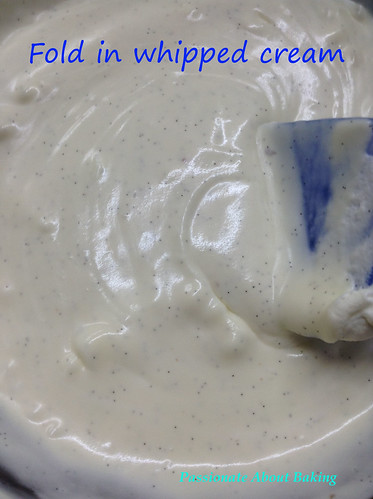
2. Whip cream to stiff peaks in a large bowl. Stir 1/3 of the mixture into the sweetened condensed milk to lighten it, then fold in remaining whipped cream.
icecream_vanilla03
3. Transfer to a freezer-safe container and freeze until firm, at least 3 to 4 hours, or overnight.
icecream_vanilla04

Coffee Gelato

I borrowed this book - Italian Ice Cream, when I brought my children to Bishan library lately. The recipe looks interesting and I thought of attempting it. I tried it and was glad it turned out well. Otherwise, I would not have shared the recipe. :p I made this before I discovered my daughter has HFMD, and I was glad I did. I fed her with this to numb her pain from the blisters and ulcers.
Recipe for Coffee Gelato, extracted from Italian Ice Cream: Gelato, Sorbetto, Granita and Semifreddi.

Ingredients:
500ml Whole milk
2 tbsps Coffee powder (I used very finely grounded coffee beans, you can use instant coffee granules)
500ml Whipping cream
2 tsps Vanilla extract
7 medium Egg yolks (original was 6 large egg yolks)
225g Sugar

Method:
1. Place the milk and coffee in a saucepan over medium heat and bring to a boil.
2. Remove from the heat and stir in the cream and vanilla.
3. Beat the egg yolks and sugar in a large bowl with an electric mixer on high speed until very pale and creamy.
4. Pour the hot milk and coffee mixture over the egg mixture, beating constantly with a wooden spoon.
5. Return the mixture to the saucepan.
6. Simmer over very low heat, stirring constantly, until it just coats the back of the spoon. Do not let the mixture boil.
7. Remove from the heat and pour into a chilled bowl. Let it cool completely, stirring often.
8. Transfer the mixture into two 500ml ice cream containers.
9. Freeze for at least 12 hours before serving.
10. Once the gelato is frozen, scoop into serving bowls and decorate with coffee beans and whipped cream.

Another Birthday Cake

I had been rather lapse in posting lately. I had been lazy, busy and dizzy all week! When I'm in front of the PC, I felt dizzy, then lazy set in. However, I cannot be lazy anymore, otherwise, I'll have lots of backlog posts!! Goodness me!

I had been busy whole week, preparing for Saturday. I made Vanilla Ice-Cream and Cheesecake in the mid-week, prior to Saturday. As both of these needed to be refrigerated way before the actual day of consumption, I had to prepare them in advance.

1. Vanilla Ice-Cream. I went through all the ice cream recipe, wanting to find the easiest to make. As it was to be used as an accompanied to my sister's Chocolate Fondant, I want it to be easy and creamy. I finally use the recipe from Recipetips.com. I modified the recipe a little to suit my taste. Instead of 6 egg yolks, I used 10 egg yolks as my eggs were pretty small. I replaced vanilla extract with a vanilla pod seeds and used 2 cups of whipping cream instead. The end result?? Creamy, real & taste expensive!!


2. Triple Layer Birthday Cheesecake. My youngest sister requested for a cheesecake. I asked if she can accept anything exotic, she said she can't. As I've baked cheesecake for her and my BIL before, I couldn't think of what other flavour I could try. Last year was the Chocolate Torte. How time has fly! After going through my cheesecake recipes, I finally settled on the recipe from "Delicious Cakes" called Triple Layer Birthday Cheesecake. This recipe needed to steam-bake the cheese layer by layer, each layer for 30 minutes. The three layers are Coffee, White Chocolate and Chocolate. I was thinking of topping it with a layer of crusted oreos after baking. However, after baking, the top was so smooth...so beautiful! There was no cracks to be found anywhere! This was my BEST cheesecake I ever baked! So I decided to frost as little as possible, to keep the smooth top visible. So this was my final decoration!


Saturday bakes include the following.
3. Red Bean Buns. I bought the red bean paste from PH lately as I found their red bean paste to be very nice, and I remembered my dad likes it. So I made a whole bunch of them to be given to my family members. I made different designs and put them into the muffin trays, an idea I got from Honey Bee Sweets.


4. Kueh Makmur. This was in my "To Bake" list. After the unsuccessful attempt the last time, I had to try again using different recipe. I used Honey Bee Sweets' recipe this time, though quite a lot of work, I was quite determined to bake this. However, I had added the egg white while the flour were not thoroughly cooled, resulting in my dough being too wet to roll. I ended having to put them in the fridge, then adding a lot more plain flour to it. The baking caused the dough to crack. Fortunately, the overall taste was much better than the previous attempt. At least, it was still melt-in-the-mouth texture! Quite happy with the outcome, though not happy with the process!


Small Celebrations, Big Preparations

The whole week was spending preparing for Aloysius, my eldest boy's birthday. He turns 9 this year. Born on the same year I got married! So it's very easy to know my wedding anniversary and his age. On a lighter note, if you think it's a shotgun marriage, I'll let you guess. I got married in March and he was born 37 weeks in December. Now you tell me...aren't I just lucky? ;)

Ok, back to preparation for his "big" day. Although it was just a small celebrations with my family, lots of preparations were put in place since Monday!?!?! This was my dinner menu:

Starter
Brown Rice with mixed nuts Salad

Main Course
Pasta with cream sauce or tomato sauce

Desserts
1. Choice of Rum & Raisins or Cookies & Cream Ice-Cream
2. Birthday Cake - Chocolate Fudge


Drinks
Lemongrass infused tea


Preparation before the actual day were:
1. Rum & Raisins Ice Creams


Recipe from Camemberu: No-Churn Rum & Raisin Ice Cream.

2. Cookies & Cream Ice Creams


Recipe from The Kwoks-Viewfinder: Cookies & Cream Ice Cream.

3. Lemongrass infused tea


4. "Lightning McQueen"


5. Baking of Chocolate Cake one day before.


Actual Day preparation were:
1. Brown Rice Salad with mixed nuts salad


Recipe from Kitchen Culture Demo.

2. Pastas
Since I used mainly canned sauces and added chicken & minced beef separately, there was nothing much to show. :p

3. Chocolate Fudge Birthday Cake Frosting


Recipe extracted from Kitchen Capers Forum.

4. Rosemary & Garlic Foccacia
Somehow, I might either have killed the yeast by the heat of my mixer, or put in too much water to the dough.:< The dough was so liquid, almost like soup. But I went ahead to bake it anyway. It was still very fragrant, except it doesn't really taste like foccacia.
Recipe from Happy Home Baking.


The Chocolate Fudge Cake was really good. However I think I might have underbaked them slightly. The recipe is here to stay for me!

Rainbow Swiss Rolls

I have been quite slackened in updating my posts this week. Mainly because I have been baking everyday, till I have no time to update. Otherwise, usually I baked alternate days so that the following day, my post will be up. So now, I'm updating for the bakes that I made for this week.

I made the Cookies & Cream Ice cream earlier this week. Unfortunately, I was too eager to mix them up, that I didn't wait for the custard to be cool before I added the whipped cream. Ended up, the mixture was like "curds". Not a good sight to see and have. The texture, of course, was affected by that. My eldest son helped me in the preparation. A good helper to have for simple tasks! ;)


The following day, I made Rainbow Swiss Rolls. I used the emulsifier cake as the base, then separated them into three containers and added colours to two of them. As there was still half of the batter left, I made them into cupcakes and frosted them with chocolate ganache. For the swiss rolls, I filled them with whipped cream and strawberry jam. They were really good! ;) Even I like the rolls.

Rainbow Strawberry Swiss Roll


Rainbow Cupcakes

Green Tea Ice Cream

After my failed attempt on the macaroons, I consoled myself by making Green Tea Ice Cream. I did the custard the day before, so I just whipped up the cream and mix the custard with the cream. Then pour them into the container and placed it in the freezer.


Recipe extracted from "Making Ice Cream & Iced Desserts". This recipe used is a classic ice cream custard. You can change the flavour to your own likings.
Ingredients:
300g Milk (Original was Semi-skimmed milk, I used normal UHT milk)
4 Medium egg yolks
75g Castor Sugar
1 tsp Cornflour
3 tsp Green Tea Powder (Flavouring up to you to decide, original was vanilla pod)
300g Whipped Cream

Method:
1. Pour the milk into a saucepan. Bring it to the boil, then remove the pan from the heat, add the green tea powder and leave to infuse for 30 minutes or until cool.
2. Whisk the egg yolks, caster sugar and cornflour in a bowl until thick and foamy. Bring the green tea milk to the boil, then gradually whisk it into the yolk mixture. Pour the combined mixture back into the saucepan.
3. Cook the mixture over a low heat, stirring it continuously until it approaches boiling point and thickens to the point where the custard will coat the back of a wooden spoon. Do not let the custard overheat or it may curdle. Take the pan off the heat and continue stirring, making sure to take the spoon right around the bottom edges of the pan.
4. Pour the custard into a bowl and cover the surface with a clear film to prevent the formation of a skin, or cover the surface with a light sprinkling of caster sugar. Leave to cool, then chill in the fridge for at least 24 hours.
5. Whisk the whipped cream.
6. Fold the whipped ream into the chilled custard and pour the mixture into a freezerproof container.

Black Sesame Ice Cream II

I tried the black sesame ice cream again. This time, I used the custard method. Haven't get a chance to try the ice cream yet, hopefully it's thick and creamy!

Ingredients:
3 egg yolks
100g sugar
250g milk

100g Grinded Toasted Black Sesame
500g Whipped Cream

Method:
1. Beat and mix together the egg yolks and sugar until thick.
2. Separately, pour the milk into a saucepan and scald it (bring slowly up to boiling point).
3. Pour the hot milk into the egg yolks and sugar mix whilst continuously stirring.
4. Then pour the mixture back into the pan and heat gently, stirring until the custard thickens - DO NOT BRING TO THE BOIL OR IT WILL PROBABLY CURDLE.
5. When you can see a film form over the back of your spoon it's time to remove the saucepan from the heat. Leave to cool.
6) Then chill the cooled custard thoroughly in the refrigerator, at least 24 hours.
7) Add black sesame into the custard.
8) Whip up the whipped cream and fold it into the custard.
9) Pour it into a container and freeze it.

If you prefer thicker ice cream, you may reduce the whipped cream to 300g.
[Afternote: It's creamy & yummy. Strong black sesame favour. Exactly what I like!]

Black Sesame Ice Cream

During my "maidless" venture, I did the coconut ice cream, which turns out to be very good. So now, I use the same recipe for my Black Sesame ice cream, with some modifications.

Sequence of making the mixture.

Mixed them up thoroughly.

Pour them into a container and freeze it.

This is how creamy & beautiful the ice cream turns out to be!

Original recipe extracted from Yochana's blog.

This is my modified version.

Ingredients:
3 egg yolks
100g Sugar
45g Blended Black Sesame (toast before blending)
70g Coconut milk (I use KARA coconut cream)
180g Full cream milk
250g Whipping cream

Method:

(1) Whisk egg yolks and sugar till white and creamy.
(2) Double boil the egg yolk mixture and stir constantly. Pour in black sesame, coconut milk, full cream milk and continue stirring until mixture is hot but not boiling.
(3) Remove the milk mixture from heat and set aside to cool.
(4) Whisk whipping cream till fluffy and fold in the cooled milk mixture.
(5) Pour into container and freeze overnight or until firm.

[Afternote: The ice-cream is really nice, very creamy. But a little too much coconut milk. I wanted it to be creamy, but not so much coconut taste. I think can reduce the coconut milk to 30g, and upped the Full cream milk to 220g should be good enough.]

Another Busy Maidless Week!

It's another busy week without my domestic helper. So I tried not to bake/make too complicated food. This time, I made green tea ice-cream and chocolate truffles.

I: Green Tea Ice-Cream

Mix the egg yolks, sugar & milk.

Added green tea paste.

Pour the green tea mixture into whipped cream & mix.

Mix them throughly.

Put it into the container and freeze.

Finally the creamy green tea ice-cream!

Recipe extracted from Japanese Food Website.

II: Chocolate Truffles
Made the chocolate truffles for my colleagues for their birthdays. Happens to be in the same month and the same horoscope as me!

5 different toppings.

Wrapped them up nicely with ribbons.


Recipe extracted from Joy of Baking, Chocolate Truffles.

Crazy Busy Week!

This week is really crazy & busy! My domestic helper went back for her home leave for two weeks. So I'm now a Part-Time maid! But somehow, I cannot stay away from baking. Just had to find time to do some baking or some other stuff. So here it is.

New Venture I: Coconut Ice Cream.
I wanted to make mango ice cream, but I spilled my mango puree!!:'( So I ended up with Coconut Ice Cream.

Creamy mix before freezing.

Smooth as silk. Looks really like ice-cream.

Texture is really ice-cream! Yummy. Rich & thick.

Recipe extracted from Yochana's Cake Delight, Coconut Gelato.

Repeat Venture II: Breads

Same old breads.


New Venture III: 100% Almond Cupcakes (Gluten free)


I topped it with almonds nibs instead of frosting as in the original recipe.

Recipe extracted from Cedele.