Showing posts with label cheesecake. Show all posts

Vanilla Cheesecake

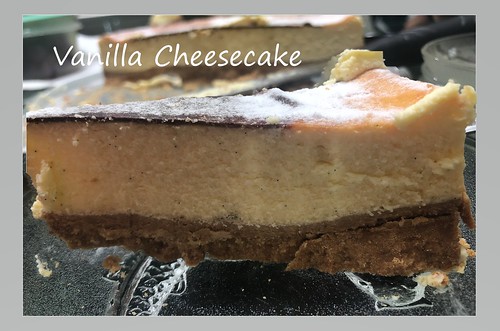
A modified recipe for Vanilla Cheesecake made for my nephew's birthday. It had been a long time since I baked a birthday cake. I requested to make a cheesecake since fanciful decoration is not required.
cheesecake_vanilla01
Recipe for Vanilla Cheesecake

(Makes a 9″ round cheesecake)

Ingredients:
Crust:
500g Digestive biscuits, finely grind (I finished up the whole packet as I do not want to keep any)
50g Salted butter, soften

1. Mix crushed biscuit crumbs with the soften butter until it resembles the texture of wet sand.

2. Using the back of your fingers, press the mixture into the base of a springform pan until the base is firm and compact.
3. Baked in a pre-heated oven of 160C for 10mins.
4. Remove from oven and let it cool.

Filling:

750g Cream cheese, softened
130g Fine sugar
4 Eggs, room temperature
150g Honey yogurt (or plain yogurt. I used the brand - Thick & Creamy Honey)
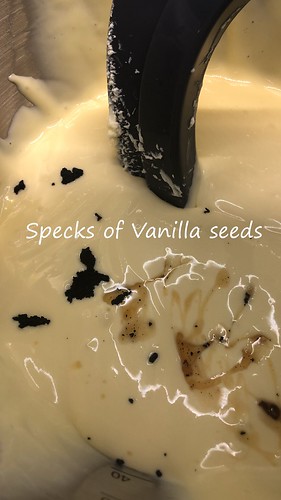
1 Vanilla pod, scraped the seeds

Method:

1. Beat cream cheese and sugar in a mixer until it is smooth without lumps.
2. Add eggs in one at a time, beating until well combined. Remember to scrape down the sides of the bowl regularly to ensure an even mixture.
3. Add in yogurt, followed by vanilla seeds. Mix well. 
cheesecake_vanilla02.jpg
4. Pour the batter into the pan. 
5. Bake in the preheated oven of 160C for 60mins on the 2nd rack (lowest 2nd).
6. Once done, turn off the oven and let the cheesecake cool in the oven completely. (I left it overnight.) 
7. Remove the cheesecake from its pan and chill for at least 4 hours.
8. To decorate, sprinkle snow powder. Refrigerate well.
9. Before serving, remove from the fridge and left it outside for at least half hour. Slice, serve and enjoy!
cheesecake_vanilla03

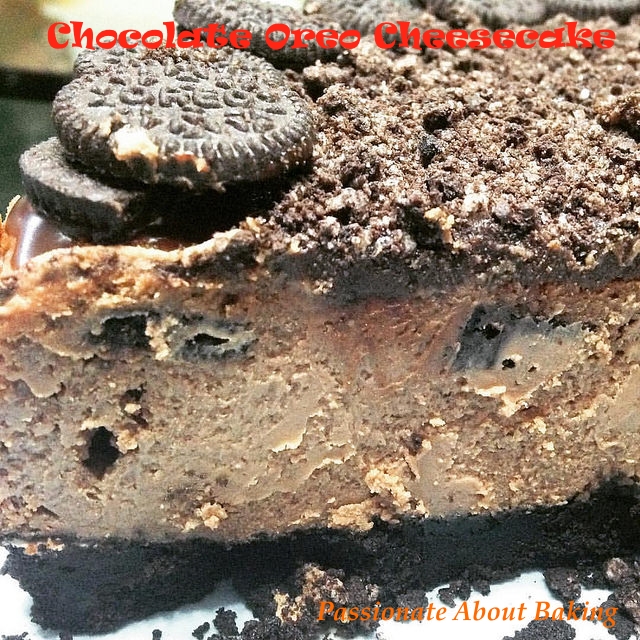
Chocolate Oreo Cheesecake

There are some not-so-healthy snacks which many people still like to indulge - Nutella for one, Oreo for another. Being a health conscious person, one would rather make their own of similar type, but the taste might or might not be the same. Somehow, I still prefer to buy these if I need them. As much as I try not to eat too much, often, I have request to use them for baking some goodies.

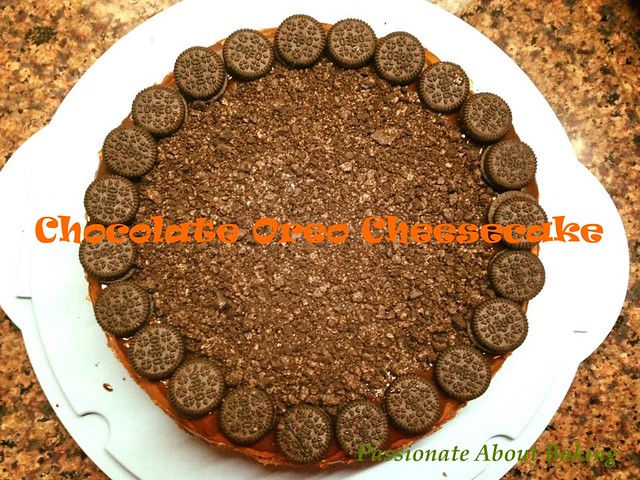
This time, the request was to bake a Chocolate Oreo Cheesecake for my nephew's birthday. Requests for birthday cakes from my family members was something I simply couldn't refuse. In anyway, I'll try my best to bake the cake according to their preference. And I know they will appreciate my efforts whether it turns out perfect or imperfect. :)
chocoreochcake01
Recipe for Chocolate Oreo Cheesecake.
(Makes a 9″ round cheesecake)

Ingredients:
Crust:
450g Oreo biscuits, finely grind
75g Salted butter, melted

1. Mix crushed biscuit crumbs with the soften butter until it resembles the texture of wet sand.
2. Using the back of your fingers, press the mixture into the base of a springform pan until the base is firm and compact.
3. Baked in a pre-heated oven of 160C for 5mins.
4. Remove from oven and let it cool.

Filling:
750g Cream cheese, softened
120g Fine sugar
4 Eggs, room temperature
130g Dark chocolate, melted
2 tbsp Rum
1 packet Mini Oreo

Decoration:
Some chocolate ganache
Some crushed Oreo biscuits
1 packet Mini Oreo

Method:
1. Beat cream cheese and sugar in a mixer until it is smooth without lumps.
2. Add eggs in one at a time, beating until well combined. Remember to scrape down the sides of the bowl regularly to ensure an even mixture.
3. Add in the melted chocolate gradually. Ensure to mix well. Add in rum and mix till incorporated.
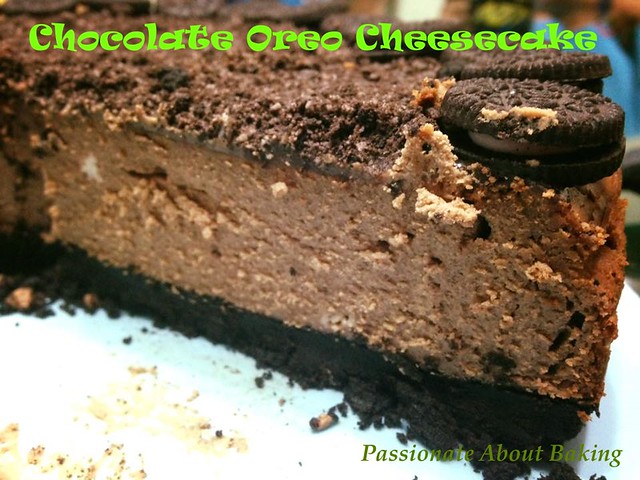
4. Pour half of the cheese batter into the pan. Arrange the mini Oreo randomly. Then carefully add the rest of the batter.
5. Bake in the preheated oven of 160C for 40mins. 
6. Once done, turn off the oven and let the cheesecake cool in the oven completely. (I left it overnight.) The cheesecake cracked with humps.
7. Remove the cheesecake from its pan and chill for at least 4 hours.
8. To decorate, spread the ganache to cover the top completely. Arrange mini Oreos around the perimeter of the cake. Then sprinkle crushed biscuits in the centre. Refrigerate well.
9. Before serving, remove from the fridge and left it outside for at least one hour. Slice, serve and enjoy!
chocoreochcake02 chocoreochcake03

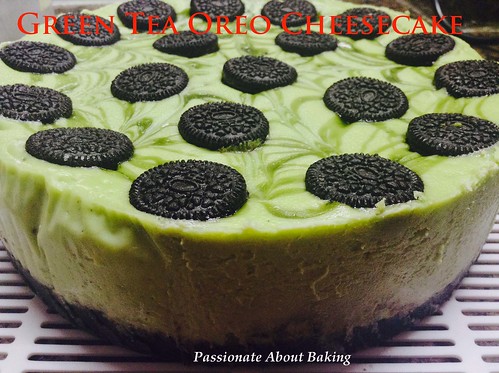
Green Tea Oreo Cheesecake

This post is sponsored by Liv butter. Try Liv today!
Liv Butter - Salted & Unsalted-001
After a wonderful holiday with my family in Tokyo, it was back to baking a birthday cake to my eldest son. He has always been a great fan of cheesecake, so this time, I decided to bake a Green Tea Oreo Cheesecake. We couldn't get enough of green tea anyway, so this was appropriate. 
cheesecake_greentea01
Recipe for Green Tea Oreo Cheesecake.
(Makes a 8″ round cheesecake)

Ingredients:
Crust:
200g Oreo, crushed (You can get the crushed oreo biscuits directly from Sun Lik)
75g Liv Salted butter, soften

1. Mix crushed oreo crumbs with the soften butter until it resembles the texture of wet sand.

2. Using the back of your fingers, press the mixture into the base of a lined bottom removable pan or springform pan until the base is firm and compact.


3. Keep it in the fridge to harden until ready to bake. 

Filling:
500g Cream cheese, softened
80g Fine sugar
3 Eggs, room temperature
1 tsp Matcha powder

2 tsbp Whole milk
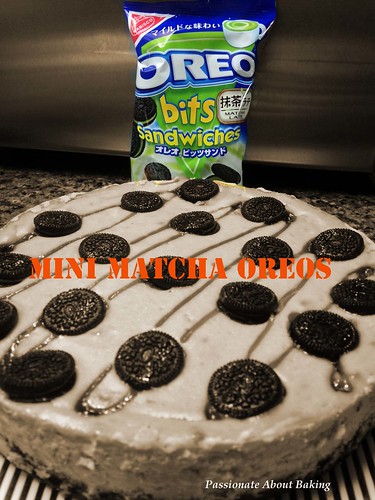
1 packet Mini Matcha Oreo (150g)

Method:
1. Preheat oven to 150C.

2. Beat cream cheese and sugar in a mixer until it is smooth without lumps.

3. Add in matcha powder and milk.


4. Add eggs in one at a time, beating until well combined. Remember to scrape down the sides of the bowl regularly to ensure an even mixture.

5. Remove the pan from the fridge and pour the mixture into the prepared pan.


6. Arrange the mini Matcha Oreos on top of the batter. Drizzle some matcha sauce (if any).
cheesecake_greentea02
7. Bake in the oven for 35mins. (I placed one cup of water at the bottom of the oven.)

8. Once done, turn off the oven and let the cheesecake cool in the oven with the door slightly ajar until totally cool.

9. Place it in the fridge and let it chill for at least 4 hours (best is overnight).

9. Let the cheesecake rest in room temperature for an hour before serving.

cheesecake_greentea03
Note:
  • Upon the request of my youngest son for this cake, I baked again the following week. I used a 7" round pan and found that they are taller and looks nicer. At least my design also improved a bit. I also added some matcha sauce I bought from Tokyo in my recent trip.
cheesecake_greentea04

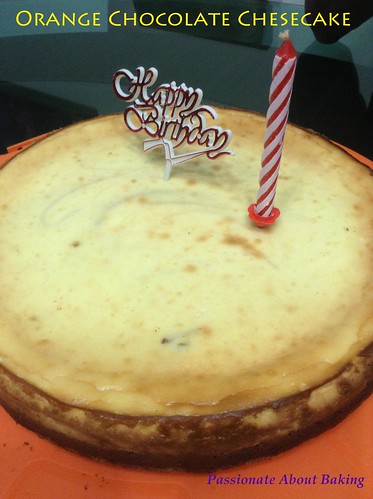
Orange Chocolate Cheesecake

There are always so many recipes to try. Then again, it's a decision to make, whether to make foolproof-done-that-before recipe or a new recipe. Whenever it comes to baking birthday cakes for my family members, I let them decide what flavour they would like, or what type of cakes.

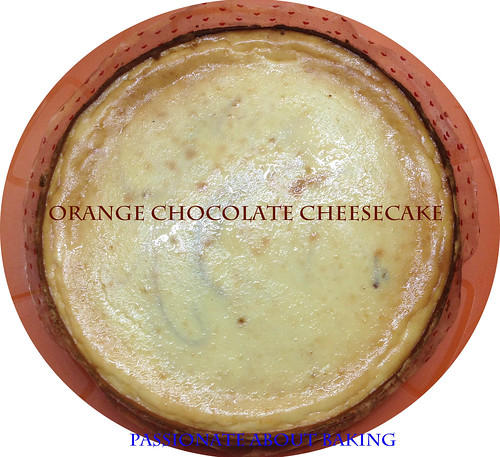
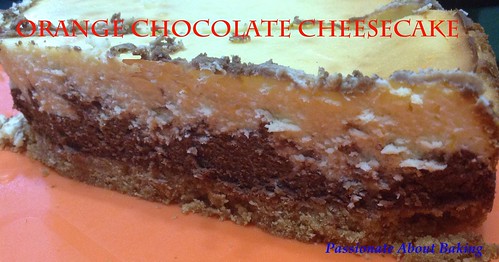
As my brother-in-law only likes Cheesecake, in particular, the original New York Cheesecake, I didn't want to make the same every year for him. This year, I made the decision for him - Orange Chocolate Cheesecake. I used Fait Maison's cheesecake recipe.
cheesecake_orangechoc03
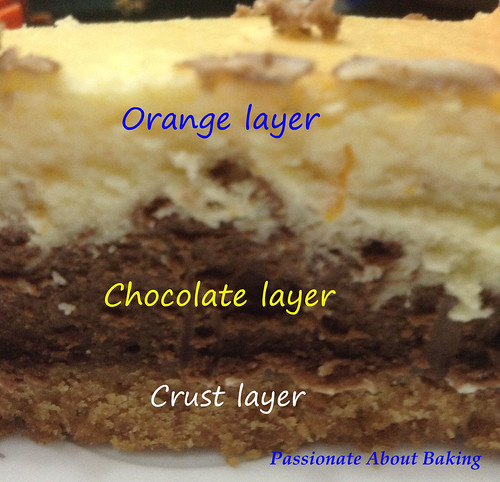
The texture of this cake was pretty good. My family members like them. However, a comment was that there was a little bitter on the orange layer. Could be due to the orange zest I added. A bit too much maybe. I will use this recipe again, it has very few ingredients to achieve a smooth cheesecake.
cheesecake_orangechoc01
Recipe for Orange Chocolate Cheesecake, modified from Fait Maison.
(Makes a 9″ round cheesecake)

Ingredients:
Crust:
200g Digestive biscuits, crushed
75g Liv Salted butter, soften

1. Mix crushed biscuit crumbs with the soften butter until it resembles the texture of wet sand.

2. Using the back of your fingers, press the mixture into the base of a lined springform pan until the base is firm and compact.


3. Baked in a pre-heated oven of 170C for 5mins, or until the crust is slightly browned.

4. Remove from oven and let it cool.

Filling:
700g Cream cheese, softened
120g Fine sugar
4 Eggs, room temperature
2 tbsp Grand Marnier (or any Orange liquor)

1 Orange Zest
130g 66% Dark chocolate, melted (can be reduced by half)

Method:
1. 
Beat cream cheese and sugar in a mixer until it is smooth without lumps.

2. 
Add eggs in one at a time, beating until well combined. Remember to scrape down the sides of the bowl regularly to ensure an even mixture.

3. Scoop half the mixture into the melted dark chocolate and mix well.

4. With the other half in the mixer, add in the orange zest and the Grand Marnier and mix on low speed to incorporate.

5. Pour in the chocolate mixture first, as it is thicker, followed by the orange mixture into the prepared pan.


6. I used a skewer to swirl the mixture a little. Bake in the oven for 30-40mins. (I placed two cups of water at in the bottom of the oven. I baked for 40mins and found the cheesecake and harden quite a bit. 35mins would have been ideal.)

7. Once done, turn off the oven and let the cheesecake cool in the oven with the door slightly ajar for about an hour. (I left it overnight.)

8. Remove the cheesecake from its pan and chill for at least 4 hours.

9. Slice the cheesecake, serve and enjoy!

cheesecake_orangechoc02 cheesecake_orangechoc04

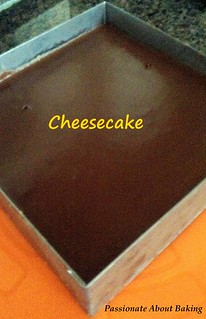
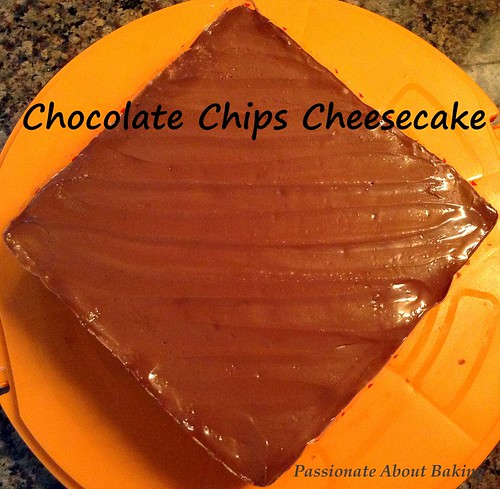
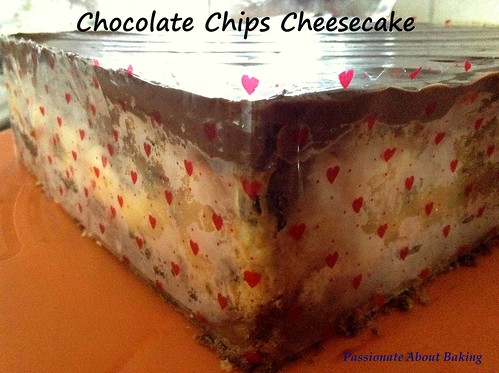
Chocolate Chips Cheesecake

How time flies! It's already into December, the last month of the year. I've always like December period. It's a month full of celebrations and feasting. And the weather is usually cooling, which makes one less temperamental and more happy. December is also the month where three of my children celebrate their birthdays, starting from my eldest son.

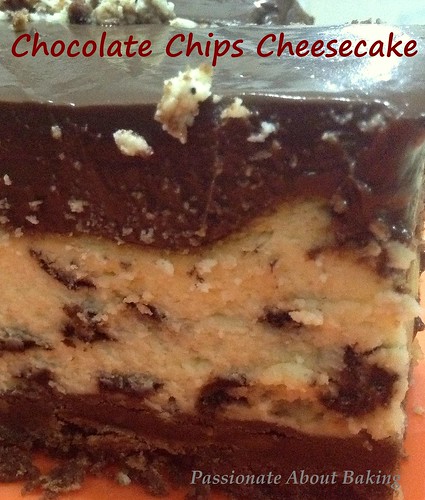
Baking a birthday cake for my eldest son is not so difficult. Every year, it's Oreo cheesecake, or some sort of cheesecake. He likes cheesecakes. So this year, we celebrated his birthday earlier together with his maternal grandparents, aunties and cousins. I baked a Chocolate Chips Cheesecake for him and he like it.

Happy birthday to my beloved son! Hope you'll be matured and successful in your endeavours!
cheesecake_chocchips04
Recipe for Chocolate Chips Cheesecake, modified from "Fantastic Cheesecake" by Alex Goh.
(Makes a 8" square cake)

Ingredients:
Cake base
2 x 120g Horlicks Biscuits, crushed finely
15g Cocoa powder
40g LIV unsalted butter, room temperature

Filling
500g Cream cheese
100g Caster sugar
20g Plain flour
2 Whole eggs
1 tbsp Lemon juice
1 Lemon zest, grated (I omitted this)
200g Whipping cream
100g Chocolate chips

Topping
200g Dark Chocolate, 55%, chopped coarsely (or use buttons)
200g Whipping Cream

Method:
    cheesecake_chocchips01
  1. Prepare an 8" (minimum 3" high) cake ring. Place baking paper below and secure it with a string. Put it on a baking tray.
  2. Cake base: Mix all the ingredients well together and press them onto the bottom of the cake ring. Refrigerate until ready to use.
  3. Filling: Cream cheese, sugar and flour until light. Add eggs one by one and cream until smooth.
  4. Add lemon juice and lemon zest and cream till well combined.
  5. Add whipping cream and mix well.
  6. Fold in the chocolate chips.
  7. Pour the cheese filling onto the prepared biscuit base.
  8. Bake in a preheated oven at 150C for 55mins, or until almost set at the centre and slightly browned on top.
  9. When it's baked, leave the oven door ajar and let it cool completely (overnight).
  10. Topping: Heat whipping cream in a saucepan over low heat. Keep stirring until almost boil.
  11. Then pour it over the dark chocolate in a mixing bowl. Let it sit for 1 min.
  12. Stir and mix well, ensure all chocolates are melted.
  13. Pour the ganache on the cooled cheesecake. Refrigerate immediately (for at least 6 hours).
  14. Remove the cake from the cake ring using a spatula. Smooth the sides, and serve.
cheesecake_chocchips02
cheesecake_chocchips03

Oreo Cheesecake

My eldest son will request for Oreo Cheesecake as his birthday cake every year. He is simply crazy about Oreos! This year is no exception. For us, I loved baked cheesecakes than cold set ones.

There is one cheesecake recipe which I liked since the day I started using it about two years ago. It was meant to be New York Cheesecake. However, I used oreo cookies as the base instead. This recipe never fails. It always turn out to be good and solid. You'll have to try it to be convinced!
Recipe for Oreo Cheesecake, modified from New York Cheesecake.
(Makes one 10" 1.5" tall and one 10" 2" tall Oreo Cheesecakes)

Ingredients:
4 Rolls of Oreo Cookies, cream removed
80g Butter, softened
1.2kg Cream cheese, softened
350g Fine sugar
235g Whole milk
6 Eggs
305g Sour cream
4 tsp Vanilla extract
40g Plain flour

Method:
1. Grind oreo cookies until fine.
2. Mix oreo cookies with softened butter, then press onto the bottom of the greased springform pans. Place it into the fridge.
3. In the large mixing bowl, mix cream cheese with sugar until smooth.
4. Blend in milk, then mix in the eggs one at a time, mixing just enough to incorporate.
5. Mix in sour cream, vanilla and flour until smooth. Pour filling into prepared crust.
6. Bake in the preheated oven of 150C for 90mins, or until the sides are firm, but centre still a little wobbly.
7. Turn the heat off, and let the cake cool in the oven with the door ajar for 5-6 hours. I left it overnight.
8. Then chill it in the refrigerator for a few hours before decorating or serving.
9. I decorated it with more crushed oreos, and added mini oreos to make it a true oreo cheesecake!
I baked my two cheesecakes in two separate ovens and both of them yield different outcomes! One of them were firmed at the end of the 90mins, while the other was still wobbly in the centre. One of it cracked while the other didn't. It could be due to the different quantities in the pan too. However, when they were chilled and cut, both yield the same taste-firm and good!

Can you guess which is the wobbly one after baking?

Cookies & Cream Cheesecake

First, I fulfilled my youngest son's mantou request. Next, I need to decide between nutella cupcake, or oreo cheesecake. The former was requested by my daughter, and the latter, by my eldest son. This is what happens when you have too many children. Not only do I have to fulfill each of their "wish", whenever I buy presents or toys, I cannot buy one, nor two. Because in their dictionary, there is no such word called "share". Therefore, in everything I buy, I need to buy THREE! One-two-three. This is how my household is like. Worse is, I need to buy double since the twins started school. Two English textbooks, workbooks, Maths textbooks etc etc... So, if anyone of you have P2 school books to give away end of this year, please think of me first. I'll be more than happy to collect hand-me-down stuff! PLEASE!!

Okay, back to my eldest son. He has been a great fan of Oreo cheesecakes since he started eating cheese. Luckily for him, I was in the mood to make some cheesecake though, not a big cheesecake. Fortunately for me, there is this Cookies & Cream Cheesecake from Shirley which looks just perfect for me! He was delighted when he knew I was going to bake a cheesecake. He helped me throughout the whole process. That is the time when I appreciate I have so many children. *wink*
The recipe made eight. Too few to feed three tiny mouths with big appetites. Instead, I made 12. I made 1.5x of the recipe. However, as I did not have sour cream, I replace it with whipping cream. With the extra cream cheese batter after scooping into the muffin cups, I made a mini cookies and cream cheesecake instead.
The cheesecake turned out to be slightly soft, but taste nice. My children loved the cheesecake. That was great for me (as I don't have to repeat it!) At least I have fulfilled another wish. Now, the last two again...

He's 10!

My eldest son has just turned a perfect 10! I had decided to have a simple celebration at home with my in-laws. Come to think of it, it has been a memorable 10 years for us. He was the first grandson in both my family and my in-laws. When he was a baby & toddler, he was under my parents care. My parents doted very much on him. My dad will buy some expensive stuff for him to play, while my mum will buy some expensive fish, brown rice and other foods for him. So he is quite pampered.

He has since grown from a very adorable boy, to a little pump cutie. It wasn't easy when he started going to school. He belongs to the kind that needs "pecking", nagging, canning and scolding before he will study. Initially, I will teach him during examinations or tests, after his P3, I sort of gave up. I let my spouse take over that role. I'm just too impatient to coach him anymore.


Coincidentally, after the birth of my eldest boy, my third sister bought an optical fibre christmas tree for me. Since then, I've been keeping it with me and bringing it out every Christmas. It's no exception this year. We took out the christmas tree as part of the celebration. The christmas tree with its optical fibre lights is easy to assemble and dis-assemble. It's so durable to own such a christmas tree!


The menu for the celebration party were:

1. Appetiser 1 : Oriental Salad.


2. Appetiser 2 : Baked Potatoes. The inspiration was from Elinluv's Tidbits Corner. I simplify the ingredients.


3. Appetiser 3 : Mushroom soup. The soup was very diluted as I didn't add starch to it.


4. Main : Chicken Puff Pies. Chicken pies of all sizes. I made two big, and six individual share to feed nine adults and six children. Of course there were some left overs.


5. Dessert 1 : Chocolate Rum Bars. Ya, I had lots of cakes in my fridge. Heehee... But they were not those "spoilt" ones. They were the leftovers...


6. Dessert 2 : Birthday cake as requested by the birthday boy - Oreo Cheesecake. I bought mini oreos to decorate the cake. But guess what, there was one mini oreo short!!! Goodness! I wanted to scream out "HELP!" However, when it comes to singing the birthday song, I managed to put the candle on the "flower" of the missing oreo place! *whew!* Close shave!


7. Drinks : Homemade Gourmet Lemongrass Tea. I boiled many sticks of lemongrass, let it infused overnight. The following day, I poured the lemongrass water out and add fresh water to the pot of lemongrass and boiled again. After I turned off the heat, I put lipton tea into it to let it infused, together with some sugar. Let it cooled down completely. Then mixed the first round of lemongrass water with the second round with the tea. Placed it in the fridge. Before serving, add some ice. It's very very refreshing. If you like lemongrass, try this. I'm a BIG BIG fan of lemongrass. Also, drinking lemongrass will keep mosquitoes off from you...for at least 24 hours! ;)

At the end of the evening, my sister-in-laws managed to packet some of the leftover goodies home. I'm glad they enjoyed the food. I had spent hours preparing them with the help of my domestic helper. Even though I was really tired from the preparation, I think it was really worth the effort!

Dark Chocolate Cheesecake

My last attempt of the Chocolate Cheesecake was very successfully. Therefore, I've decided to bake one more time, this time, for the special someone in my life-my dearest husband. When I asked him what cake he would like for his birthday, he said he didn't know. I suggested to him that I shall bake a chocolate cheesecake for him since my colleague has commented that the one I baked for her was good, he agreed. For someone who has been with me for the past 18 years (8 years courtship + 10 years marriage), it will worth any efforts it takes to bake a cake. Cheesecake is not as easy as a normal cake to bake. And it takes at least 24 hours before it can be consumed. So, preparation work is definitely a few days before the actual consumption.

As I used Valrhona 60% chocolate, I would prefer to call this a dark chocolate cheesecake. I'm a big fan of dark chocolates, but I can't say he is! As the chocolates turned out to be slightly more bitter, I've decided to frost it with whipping cream so as to mellow the taste of the dark chocolate in the cheesecake. I also wanted to keep it simple, so this was the result of my simple frostings.


I was glad I can practice my piping skills, as I felt I really needed that, especially my last Cake Decoration workshop was like months ago! I managed to pipe a presentable flower on the cake, at least that was what he thought too! :)


Happy birthday to my dearest! Thank you for all your mental and physical support all these years!

Chocolate Cheesecake


I had almost missed out on this post! Earlier last week, I had actually baked a Chocolate Cheesecake for my colleague. And because I gave it to her much earlier, I had completely forgotten about this chocolate cheesecake. I've asked her much earlier what kind of cake she would like. Her reply to me was "rich chocolate cake or cheesecake". So I thought, might as well have a chocolate cheesecake!


As it was the first time I was using this recipe to bake a chocolate cheesecake, I didn't know how it taste like. So I requested her to leave a tiny piece for me, if possible, for me to try it. This morning, the moment I stepped into the office, she told me, "your cheesecake is vv-ery, vv-ery...nice!" For a moment, I thought she wanted to tell me my cheesecake is not nice. I'm so glad she loved it! She had shared them with her siblings on Sunday. I tried the cheesecake, and true enough, it was really smooth, chocky and nice! This shall be a keeper for me!

California Style Bakings 1

Good news to announce! My dear hubby took my oven to the service centre and got it repaired within two days! It was a pleasant surprise for me on Friday. Fortunately, the cost of the repair was not too exobitant! Boy, was I glad.

I hadn't been updating much on my wedding cake decoration course. Mainly because I was still struggling with my designs. I've not even decided on the theme yet! Worst was, I was the slowest to cover the dummy cakes on Friday! It really gave me a lot of stressed over past two weeks. Sigh! A bit of regrets taking up this course. Life was actually quite smooth, wondered why I want to make it so "rough" myself. Having said that, all of us were just waiting for our own final presentation. Just wait and see.

Life is a like box of assorted chocolates. You'll have to taste it to experience it. If you don't taste it, you won't know if you like it. Only when you have tasted it, then you can tell others of your experience. Many times, certain things just don't go our way. We got stressed, we got upset. But when we reflect about it, life just has a way of making it better for you!

Actually, attending courses quite be quite addictive, at least for me. I've signed up for BITC's Certificate in California Style Baking. The course is about 4 hours over 4 weekends. I started my first workshop last Saturday.

We started with the California Cheesecake with Mixed Nut Crust. Subsequently, there are financiers, rockies, muffins, brownies and breads. Well, it's not that I don't know how to bake these, but I would like to understand the art and science of using these ingredients for the particular bakes. It's really interesting to learn.

Here's a summary of what was done in class:


1. Chopping up the walnuts and almonds.
2. Pressing the nuts together with the sugar and butter.
3. Roasted nuts.
4. The nut base for the cheesecake.
5. Ingredients for the cream cheese fillings.
6. Well mixed cream cheese fillings.
7. Chilled nuts base.
8. Measuring the cream cheese fillings into the nuts base.


9. Steam bake the cheesecakes with elevation.
10. Baked cheesecake.
11. Transferring the cheesecake into the cake board.
12. Glazing the strawberry for decoration.
13. Decorating the cheesecake.

This is my baked California cheesecake. The cheesecake is really soft, creamy and nice, especially with the walnuts and almonds. The taste together was really good!


So next time, instead of the normal digestive biscuits or sponge cake base, substitute them with the mixed nuts base. It really brings up the value of your cheesecake!


I'd like to share some tips with you on what I've learnt about cheesecakes.

1. Baked cheesecakes must be only 75-80% baked. If it's 100% baked, it will then be too dry. So how do you see if it's only 80% baked? You shake the cheesecake, if the centre is slightly wobbly, it means it's already 75-80% baked. If the cake is firmed, then you would have overbaked it already!

2. Minimum decoration is required for cheesecakes. You can brush the top with apricot gel to give it a shiny look, then decorate it with some fruits.

3. Cream cheese contains some kind of "gum" that helps it to stay in "shape". It means that no matter how you beat it, it will not curdle. This is different for mascarpone cheese.

4. Water bath or steam bake is required for cheesecake. Hot water is used so that it expedite the steam in the baking.

I hope we can all benefit from this few tips. Good luck in your cheesecake baking!
Vanilla Bean Cheesecake

The bbq on Saturday was partially to celebrate my brother-in-law's birthday and also to have some bbq fun. The stuff that they bought for bbq are pretty good - lamb chops, satay, chicken wings, sotong balls, sausages and MARSHMALLOWS! How can we have bbq without marshmallows? That was actually requested by my daughter.


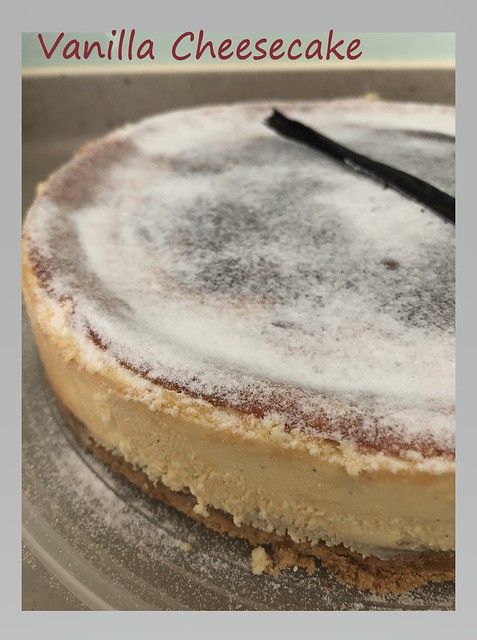
Anyway, my brother-in-law requested for cheesecake for his birthday. He is a cheesecake person. Last year, I baked him a New York Cheesecake. This year, he asked me to surprise him. I went surf through the web, looking for "exotic" or "special" cheesecakes, but just don't know what is suitable. Finally, I found a very special cheesecake recipe - Vanilla Bean Cheesecake. It looks simple enough to follow and special enough to make as it has real vanilla seeds. However, instead of baking the sponge cake from the recipe by Mandy, I use the usual biscuits crumbs. As I crushed more crumbs, I decided to have the crumbs at the sides too. It turns out, the cheesecake was really really nice. Not too sweet, as I cut down the sugar, a mild vanilla taste, not too cheesy, and the biscuit crumbs lighten the cheese taste. Everyone said it was really really nice and special. I'm glad I made the right choice...again!


Another Birthday Cake

I had been rather lapse in posting lately. I had been lazy, busy and dizzy all week! When I'm in front of the PC, I felt dizzy, then lazy set in. However, I cannot be lazy anymore, otherwise, I'll have lots of backlog posts!! Goodness me!

I had been busy whole week, preparing for Saturday. I made Vanilla Ice-Cream and Cheesecake in the mid-week, prior to Saturday. As both of these needed to be refrigerated way before the actual day of consumption, I had to prepare them in advance.

1. Vanilla Ice-Cream. I went through all the ice cream recipe, wanting to find the easiest to make. As it was to be used as an accompanied to my sister's Chocolate Fondant, I want it to be easy and creamy. I finally use the recipe from Recipetips.com. I modified the recipe a little to suit my taste. Instead of 6 egg yolks, I used 10 egg yolks as my eggs were pretty small. I replaced vanilla extract with a vanilla pod seeds and used 2 cups of whipping cream instead. The end result?? Creamy, real & taste expensive!!


2. Triple Layer Birthday Cheesecake. My youngest sister requested for a cheesecake. I asked if she can accept anything exotic, she said she can't. As I've baked cheesecake for her and my BIL before, I couldn't think of what other flavour I could try. Last year was the Chocolate Torte. How time has fly! After going through my cheesecake recipes, I finally settled on the recipe from "Delicious Cakes" called Triple Layer Birthday Cheesecake. This recipe needed to steam-bake the cheese layer by layer, each layer for 30 minutes. The three layers are Coffee, White Chocolate and Chocolate. I was thinking of topping it with a layer of crusted oreos after baking. However, after baking, the top was so smooth...so beautiful! There was no cracks to be found anywhere! This was my BEST cheesecake I ever baked! So I decided to frost as little as possible, to keep the smooth top visible. So this was my final decoration!


Saturday bakes include the following.
3. Red Bean Buns. I bought the red bean paste from PH lately as I found their red bean paste to be very nice, and I remembered my dad likes it. So I made a whole bunch of them to be given to my family members. I made different designs and put them into the muffin trays, an idea I got from Honey Bee Sweets.


4. Kueh Makmur. This was in my "To Bake" list. After the unsuccessful attempt the last time, I had to try again using different recipe. I used Honey Bee Sweets' recipe this time, though quite a lot of work, I was quite determined to bake this. However, I had added the egg white while the flour were not thoroughly cooled, resulting in my dough being too wet to roll. I ended having to put them in the fridge, then adding a lot more plain flour to it. The baking caused the dough to crack. Fortunately, the overall taste was much better than the previous attempt. At least, it was still melt-in-the-mouth texture! Quite happy with the outcome, though not happy with the process!