Arashi Shabu Shabu @ JB

I visit our "neighbour" very often. Usually once a month. On Good Friday, hubby decided to brave the traffic jam to visit our neighbour again. We brought our children to watch "Ah Boys to Men II" at KSL. My favourite shopping mall in JB is Aeon Tebrau City. Even though I've been there so many times, this was the first time I tried Arashi Shabu Shabu.

There are a variety of soup bases to choose from. My youngest son preferred to have his own miso soup, whereas my hubby shared herbal soup with my elder son, and I chose to have tom yam soup base. My daughter has no preference, so she shared with all of us. The sets for the shabu shabu starts from RM21.90. I ordered the salmon set at RM$29.90. A-la-carte meat starts from RM10.90. There are various sizes of meat plates, depending on whether you want to share, or for personal consumption.

Overall, I like the selection of items in the set meal, and the ingredients are very fresh. There was a long queue even after we left at half past eight. If you ordered a-la-carte separately, you can expect to pay quite a lot. Set meals are more value for money. We ordered a Garden Tea to go with our shabu shabu. The tea was fragrant and light. I like it.
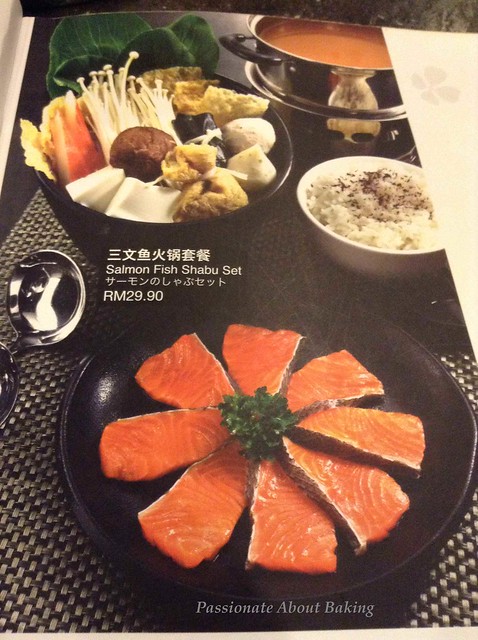
arashijb1
I ordered this set.
arashijb2
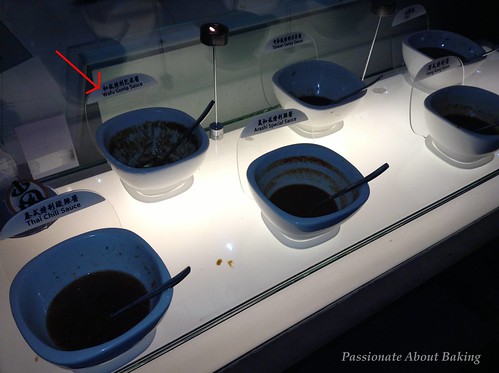
Sauce table. Must try this sauce - Wafu Goma Sauce. It's sesame sauce and it's SUPER DUPER good!
arashijb3
Salmon set with Tom Yum soup base.
arashijb4
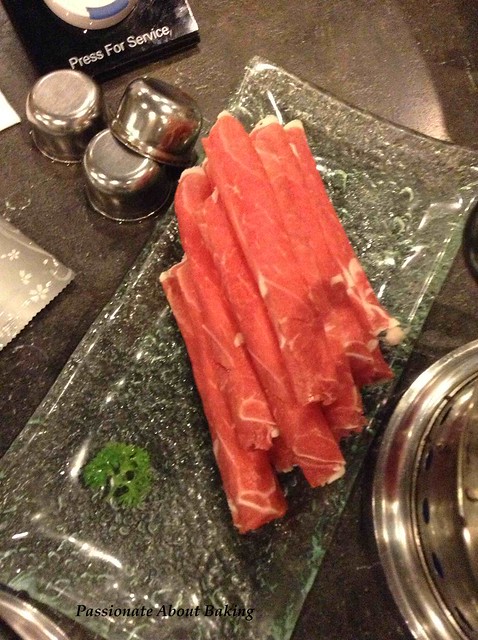
A-la-carte extra large NZ beef.
arashijb5
A-la-carte extra large lamb. It has a very strong taste, which I don't like.
arashijb6
Garden Tea. Very fragrant. Helped to clear the oily food.
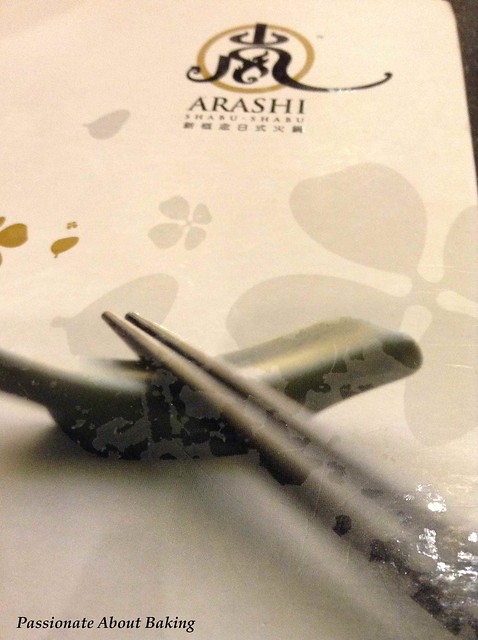
arashijb7
Overall, it was a good experience at Arashi. However, I realised that after my dinner, I felt very thirsty. Still, it was worth a try. I will like to try other set meals in future.  We paid for the meals ourselves.

Arashi Shabu Shabu
Lot S26, 2nd floor
Aeon Tebrau City Shopping Centre
No. 1 Jalan Desa Tebrau
Taman Desa

Winner for Liv Butters Giveaway

Thank you to all those who has responded to the giveaway! If you have not tried Liv Butters, do try them today.

Congratulations to our winner...


Phoebe Swinn
winner for liv
Phoebe, please send your mailing address and contact number to aloyallyanders[at]gmail[dot]com.

This giveaway is proudly sponsored by Liv butter. Try Liv today!
Liv Butter - Salted & Unsalted-001

LIV Butter Cake & LIV Butters & Cake Recipe Card Giveaway

This post is sponsored by Liv butter. Try Liv today!
Liv Butter - Salted & Unsalted-001
[Baked on 6 Mar 2013]
In order to know if a butter is really good and fragrant, bake a fuss-free butter cake. Thanks to the chefs at SATS, this butter cake was a true testimony of how fragrant and buttery Liv is! Enjoy this dense and creamery Liv Butter cake!
cake_butter01
Recipe for LIV Butter Cake, modified from LIV Butter Cake Recipe (halved of the original recipe)
(Makes a 7" square pan, or a 8" round pan)

Ingredients:

250g Liv Salted butter, soften at room temperature
250g Top flour (or cake flour)
3 Large eggs (approx. 60g without shells)
4g Baking powder
30g Whole milk (or evaporated milk)
145g Caster sugar

Method:

  1. Preheat the oven to 180C and grease or line a 7" square pan.
  2. Beat butter and sugar with a mixer at slow speed until soft, then medium speed till light and fluffy.
  3. Mix top flour with baking powder and sift twice. Set aside.
  4. Break the eggs into a separate bowl and mix, but do not whisk.
  5. Pour the eggs into the batter slowly in three batches. Ensure the egg is absorbed by the batter before adding more.
  6. Fold the sifted flour into the batter slowly, making sure that the batter absorbs the flour evenly.
  7. Mix in the milk and ensure it is incorporated.
  8. Pour the batter into the baking pan and bake in the oven for approximately 45mins, or until a skewer inserted in the middle is clean.
cake_butter02 cake_butter03
Note: Original recipe says to bake for 30mins. However, after 30mins, my cake centre was still very wet. I continued baking until the centre was cooked. It could likely due to the fact that I only use 160C for my Sharp oven. Try 30mins and adjust accordingly.

I have a LIV Butter Cake recipe card to giveaway. If you like to collect recipe card, and have tried LIV Salted or Unsalted Butter, please leave a comment and tell me what you have cook/bake with LIV Butter and why do you like it. I'll select the best comments and send you the recipe card.
Closing date for comments: 22 March 2013.

Updated on 23 March 2013:
Thanks to the generosity of the people at Liv Butters. They will be sponsoring five Liv Salted and five Liv Unsalted butters to a winner. For those who had try LIV Butter, please leave a comment on why you like it. For those who had not try, please tell me what you will be using LIV Butter if you won the 10 blocks. Good luck!
Closing Date: 29 March 2013.
Liv Butter - Salted & Unsalted-001
IMG_3056-001

Chocolate Meringue Cookies

cookies_meringue03
[Baked on 9 Mar 2013]
I still had some egg whites leftover from my CNY baking, and was wondering how to use it. Then I saw a post on Chocolate Meringue Cookies from Joy of Baking in FB, and decided to bake it. As discussed in the FB comments, we were told not to reduce the sugar as it will affect the crispiness of the cookies. I reduce it from 200g to 160g anyway. I found that the cookies were able to stay crisp. However, I realised that the baking time for me was too short as the cookies wasn't able to pull away from the parchment paper easily. I had difficulties separating them to. Having said that, the cookies were really nice. It had a crisp outer and a very chewy inner.
cookies_meringue01
Recipe for Chocolate Meringue Cookies, adapted from Joy of Baking.
Makes approx. 50 1" cookies

Ingredients:
100g Egg whites (approx. 3 eggs)
160g Caster sugar
15g Dutch-processed cocoa powder, sifted

Method:
  1. Preheat oven to 130C and line a baking tray with parchment paper. 
  2. Put the egg whites and sugar in a heatproof bowl and whisk to combine.
  3. Place the bowl over a saucepan of simmering water and, stirring constantly, heat the mixture until the sugar has melted and is warm to the touch (about 2-5 minutes).
  4. Remove from heat and wipe the bottom of the bowl to remove any condensation.
  5. Using an electric whisk, beat on high speed until the meringue is stiff with glossy peaks and cool to the touch.
  6. Sift the cocoa powder over the meringue and with a large spatula, gently fold the cocoa powder into the meringue. Mix well.
  7. Before placing the cookies on the parchment paper, place a little of the meringue on the underside of each corner of the parchment paper. This will prevent the paper from sliding.
  8. With piping bag and a star nozzle, pipe the meringues on your prepared baking tray.
  9. Sift a little more cocoa powder over the meringues.
  10. As soon as you put the meringues into the oven, reduce the oven temperature to 100C and bake the meringues for approximately 90mins (1.5hrs), or until the meringues have a crisp outside crust and release easily from the parchment paper. (If you break one open, the inside will be soft and marshmallowy. The longer you bake the Meringues, the firmer they will be inside.)
  11. Remove from oven and place on a wire rack to cool. The meringues can be covered and stored at room temperature for 2-3 days (depending on humidity).
cookies_meringue02

Herbed Wholemeal Focaccia

bread_focaccia1
[Baked on 9 Mar 2013]
I haven't been baking bread for a long time. I wished I have more time to bake breads. Given a choice to bake, I'll go for breads! Unfortunately, baking bread takes a long floor time. Since I didn't do bread-baking planning, I wasn't able to make pre-fermented dough.  So I made an easier recipe. This is from "bake!". This focaccia bread is easy to make as it does not require much kneading, and the end result is holey and good. You may replace the wholemeal flour with plain flour or bread flour to get a softer bread.
bread_focaccia2
Recipe for Herbed Wholemeal Focaccia, adapted from bake! by Nick Malgieri
(Makes a 11" x 9" loaf)

Ingredients:
120g Wholemeal flour
465g Bread flour
2 tsp Sea salt
7g Instant yeast
420g Warm water, about 43C
60g Olive oil
3 tsps Silician herb mix
A dash of Cayenne pepper

Some dried sage leaves
Some garlic chopped coarsely
Sea salt
Olive oil

Method:
  1. Stir the flour and salt together and set aside.
  2. In a large mixing bowl, whisk the yeast into the water. Wait for 2 mins and whisk again to make sure the yeast is completely dissolved. Whisk in the oil.
  3. Use a large rubber spatula to smoothly stir half the flour mixture into the liquid. Stir in the remaining flour mixture, using the spatula to dig up any unmoistened flour from the bottom of the bowl. Add in the herb mix and mix well.
  4. After all the flour is moistened, use a dough hook to mix thoroughly, for approximately 5 mins. The dough will still be moist. 
  5. Cover the bowl with clingfilm and let the dough rise until it has doubled in size, about an hour.
  6. Scrape the dough into the prepare baking tray. Use the flat palm of your hands to press the dough into the tray. Make sure the dough covers the entire base of the tray.
  7. Let the dough rise for another 1 hour.
  8. Once the focaccia is fully risen, use your index finger to dimple the top all over. Drizzle some olive oil over the surface, sprinkle sage leaves and chopped garlic, followed by sea salt.
  9. Place the focaccia in the preheated oven of 200C and bake for about 25mins or until the top is browned.
  10. Remove the focaccia from the tray after baking.
  11. Cool completely before serving.
bread_focaccia3

Wholemeal Chia Seeds Scones

This post is sponsored by Liv butter. Try Liv today!
Liv Butter - Salted & Unsalted-001
scones_wholemealchiaseeds02
Recipe for Wholemeal Chia Seeds Scones
(Makes approx. 36 mini scones)

Ingredients:
125g Wholemeal flour
250g Self raising flour
2.5 tsp Baking powder, heaped
15g Caster sugar
100g Liv Unsalted butter, cold & cubed
3 tsp Chia Seeds
25g Pumpkin seeds, toasted
2 Eggs
110g Whole milk

Method:

1. Place wholemeal flour,self-raising flour, baking powder and caster sugar into a large bowl. Mix well.
2. Rub in the cold butter with your fingertips until the mixture resembles fine breadcrumbs.
3. Add in the the chia seeds and pumpkin seeds. Mix well.
4. Make a well in the centre and pour in the beaten eggs and milk. Mix with a wooden spoon, starting from the centre of the well and stirring outwards until you have a sticky dough.
5. Cover the bowl with clingfilm or a damp cloth and leave to rest for 5 mins.
6. Knead the dough for 2 mins until it is smooth and elastic. Rest the dough for another 5 mins.
7. Roll out the dough to a rectangle. Then fold the dough, roll it out flat again, fold again and roll it out.
8. Then roll it to approximately 1/2 inch thick and use a 2 inch fluted cutter to cut out the scones, re-rolling the trimmings as necessary.
9. Place it on a baking tray and brush with milk. Bake in the preheated oven of 200C for 12mins or until it's golden brown.
6. Serve warm with whipped cream and jam. scones_wholemealchiaseeds01