Showing posts with label oreo. Show all posts

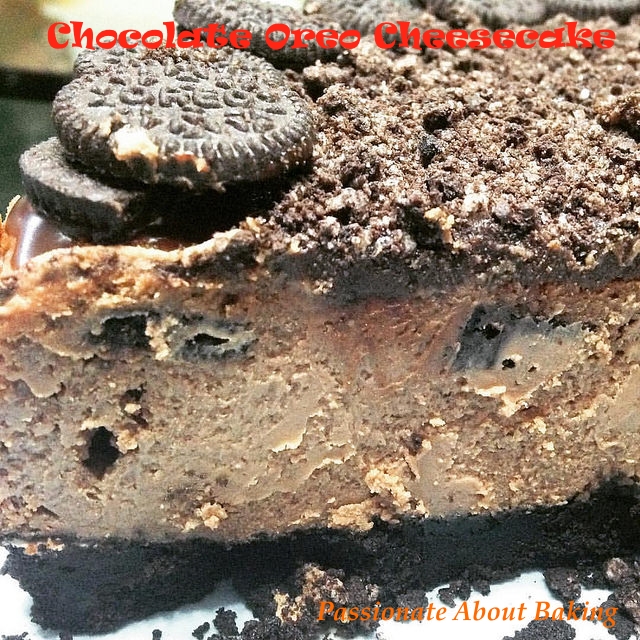
Chocolate Oreo Cheesecake

There are some not-so-healthy snacks which many people still like to indulge - Nutella for one, Oreo for another. Being a health conscious person, one would rather make their own of similar type, but the taste might or might not be the same. Somehow, I still prefer to buy these if I need them. As much as I try not to eat too much, often, I have request to use them for baking some goodies.

This time, the request was to bake a Chocolate Oreo Cheesecake for my nephew's birthday. Requests for birthday cakes from my family members was something I simply couldn't refuse. In anyway, I'll try my best to bake the cake according to their preference. And I know they will appreciate my efforts whether it turns out perfect or imperfect. :)
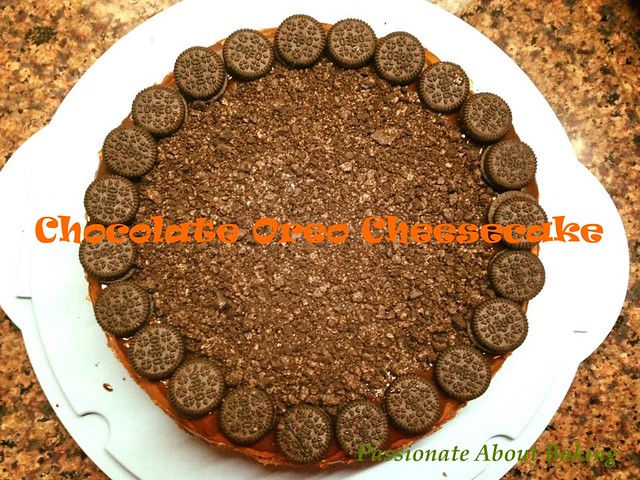
chocoreochcake01
Recipe for Chocolate Oreo Cheesecake.
(Makes a 9″ round cheesecake)

Ingredients:
Crust:
450g Oreo biscuits, finely grind
75g Salted butter, melted

1. Mix crushed biscuit crumbs with the soften butter until it resembles the texture of wet sand.
2. Using the back of your fingers, press the mixture into the base of a springform pan until the base is firm and compact.
3. Baked in a pre-heated oven of 160C for 5mins.
4. Remove from oven and let it cool.

Filling:
750g Cream cheese, softened
120g Fine sugar
4 Eggs, room temperature
130g Dark chocolate, melted
2 tbsp Rum
1 packet Mini Oreo

Decoration:
Some chocolate ganache
Some crushed Oreo biscuits
1 packet Mini Oreo

Method:
1. Beat cream cheese and sugar in a mixer until it is smooth without lumps.
2. Add eggs in one at a time, beating until well combined. Remember to scrape down the sides of the bowl regularly to ensure an even mixture.
3. Add in the melted chocolate gradually. Ensure to mix well. Add in rum and mix till incorporated.
4. Pour half of the cheese batter into the pan. Arrange the mini Oreo randomly. Then carefully add the rest of the batter.
5. Bake in the preheated oven of 160C for 40mins. 
6. Once done, turn off the oven and let the cheesecake cool in the oven completely. (I left it overnight.) The cheesecake cracked with humps.
7. Remove the cheesecake from its pan and chill for at least 4 hours.
8. To decorate, spread the ganache to cover the top completely. Arrange mini Oreos around the perimeter of the cake. Then sprinkle crushed biscuits in the centre. Refrigerate well.
9. Before serving, remove from the fridge and left it outside for at least one hour. Slice, serve and enjoy!
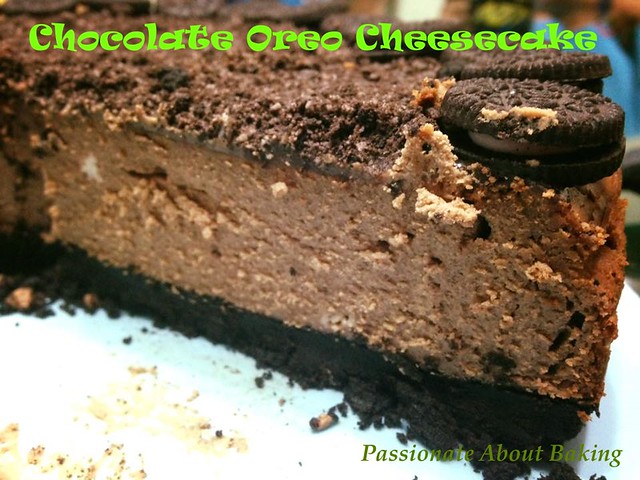
chocoreochcake02 chocoreochcake03

Green Tea Oreo Cheesecake

This post is sponsored by Liv butter. Try Liv today!
Liv Butter - Salted & Unsalted-001
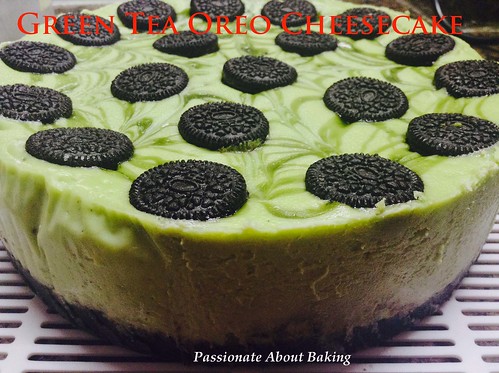
After a wonderful holiday with my family in Tokyo, it was back to baking a birthday cake to my eldest son. He has always been a great fan of cheesecake, so this time, I decided to bake a Green Tea Oreo Cheesecake. We couldn't get enough of green tea anyway, so this was appropriate. 
cheesecake_greentea01
Recipe for Green Tea Oreo Cheesecake.
(Makes a 8″ round cheesecake)

Ingredients:
Crust:
200g Oreo, crushed (You can get the crushed oreo biscuits directly from Sun Lik)
75g Liv Salted butter, soften

1. Mix crushed oreo crumbs with the soften butter until it resembles the texture of wet sand.

2. Using the back of your fingers, press the mixture into the base of a lined bottom removable pan or springform pan until the base is firm and compact.


3. Keep it in the fridge to harden until ready to bake. 

Filling:
500g Cream cheese, softened
80g Fine sugar
3 Eggs, room temperature
1 tsp Matcha powder

2 tsbp Whole milk
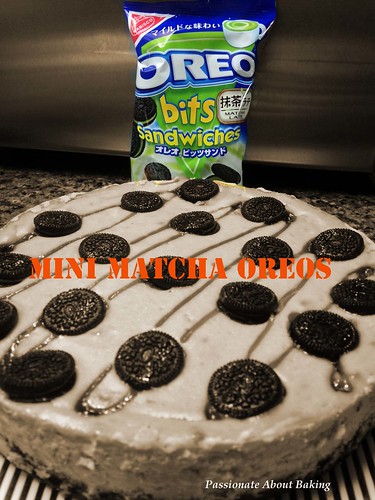
1 packet Mini Matcha Oreo (150g)

Method:
1. Preheat oven to 150C.

2. Beat cream cheese and sugar in a mixer until it is smooth without lumps.

3. Add in matcha powder and milk.


4. Add eggs in one at a time, beating until well combined. Remember to scrape down the sides of the bowl regularly to ensure an even mixture.

5. Remove the pan from the fridge and pour the mixture into the prepared pan.


6. Arrange the mini Matcha Oreos on top of the batter. Drizzle some matcha sauce (if any).
cheesecake_greentea02
7. Bake in the oven for 35mins. (I placed one cup of water at the bottom of the oven.)

8. Once done, turn off the oven and let the cheesecake cool in the oven with the door slightly ajar until totally cool.

9. Place it in the fridge and let it chill for at least 4 hours (best is overnight).

9. Let the cheesecake rest in room temperature for an hour before serving.

cheesecake_greentea03
Note:
  • Upon the request of my youngest son for this cake, I baked again the following week. I used a 7" round pan and found that they are taller and looks nicer. At least my design also improved a bit. I also added some matcha sauce I bought from Tokyo in my recent trip.
cheesecake_greentea04

Oreo Marble Cake

When I was resting at home last Monday, I decided to bake a simple cake. When I saw Ellena's post on the marble cake, I felt like having some. The recipe was in fact from Ju. Without hesitation, I got my kitchen accessories and ingredients and started baking.
Since I still have some crushed oreos in my cupboard, I decided to replace the cocoa powder with my crushed oreos.
Recipe for Oreo Marble Cake, modified from Ju's Marble Cake.
(Makes a 7" cake)

Ingredients:
225g Unsalted butter, softened
185g Caster sugar
4 Eggs
225g Self-raising flour
3 tbsp Whole milk
1 tsp Vanilla extract
40g Ground Oreos

Method:
1. Line the bottom of a 7" cake tin with a greaseproof paper.
2. Beat the butter and sugar together, then add the eggs one at a time, mixing well after each addition.
3. Fold in the flour, milk and vanilla extract until the mixture is smooth.
4. Divide the mixture between 2 bowls. Add the crushed oreos into one of the bowls and mix well.
5. Alternate the two batters. Otherwise, just pour one batter in and add the other one.
6. When all the mixture has been used up, take a skewer and swirl it around the mixture in the tin a few times to create a marbled effect.
7. Bake the cake at 180C for 65 mins or until a skewer inserted into the centre comes out clean.
8. Turn out onto a cooling rack and leave to cool.

The cake turned out to be really nice and solid. It's not too crumbly. The cake tasted even better the next day. This is definitely a keeper for me!

Oreo Cheesecake

My eldest son will request for Oreo Cheesecake as his birthday cake every year. He is simply crazy about Oreos! This year is no exception. For us, I loved baked cheesecakes than cold set ones.

There is one cheesecake recipe which I liked since the day I started using it about two years ago. It was meant to be New York Cheesecake. However, I used oreo cookies as the base instead. This recipe never fails. It always turn out to be good and solid. You'll have to try it to be convinced!
Recipe for Oreo Cheesecake, modified from New York Cheesecake.
(Makes one 10" 1.5" tall and one 10" 2" tall Oreo Cheesecakes)

Ingredients:
4 Rolls of Oreo Cookies, cream removed
80g Butter, softened
1.2kg Cream cheese, softened
350g Fine sugar
235g Whole milk
6 Eggs
305g Sour cream
4 tsp Vanilla extract
40g Plain flour

Method:
1. Grind oreo cookies until fine.
2. Mix oreo cookies with softened butter, then press onto the bottom of the greased springform pans. Place it into the fridge.
3. In the large mixing bowl, mix cream cheese with sugar until smooth.
4. Blend in milk, then mix in the eggs one at a time, mixing just enough to incorporate.
5. Mix in sour cream, vanilla and flour until smooth. Pour filling into prepared crust.
6. Bake in the preheated oven of 150C for 90mins, or until the sides are firm, but centre still a little wobbly.
7. Turn the heat off, and let the cake cool in the oven with the door ajar for 5-6 hours. I left it overnight.
8. Then chill it in the refrigerator for a few hours before decorating or serving.
9. I decorated it with more crushed oreos, and added mini oreos to make it a true oreo cheesecake!
I baked my two cheesecakes in two separate ovens and both of them yield different outcomes! One of them were firmed at the end of the 90mins, while the other was still wobbly in the centre. One of it cracked while the other didn't. It could be due to the different quantities in the pan too. However, when they were chilled and cut, both yield the same taste-firm and good!

Can you guess which is the wobbly one after baking?

Queen Bread and Oreo Buns

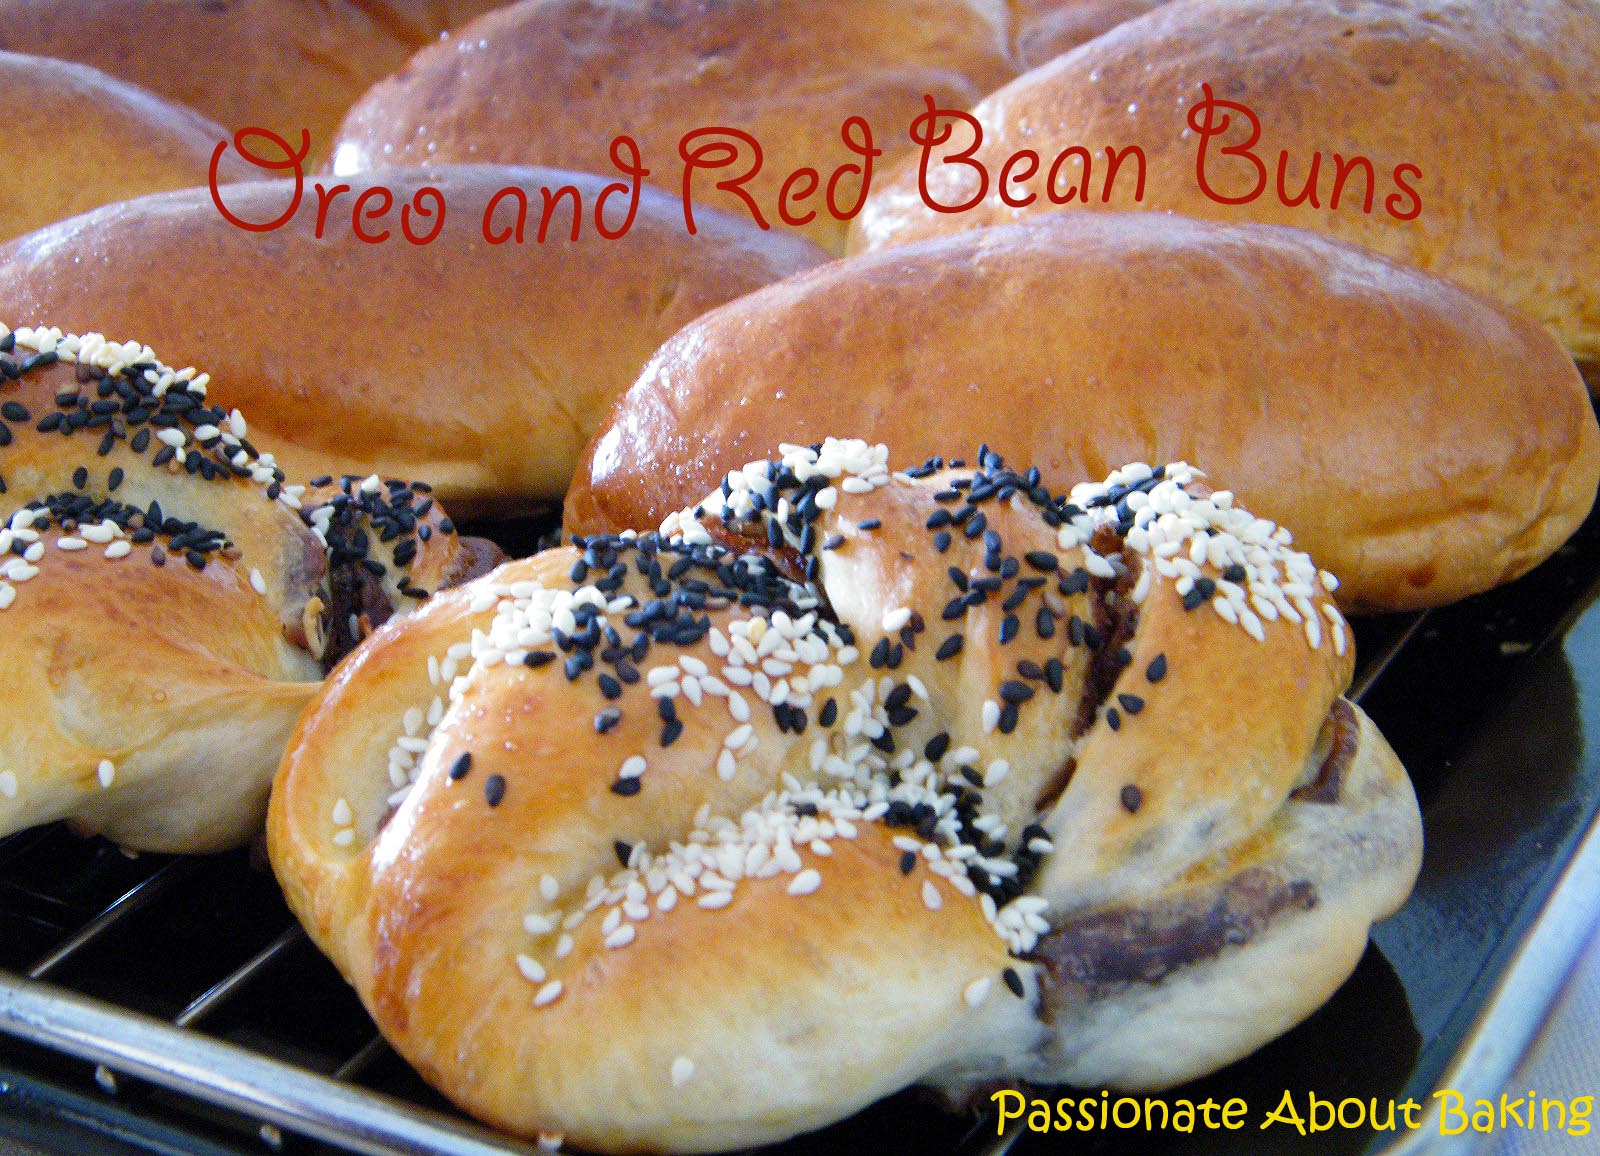
I was looking for some inspirations to bake my bread. So I asked my eldest son what would he like. He replied me "Oreo". It sounded weird to have oreo in the bread. And he wanted it wholesome in the buns, not crushed, nor any other way. So I obliged.
I made one recipe of the Queen Bread from Baking Code. Separated into two portions. One portion, I proceeded with the Queen bread, the other portion, I made into buns, a mixture of oreo buns and red bean buns.
Recipe for Queen Bread, extracted from "Baking Code by Alex Goh"
(Makes 2 loaves, but I only make one loaf. The other half dough I made into buns.)

Ingredients:
A:
500g Bread flour
75g Sugar
6g Salt
20g Milk powder
8g Instant yeast

B:
150g Overnight sponge dough*
1 Cold egg
240g Cold water

C:
90g Butter

Method:
1. Mix A until well blended. Add in B, knead to form a dough.
2. Add in C, continue kneading to form a smooth and elastic dough. Cover it with cling wrap and allow it to proof for 60mins.
3. Divide the dough into 4 pieces, mould it round. Allow it to rest for 10 mins.
4. Roll out the dough, roll it up like swiss rolls. Allow it to rest for 10 mins. Repeat the step one more time. Place two dough onto the greased loaf tin. Makes two loaves.
5. Let it proof for 50mins. Cut the top with scissors. Place some butter on top and sprinke some sugar. (I had forgotten to do this! I left the top plain and just baked it!)
6. Bake in pre-heat oven at 180C for 35mins.

*Overnight Sponge Dough (use all)
(makes approx. 155g dough)

Ingredients:
100g Bread flour
60g Water (room temperature)
1/4 tsp Instant yeast

Method:
1. Mix the instant yeast with 20g of water until well-blended.
2. Add in the remaining ingredients and knead to form a dough.
3. Let it proof for 30mins.
4. Wrap in cling film and keep in the refrigerator overnight.


The beautiful loaf baked from the galvanised loaf tin. One of my favourite baking tool!
I saw with great interest what Bee Bee did to her buns. So I decided to try it on a slice of the Queen bread to test if it will spring back. It responded so well I decided to "massage" it a couple more times. (Don't worry, I only tested on one ;))Then I decided this loaf is truly worth making! Enjoy the "massage"!

Cookies & Cream Cheesecake

First, I fulfilled my youngest son's mantou request. Next, I need to decide between nutella cupcake, or oreo cheesecake. The former was requested by my daughter, and the latter, by my eldest son. This is what happens when you have too many children. Not only do I have to fulfill each of their "wish", whenever I buy presents or toys, I cannot buy one, nor two. Because in their dictionary, there is no such word called "share". Therefore, in everything I buy, I need to buy THREE! One-two-three. This is how my household is like. Worse is, I need to buy double since the twins started school. Two English textbooks, workbooks, Maths textbooks etc etc... So, if anyone of you have P2 school books to give away end of this year, please think of me first. I'll be more than happy to collect hand-me-down stuff! PLEASE!!

Okay, back to my eldest son. He has been a great fan of Oreo cheesecakes since he started eating cheese. Luckily for him, I was in the mood to make some cheesecake though, not a big cheesecake. Fortunately for me, there is this Cookies & Cream Cheesecake from Shirley which looks just perfect for me! He was delighted when he knew I was going to bake a cheesecake. He helped me throughout the whole process. That is the time when I appreciate I have so many children. *wink*
The recipe made eight. Too few to feed three tiny mouths with big appetites. Instead, I made 12. I made 1.5x of the recipe. However, as I did not have sour cream, I replace it with whipping cream. With the extra cream cheese batter after scooping into the muffin cups, I made a mini cookies and cream cheesecake instead.
The cheesecake turned out to be slightly soft, but taste nice. My children loved the cheesecake. That was great for me (as I don't have to repeat it!) At least I have fulfilled another wish. Now, the last two again...

He's 10!

My eldest son has just turned a perfect 10! I had decided to have a simple celebration at home with my in-laws. Come to think of it, it has been a memorable 10 years for us. He was the first grandson in both my family and my in-laws. When he was a baby & toddler, he was under my parents care. My parents doted very much on him. My dad will buy some expensive stuff for him to play, while my mum will buy some expensive fish, brown rice and other foods for him. So he is quite pampered.

He has since grown from a very adorable boy, to a little pump cutie. It wasn't easy when he started going to school. He belongs to the kind that needs "pecking", nagging, canning and scolding before he will study. Initially, I will teach him during examinations or tests, after his P3, I sort of gave up. I let my spouse take over that role. I'm just too impatient to coach him anymore.


Coincidentally, after the birth of my eldest boy, my third sister bought an optical fibre christmas tree for me. Since then, I've been keeping it with me and bringing it out every Christmas. It's no exception this year. We took out the christmas tree as part of the celebration. The christmas tree with its optical fibre lights is easy to assemble and dis-assemble. It's so durable to own such a christmas tree!


The menu for the celebration party were:

1. Appetiser 1 : Oriental Salad.


2. Appetiser 2 : Baked Potatoes. The inspiration was from Elinluv's Tidbits Corner. I simplify the ingredients.


3. Appetiser 3 : Mushroom soup. The soup was very diluted as I didn't add starch to it.


4. Main : Chicken Puff Pies. Chicken pies of all sizes. I made two big, and six individual share to feed nine adults and six children. Of course there were some left overs.


5. Dessert 1 : Chocolate Rum Bars. Ya, I had lots of cakes in my fridge. Heehee... But they were not those "spoilt" ones. They were the leftovers...


6. Dessert 2 : Birthday cake as requested by the birthday boy - Oreo Cheesecake. I bought mini oreos to decorate the cake. But guess what, there was one mini oreo short!!! Goodness! I wanted to scream out "HELP!" However, when it comes to singing the birthday song, I managed to put the candle on the "flower" of the missing oreo place! *whew!* Close shave!


7. Drinks : Homemade Gourmet Lemongrass Tea. I boiled many sticks of lemongrass, let it infused overnight. The following day, I poured the lemongrass water out and add fresh water to the pot of lemongrass and boiled again. After I turned off the heat, I put lipton tea into it to let it infused, together with some sugar. Let it cooled down completely. Then mixed the first round of lemongrass water with the second round with the tea. Placed it in the fridge. Before serving, add some ice. It's very very refreshing. If you like lemongrass, try this. I'm a BIG BIG fan of lemongrass. Also, drinking lemongrass will keep mosquitoes off from you...for at least 24 hours! ;)

At the end of the evening, my sister-in-laws managed to packet some of the leftover goodies home. I'm glad they enjoyed the food. I had spent hours preparing them with the help of my domestic helper. Even though I was really tired from the preparation, I think it was really worth the effort!

Cakes on the list

There are always time for baking cakes. Any kind of cakes are good enough to bake, as long as you want to. There are always recipes that you fall back on, and new ones which you put them in your "To Bake" list. For me, I have more of the latter than the former. Sometimes, I just want to try new recipes. Other times, I just want to "play safe". Whatever it is, both will derived satisfaction equally.


Last weekend, I didn't manage to do any baking as I attended a full three days workshop. I only managed to catch up on some bakings yesterday. I baked marble pound cakes and Oreo Cupcakes. The Oreo cupcakes were extracted from Yochana's Blog with modification. I'm glad it turned out good. I wrapped them up and let my son bring them to school to give away to his teachers and friends. This is the last week of school. They'll get their well-deserved holidays soon. Boy I'm so happy too!


Recipe for Mini Oreo Cupcakes (modified)
(Makes approx. 60 cupcakes, base about 1")


Ingredients:
230g Salted butter
150g Fine sugar
4 eggs
1 tsp Vanilla extract
235g Self-raising flour (sieved)
100g Oreo Biscuits - crushed lightly
30g Chocolate Chips (Optional)

Method:
(1) Using a k-beater, beat butter and sugar till fluffy.
(2) Add in the eggs one by one. Mix well before adding the next one.
(3) Mix in vanilla extract.
(4) Add in the flour in 2-3 batches. Mix till combined. Continue beating until smooth, but thick.
(5) Stir in the crushed oreo biscuits and spoon into paper cups.
(6) Topped with one chocolate chip each.
(7) Bake at 180C for 14mins. or until cooked.
(8) Remove from oven and cool on a cooling rack.

Durian Oreo Cake


Some days back, I saw HHB posted her blog with this Durian Oreo Cake. I thought it was rather interesting. Actually I've seen this combination of cake before, but I didn't think much of it until she baked it. I've requested her for the recipe and she was generous and kind enough to post it up after receiving so many requests. Well, since I've requested for it, I'd better not waste her effort.

So, picking up my courage, I tried to bake this cake. I knew I wanted to bake a durian cake, but was hesitant about adding oreo. Eventually, I did add the oreos. My failed attempt was baking the cake. Somehow, I still cannot fold in the flour without deflating the bubbles. In fact, I had to bake twice in a row, just so to get 3 layers of sponge. *sigh* Still trying to get the techniques of folding flour into aerated eggs right! Anyone there can coach me one-to-one please?? The batter just went flat and there was no difference in the level of the pan before and after baking! Hahaha... I saw how high the cake can rise in HHB's picture. Mine just refused!


Anyway, the comments I received on the cake is - sponge is too dense (as expected), should have more durian pulps, otherwise, the overall taste is good. I used diary whipped cream instead of non-diary as I prefer the diary taste more. It's actually a very easy and simple recipe to do, except for the challenge of the sponge cake for me! I like this cake too!


Some updates on my Wedding Cake Decoration course. Last week, we did some extension works and bridging. It was rather difficult to pipe as the royal icing was hard, and extensions required at least 7 layers!! Most of us agreed that we will skip this for our project work! Heehee... We also tried our hands on sugar paste frills and flounce and started some carnation modelling. We'll be doing more flowers next week. Yippee!


Breads, Tarts, Cakes.

It seems that I have been a bit outdated in updating my blog. So many stuff to update, but just so little time. Sometimes, it's just a compromise between updating blog or baking. Finally found sometime to update on what I have baked for the past few days. The bakes are not in chronological order!

Pork Floss Buns.


Banana Chiffon Cake.
After a successful attempt on Kevin's recipe, I tried it again, but this time, I reduced by two egg yolks and the chiffon is really soft & nice!


Cranberry Bread Loaves. I modified this from Alex Goh's recipe. However, it wasn't very soft. Therefore, I shall not post any recipe here.


Chocolate Oreo Tarts. I layered this tart with chocolate, then crushed oreo, then chocolate again & finally crushed oreo.


Pineapple Tarts. I baked these tarts with the ready-made dough & pineapple fillings from Gina's Pineapple Tart workshop the day before. The pineapple fillings is very fragrant & moist. The crust is however, a bit crispy. I would have much prefer the melt-in-the-mouth kind. But generally, the taste is great. I could just pop a few at one go! The recipe can be found at KC forum.