Review of 2012 Bakes

As 2012 comes to an end, I reviewed my 10 best (and new) bakes for the year. I hope with this review, I will be able to do more new bakes next year.

Looking forward to a better baking 2013! Happy 2013 and beyond!


swissroll_01


kueh serimuka03

bread_chocwassant2

bread_cranberry3

cake_ogurapandan2

cupcake_pumpkins3

Christmas Holly Durian Logcake

Christmas is my favourite festive season of the year. It is a period where there will be lots of feasting and gathering. I love to host Christmas gathering with family members and friends too! This year, I invited my family members and in-laws over to my place (separately) for a mini celebration. For occasions like this, I will usually bake some kind of desserts. And one of the common desserts will have to be Christmas logcake.

Ploughing through the patterned swiss rolls recipes in the blog, I decided to try this recipe from Reese. As I wanted to make two log cakes, I increased the quantity of the ingredients. I made one with strawberry jam and the other with durian. The durian logcake was very well received by my in-laws! I was glad they enjoyed it!

I am submitting this post to Aspiring Bakers #26 - Creative Christmas Motif Bakes! hosted by Alan of Travellingfoodies.
swissroll_durian04 
Recipe for Christmas Holly Durian Logcake, adapted from Reese.
Makes two 10 x 13" sheet cake

Ingredients:

Egg yolk batter:
8 Egg yolks
27g Caster sugar
80g Milk
2 tsp Vanilla extract (may omit this. I prefer to add vanilla extract as I found it very eggy without)
60g Vegetable oil
133g Cake flour
20g Cornflour

Egg Whites:
8 Egg whites
94g Caster sugar

For picture: (I originally use more. However, there were a lot of left over. This is the original recipe)
20g Egg whites
10g sugar
[with 30g egg yolk batter from the top]
Green colouring
Red colouring

Frosting:
60g Durian flesh
130g Whipping Cream
13g Caster sugar
swissroll_durian02

Method:

1. Egg yolk batter: Whisk egg yolks together with sugar, then add in milk and oil and mix well.
2. Add in cake flour and cornflour and stir well. Set aside.
3. Scoop out 30g egg yolk batter with 10g (for red) and 20g (for green) respectively. Mix in red colouring to the 10g batter and green colouring to the 20g batter. Mix well.
4. Whisk the 20g egg whites and sugar (ingredients for pictures) till half soft peak form and add 1/3 in the prepared 10g red egg yolk batter, and remaining egg whites in the green yolk batter. Stir well.
5. Spoon the red batter into a piping bag with tip #3. Pipe 3 rounds to form a little triangles onto lined tray.
6. Spoon the green batter into a piping bag. Cut off the tip and pipe it to form a leaf. Pipe three leaves around the red triangle.
7. Bake at 180C for 1 minute then set aside.
8. Egg whites: Whisk the egg whites together with the sugar until stiff peak.
9. Fold into the egg yolk batter. Then pour batter over the half-baked hollies. Split them (almost) equally into the two trays. (As I have left over from the picture batter, I piped them onto the surface of the batter, to prevent wastage.)
swissroll_durian01
10. Flatten the top with a spatula and bake at 180C for 13 minutes, or browned. (Then baked the other tray)
11. Transfer onto wire rack to cool completely.
swissroll_durian03
To assemble:

12. Whisk the whipping cream with sugar till stiff.
13. Spread the durian flesh onto the swiss roll, followed by whipped cream.
14. Roll it up and decorate with Christmas decorations.
swissroll_durian06 swissroll_durian05
Wish you a Merry Christmas & a very Happy New 2013!

Salted Caramel Chocolate Cake

cake_saltedcaramel06
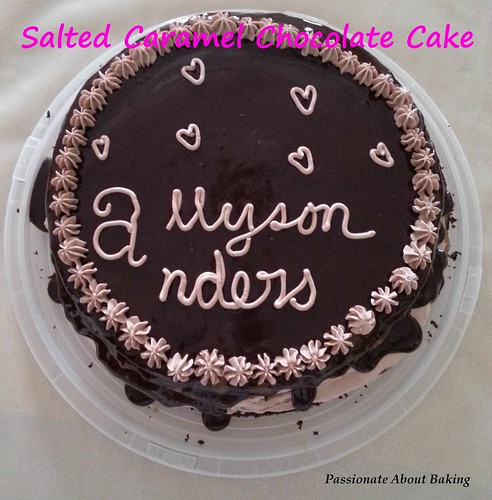
I asked my daughter what she would like for her birthday cake. She didn't know what to request for. Lately she has taken a liking to mocha. So I suggested the mocha checkered cake for her. She was agreeable. However, after much thought, I decided to do a different cake even though I knew the mocha cake will be well received.

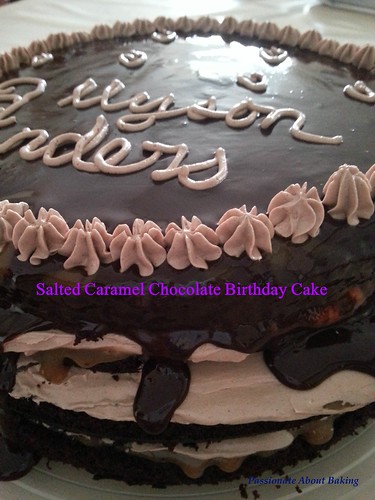
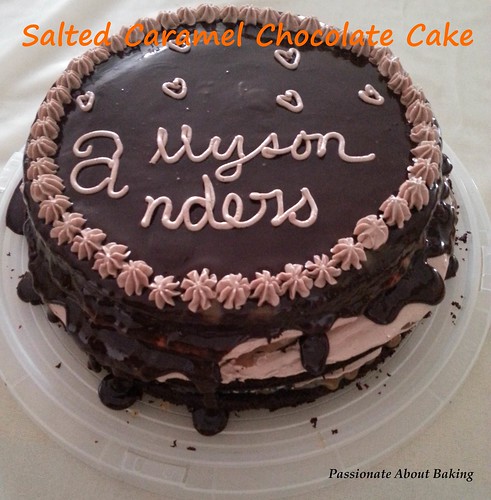
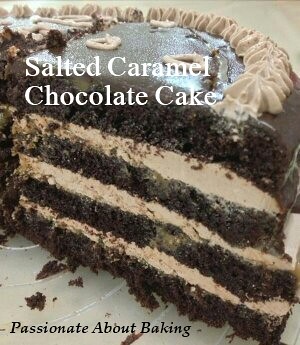
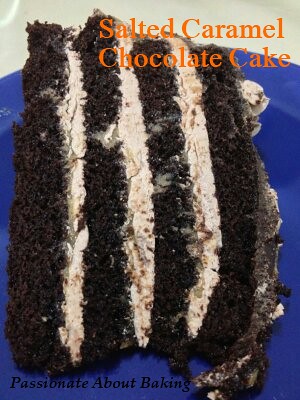
I decided on Martha Stewart's Salted Caramel Six-Layer Chocolate Cake. As I do not possess two 9" cake pans, I made one in 9" and another in 8". And instead of six layers, I only have 4 layers. I didn't follow the recipe totally. I added buttercream and chocolate ganache and didn't frost the whole cake. The cake was really unique and special with the salted caramel taste. The chocolate cake was really moist and dense. Most of us like the sweet & salty taste including myself.
cake_saltedcaramel05
Recipe for Salted Caramel Chocolate Cake, adapted from Martha Stewart site.
Makes a 9" cake

Ingredients:


For The Cake
375g Plain flour
380g Granulated sugar
129g Unsweetened Dutch-process cocoa powder
1 tbsp Baking soda
1 1/2 tsp Baking powder
1 1/2 tsp Coarse salt
4 Large eggs
368g Buttermilk (I weigh 366g whole milk with 1 1/2 tsp lemon juice. Mix well and let it sit for 5mins)
90g Warm water
137g Vegetable oil
2 tsp Vanilla extract

For The Caramel (Half of original recipe)
250g Granulated sugar
40g Light corn syrup
20g Water
238g Heavy cream
1 tsp Coarse salt
113g Liv unsalted butter, cut into cubes

For Chocolate Buttercream
2 Egg whites
80g Caster sugar
150g Unsalted butter, soft but still cold
25g Cocoa powder

For Chocolate Ganache
150g Semi-sweet chocolates, chopped (or 55% dark chocolate buttons)
150g Heavy cream (whipping cream)

Method:

Make the cake
1. Line two 9" round cake pans with parchment paper. (As I do not have two 9" round cake pans, I baked them in 9" and 8" pans)
2. Sift flour, granulated sugar, cocoa, baking soda, baking powder, and salt into the bowl of a mixer.
3. Beat on low speed until just combined. Raise speed to medium, and add eggs, buttermilk, cups warm water, oil, and vanilla. Beat until smooth, about 3 minutes.
4. Divide batter among the prepared pans.
5. Bake until cakes are set and a toothpick inserted into the center of each comes out clean, about 35-40 minutes.
6. Let them cool in the pans on a wire rack for 15 minutes. Then turn out the cakes onto the wire racks, and cool completely.

Make the caramel
7. Combine granulated sugar, corn syrup, and water in a medium saucepan over high heat.
8. Cook, without stirring, until mixture is dark amber, approximately 14 minutes. (I took longer than this, about 18 minutes)
9. Remove from heat, and carefully pour in cream (mixture will expand and spatter); stir until smooth.
10. Return to heat, and cook until a candy thermometer reaches 114°C, about 2 minutes. (I seemed to cook forever. My thermometer continues to read 104°C after 8 minutes, I stopped heating)
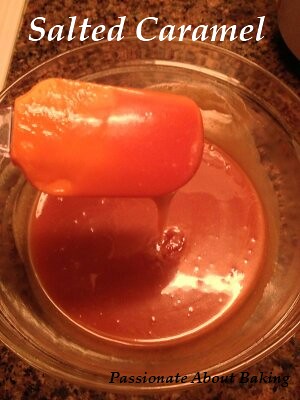
11. Pour caramel into a medium bowl, stir in 1 teaspoon coarse salt, and let it cool slightly, about 15 minutes.
12. Stir in the butter,  a little at a time. Let it cool completely.
13. Refrigerate at this stage if you are not using immediately (just like me).
cake_saltedcaramel03
Make the Chocolate Buttercream
14. Whisk the egg whites and sugar over a double boiler until sugar has dissolved.
15. Remove from heat and whisk continuously until it's cooled and the peaks are stiff and glossy.
16. Add the butter in 3 batches, ensuring that it is well incorporated before adding another batch.
17. Continue beating until it becomes creamy and fluffy.
18. Lastly, sift in the cocoa powder and continue beating until the buttercream is uniformly smooth and chocky.

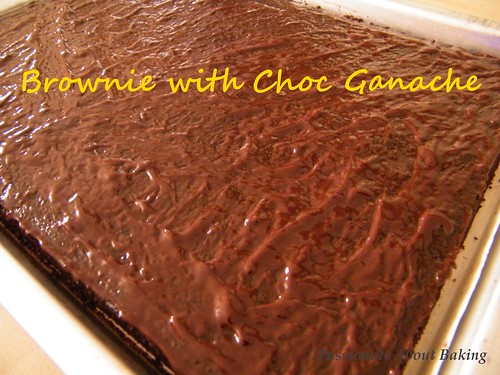
Make Chocolate Ganache
19. Heat whipping cream in a saucepan over low heat. Do not let it boil.
20. Before it boils, remove from the heat and pour over the chopped chocolates in a large bowl. Let it sit for 5 mins.
21. Stir and mix till all the chocolates are completely melted and smooth. (If it does not melt completely, heat it for a few seconds in the microwave.)
cake_saltedcaramel04
To Assemble:

22. Cut each cake in half horizontally to form 2 layers.
23. Transfer 1 layer to a serving platter, and spread caramel generously over the top.
24. Add chocolate buttercream and spread evenly.
25. Top with another cake layer, and repeat with remaining caramel, buttercream and cake layers, with the top layer only covered in caramel.
26. Refrigerate until set, about 1 hour.
27. Pour the chocolate ganache on the top and let it flow down. (You can choose to frost the sides with chocolate ganache, or leave the sides empty with random chocolate drips.)
28. Decorate the top as desired.
cake_saltedcaramel01
cake_saltedcaramel02
I'm submitting this for this month's Cook like a Star, Martha Stewart, organised by Zoe from Bake for Happy Kids, Baby Sumo from Eat your heart out and Riceball from Riceball Eats.

Egg Mousse Tarts

This post is sponsored by Liv butter. Try Liv today!
Liv Butter - Salted & Unsalted-001
Planning for a mini celebration is not easy. You always have to decide if you want to buy from store or made everything from scratch. If you're going to make everything from scratch, then it will mean early preparation of everything. However, some food cannot be prepared in advance. It needs to be prepared only when guests arrived. So when you don't have an extra hand, avoid making such foods, cos you really want to spend time with your guests instead of slogging in the kitchen right?

I invited my family members over to my place for a simple birthday celebration for my "Little Twins Stars". After thinking for a long time, I decided to make some finger food. A little special from the usual dinner I have with my family. This will be the one-bite food which I think they will like. Using the same pastry base, I made them into Egg mayonnaise, prawns and mushrooms with sour cream mint. It was a delight to know that they loved the finger foods! Even the helpers like them and finished them all! So for future events, finger foods will be here to stay. Good that I can always make the pastry way before the event!
fingerfood_04
Recipe for Egg Mousse Tarts, extracted from Irresistible Pastry by Alex Goh.
Makes approx. 50 cookie size tart base

Ingredients:

Pastry
200g Plain flour
100g Liv Salted Butter, cold
60g Water
2 tsps Parsley, finely chopped (I used dried Parsley)

Method:


1. Mix the butter with the flour until crumbly.

2. Add in parsley and water.
3. Mix to form a dough. Shape it into ball and press it flat. Wrap with plastic and refrigerate for at least 30 minutes. (I left mine overnight).
4. Roll out the pastry between two sheets of plastic wrap to about 3mm thickness.
5. Cut it with a cookie cutter (your preference of any shape).
6. Place the cut-outs onto a greased pan.
7. Prick the pastry with fork and bake at 190C for 20mins or until golden. (I baked mine at 170C fan oven for at least 22 mins, turning the tray in between)
8. Leave it to cool completely before serving. (I kept mine in airtight container until ready to use.)
fingerfood_01
Egg Mousse

3 Hard boiled eggs
25g Mayonnaise
Pizza topper (use any dried herbs of your preference)
Black pepper
Salt

Method:

1. Mash the eggs finely and mix it with mayonnaise, pizza topper, black pepper and salt until well blended.
2. Scoop them into the pastry base and serve.

For Prawns and Mushrooms, cook them separately. Place them individually on the pastry base. Then topped with mint sour cream.

fingerfood_05
Mint Sour Cream

50g Sour cream
2 tsp Mint Sauce
Black pepper

Mix well and place on top of prawns and mushrooms.
fingerfood_03 fingerfood_02

Strawberry Surprise Chocolate Cupcakes

This post is sponsored by Liv butter. Try Liv today!
Liv Butter - Salted & Unsalted-001
I've seen many bakers adding jam to their cupcakes in some of the blogs. It looked rather interesting though. So I decided to try baking some myself, to have a taste of how it's like. Since owning "Fabulous Cake Business" for quite a while, I didn't have the opportunity to try any recipes from this book. Therefore, I decided to modify one of their recipe - Blueberry Cupcake to bake my Strawberry Surprise Chocolate Cupcakes.
cupcake_chocstrawberry2
Recipe for Strawberry Surprise Chocolate Cupcakes, modified from Fabulous Cake Business by Alex Goh.
Makes 27 regular cupcakes (No. 8 paper liner from Daiso)

Ingredients:

(A)
250g Liv Unsalted butter, soften
160g Caster Sugar
(B)
50g Plain flour
(C)
4 Large eggs (weighs 60g per egg without shells)
(D) (sift together)
140g Plain flour
30g Cocoa powder
30g Corn flour
1 tsp Baking powder
(E)
50g Whole milk
(F)
180g Strawberry jam

Frosting:

Chocolate Buttercream

Method:


1. Beat (A) with a k-beater at medium speed until light and fluffy. Stop to scrap the sides and bottom of bowl with rubber spatula frequently.
2. Add (B) and cream until well blended. Gradually add (C) in 4 batches and cream until light and smooth. Stop to scrap the sides and bottom of bowl after each addition.
3. Add (D) and (E) alternately and mix at low speed until well blended.
4. Line the muffin moulds with the paper cups.
5. Scoop a small amount of the batter into the cups, then add a small teaspoon of the strawberry jam into the batter. Topped it up more batter and smooth the top.
cupcake_chocstrawberry
6. Bake at 190C in the middle rack for 20 minutes.
7. Remove the cakes from the moulds immediately after baking and set aside to cool.
cupcake_chocstrawberry1
8. Decorate it by piping chocolate buttercream on top of the cake.
cupcake_chocstrawberry3

You'll never know me

You made me
Yet you don't know

You had me
Yet you don't want me

I fulfill your wish
Yet you are regretful

I have left you
Yet you are sad

I am gone forever
You'll never know me.

--- Unknown, 21 Nov 2012

Steamed Pumpkin Peanut Butter Buns

After making my pumpkin cupcakes, I was left with some (canned) pumpkin puree. As I didn't want to waste it, I decided to make some pumpkin buns. Deciding between HBS's Soft Pumpkin Milk Loaf or Pumpkin Pork Floss Steamed Buns. Since I still have a packet of Hong Kong flour, I decided to make the Steamed Buns instead.

However, as I had no Pork Floss on hand, and not wanting to have plain steamed pumpkin buns, I decided to spread some peanut butter on the dough instead.
steamed_pumpkinbun1
Recipe for Steamed Pumpkin Peanut Butter Buns, adapted from Honey Bee Sweets.
Makes 40 buns

Ingredients:
Starter dough:
120g Hong Kong flour
1/2 tsp Instant yeast
80g Warm water
pinch of salt

Method:
  1. Knead all the ingredients together till it comes together to form a soft, smooth dough. Chill in the fridge up to 6-8hrs before use.

Main dough:
200g Starter dough (all of starter dough)
3tsp Instant yeast
600g pau flour
360g Steamed pumpkin (I added half canned pumpkin puree & fresh steamed pumpkin. I added slightly more pumpkin than the recipe. Therefore, the dough was slightly moist)
40g Water
80g Caster sugar
1/2tsp Fine salt

Creamy Peanut Butter

Method:
  1. Place everything in a large mixing bowl and knead till it comes together. Continue kneading till it is elastic and smooth.
  2. Place the dough in a greased bowl and let proof till double in size. Punch out the air and divide the dough into 4 portions. Roll round and let rest for 5 minutes.
  3. Take a dough portion and roll it out with into a big flat rectangle. Spread them with creamy peanut butter. (I made two rolls of plain buns and two rolls of peanut butter buns.)
  4. Roll it up from the long side like a swiss roll and then slice it up into 10 equal portions. Place on a grease proof paper and let proof in the steamer (cold) for 10 minutes.
  5. Start the stove fire, once the water boils, lower it to medium low and let steam for 10 minutes. Then turn off the fire and let the buns stay into the steamer for another 5 minutes before taking them out. (As I need to steam twice, I removed the buns immediately after steaming and put in the second batch.)
steamed_pumpkinbun2

Pumpkin Cupcakes

This post is sponsored by Liv butter.
Liv Butter - Salted & Unsalted-001
During my trip to Orlando and New York City recently, I had the opportunity to visit hypermarket like Walmart and departmental stores like Macy's. When you go to places like this, you're just tempted to to into their baking sections - both ingredients and accessories. I couldn't resist to buy back some beautiful cupcake liners and even cupcake carriers and cake stand! My hubby was very kind to help me lugged those back. Not that Singapore stores don't have, but it's cheaper there and the variety is good!

Since it was the Halloween season, I bought some Halloween related cupcake liners and sticks. And I decided to make Pumpkin Cupcakes so that I can use the liners and make the occasion more real!
cupcake_pumpkins2
Recipe for Pumpkin Cupcakes, adapted from Hummingbird Bakery
Makes 12 regular (American size) cupcakes

Ingredients:

120g Plain flour
100g Caster sugar
1 tbsp Baking powder
1 1/2 tsp Ground Cinnamon
A pinch of salt
40g Liv Unsalted butter, room temperature
120g Whole milk
2 Eggs
200g Canned pumpkin puree

Method:


  1. Put the flour, sugar, baking powder, cinnamon, salt and butter in a large mixing bowl.
  2. Beat on slow speed until you get a sandy consistency and everything is combined.
  3. Gradually pour in the milk and beat until well mixed.
  4. Add the eggs one at the time to the mixture and mix well. Stop and scrape the sides.
  5. Stir in the pumkin puree using a spatula, until evenly dispersed.
  6. Spoon the batter into the paper cases until 2/3 full.
  7. Bake in a preheat oven of 170C for about 20mins, or until browned.
  8. Leave the cupcakes to cool slightly in the tray before turning into a wire cooling rack to cool completely.
cupcake_pumpkins1
Cream Cheese Frosting

Ingredients:
80g Icing sugar, sieved
60g Liv Unsalted butter, room temperature
125g Cream cheese

Method:
  1. Beat the icing sugar and butter together in a mixing bowl until they are creamy and well mixed.
  2. Add all the cream cheese and beat until completely incorporated.
  3. Continue beating until the frosting is light and fluffy.
cupcake_pumpkins3 
Frosting:
  1. Using an off-set spatula, frost the cupcakes with the cream cheese generously.
  2. Sprinkle some cinnamon powder on the cream cheese.
  3. Add cupcake sticks to beautify.
cupcake_pumpkins4

Brownie Truffles

This post is sponsored by Liv butter.
Liv Butter - Salted & Unsalted-001 I was looking for some good and simple recipes which I wanted to bake for my dad's party some weeks back. Then I saw a post from The Little Teochew on Cocoa Brownies which looked very presentable, and in bite size! I wasted no time in trying this out and was very happy with the result. I named it - Brownie Truffles! It certainly can posed off as truffles with the sprinkle of cocoa powder on it. This is one sweet treat which you can certainly impress!
brownie_cocoa3 
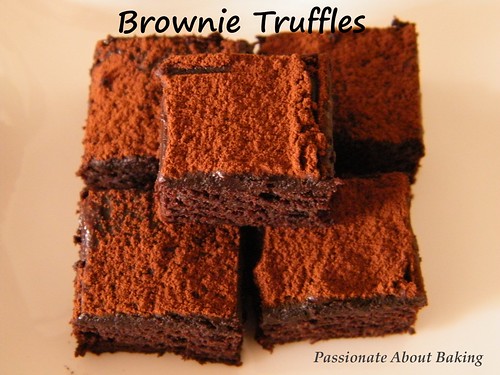
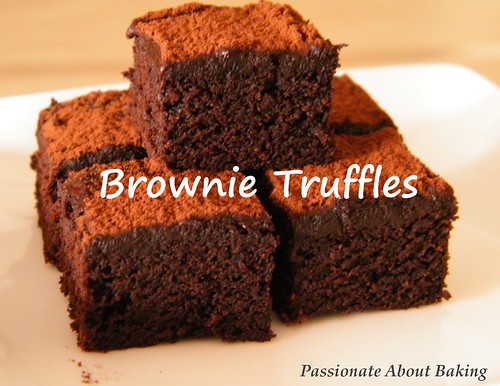
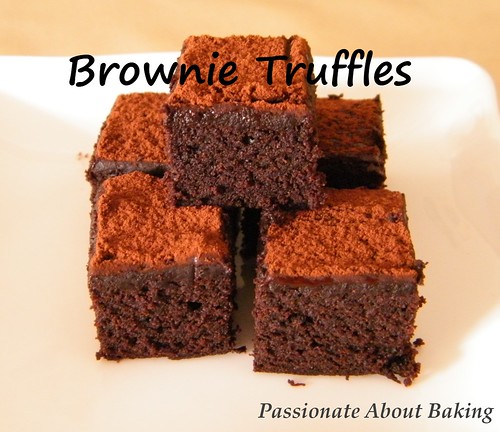
Recipe for Brownie Truffle, adapted from The Little Teochew.
Makes a 14 x 11" tray

Ingredients:

282g Liv Unsalted butter
340g Caster sugar
164g Unsweetened cocoa powder (natural or Dutch-process)
1/2 tsp Fine Rock salt
1 tsp Vanilla extract
4 Large cold eggs
132g Plain flour

Method:

1. Preheat the oven to 160°C. Line the bottom and sides of a 14" x 11" rectangular baking tray with parchment paper, leaving an overhang on two opposite sides.

2. Combine the butter, sugar, cocoa, and salt in a medium heatproof bowl and set the bowl in a bigger pot with barely simmering water. Stir from time to time until the butter is melted and the mixture is smooth and hot enough that you want to remove your finger fairly quickly after dipping it in to test.

3. Remove the bowl from the pot and set aside briefly until the mixture is only warm, not hot. It looks fairly gritty at this point, but don’t fret — it smooths out once the eggs and flour are added.

4. Stir in the vanilla with a wooden spoon. Add the eggs one at a time, stirring vigorously after each one. When the batter looks thick, shiny, and well blended, add the flour and stir until you cannot see it any longer, then beat vigorously for 40 strokes with the wooden spoon or a rubber spatula. Spread evenly in the lined pan.
brownie_cocoa1
5. Bake until a toothpick plunged into the center emerges slightly moist with batter, about 20 to 25 minutes. Let it cool completely on a rack.

5. Lift up the ends of the parchment or foil liner, and transfer the brownies to a cutting board. Cut them into 1" square each. Should give >80 bite size pieces.

brownie_cocoa2 brownie_cocoa4

Orlando & New York City, USA

IMG_1930DSCF3356DSCF3359DSCF3364DSCF3374DSCF3378
DSCF3379DSCF3381IMG_0730DSCF3383DSCF3388DSCF3389
DSCF3390DSCF3391DSCF3392IMG_1426IMG_1427IMG_1429
IMG_0749IMG_0750IMG_0752IMG_0759IMG_0769IMG_1432
Free & easy holiday in Orlando & New York City for the period 4 - 17 Oct 2012.