Spizzico and Laurent's Cafe

Some weekends back, we had our sisters' lunch. I bought a the voucher from deal.com.sg for Spizzico Ristorante Italiano. It is located in UE Square. We were there earlier than expected for lunch. When we reached the restaurant, it was still empty. The restaurant had a "fine dining" set up, with the usual cockeries and wine glasses. The indoor setting were pretty small. It got filled up rather quickly.

The overall experience at this restaurant was just so-so. We found the food to be overly-priced, for something which were not so authentic or fantastic. The dessert fridge didn't look appetizing, so we decided we to skip it totally. I doubt I will visit this restaurant again.

Appetizers
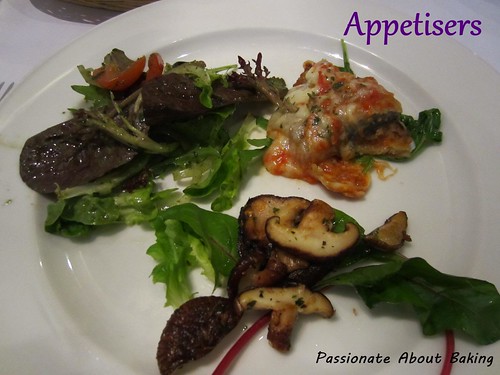
From top left corner: Mixed Salad ($14), Parmigiana ($14) and Sauteed Wild Mushroom ($18).
spizzico1
Mixed Salad was very ordinary. To pay $14 for a bowl of greens is quite pricey in my view. It was just pure greens.

Parmigiana, which was supposed to be famous in Italian dish was a disappointment. According to my sisters, authentic Parmigiana wasn't supposed to taste like that. It was aubergine with baked cheese and tomato sauce. The taste was quite alright.

The Sauteed Wild Mushroom was the best appetisers amongst them. There was this grilled taste though. I like the it though. However, a bit pricey for the quantity we had. :p

Main Course
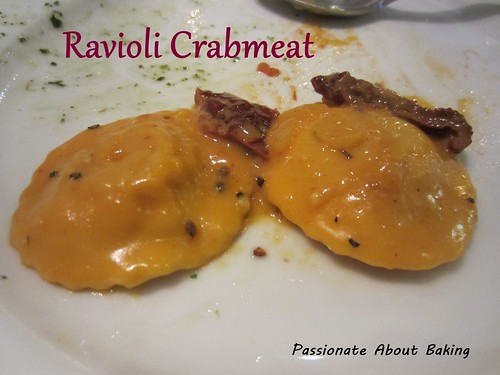
Ravioli Crabmeat ($24) was good. Even though the pasta was rather thick, there was enough fillings to complement the texture. Even though there was a hint of fishiness, it still tasted very good. The sauce included sundried tomatoes, which were our favourites.
spizzico2
Pizza Salmone ($20) tasted good with its fresh smoked salmon. The crust was thin and topped with lots of rockets.
spizzico3
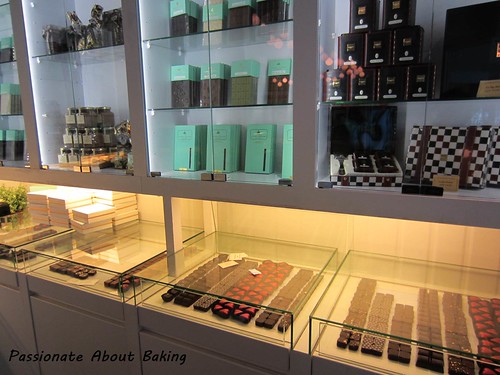
After lunch, we felt that we were not satisfied. So we proceeded to Laurent's Cafe at Robertson Quay. I was "wowed" by the specialty chocolate sections and the chocolate desserts on display. The ambience was really country. We loved it. I supposed there is a price to pay for good chocolates. I'm sure this is not the last time I'll be there! The amount I paid for the desserts was almost the same as my lunch! Haha...
Laurent1 Laurent2
Carupano Venezuela Hot Chocolate ($9) was far better than their Classic Hot Chocolate Caraïbe 66% ($8). Venezuela Hot Chocolate has a deeper, richer and more spicy taste than the Classic. Classic tasted a bit too much milk. You can only realised the difference when you tried both. However, if you ordered only Classic, you might also like it. [I had forgotten to take a picture of the hot chocolate.] A fudgey dark chocolate cookie was served with the Hot Chocolate. Double yummy!

Next up, Pleasure ($9.80). Layers of chocolates with whipped chocolate cream and hazelnut praline on a thin vanilla sponge cake. Generous hazelnuts with the praline. I love this to bits!
Laurent3
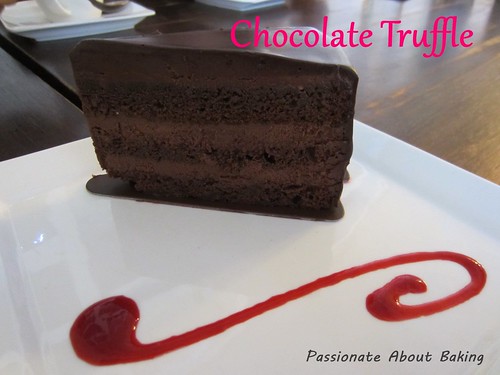
Chocolate Truffle ($7.80). Nothing to shout about this truffle cake though. I think many of the bloggers can make similar cake. I like that it is not too sweet, it's really something that I can make at home, with dark and good quality chocolates.
Laurent4
Chocolate Tart ($7.80). This was the reason my sister brought us here. According to her, the chocolate tart here is the best. I have to agree. The crust was thin and crispy. There was a layer of hazelnut praline, followed by the chocolate. It's dark chocolate. It's to die for. Goes really well with the whipped cream.  We had chocolate overdose for that day. However, we're happy with that!
Laurent5

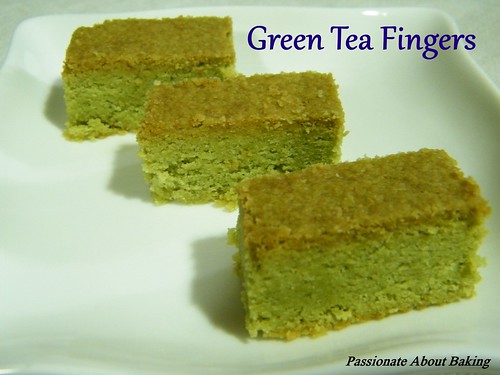
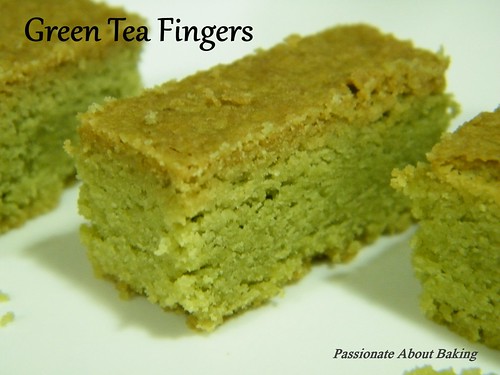
Green Tea Fingers

I baked this last week as my fingers were feeling "itchy". This was the simplest baking one could do.
shortbread_greentea2 Recipe for Green Tea Fingers, modified from "Cakes & Bakes".
Makes a 8" square pan (possible to bake in a 9" round pan too!)

Ingredients:
175g Cold Butter, plus extra for greasing
225g Plain flour
1 1/4 tsp Green Tea powder
60g Fine sugar
shortbread_greentea1
Method:
1. Preheat the oven to 180C. Grease a 8" square pan.
2. Sift the flour, green tea powder into a bowl and stir in the sugar.
3. Rub in the butter until the mixture begins to stick together.
4. Press the mixture into the prepared tin and smooth the top with a palette knife.
5. Bake in the preheated oven for 40mins, or until browned.

6. Leave it to cool thoroughly before slicing and serve.
7. Stores well in an air-tight container. shortbread_greentea3

Bread Cups

I made this to pamper myself on Mother's Day. It's simple, and full of goodness. Try this for your breakfast, I'm sure your family members will be pleased.
bread_cup2 Recipe for Bread Cups
Makes 12 cups

Ingredients:
12 Slices of bread
Some Butter/Margarine spread
4 Smoked Cheese sausages
5 Whole eggs
3 tbsp Whole milk
Salt
Pepper
bread_cup1 Method:

  1. Spread butter on the individual slices of bread.
  2. Cut the sausages into thin slices.
  3. Beat the eggs with milk, salt and pepper.
  4. Press the bread down into a large non-stick muffin tray individually.
  5. Scoop about three tablespoons of eggs into each bread cups.
  6. Add in the sausages evenly.
  7. Bake in a preheated fan oven of 160C (or 180C for normal convection oven) for 18mins.
  8. Served hot with side salad, and enjoy!
bread_cup3

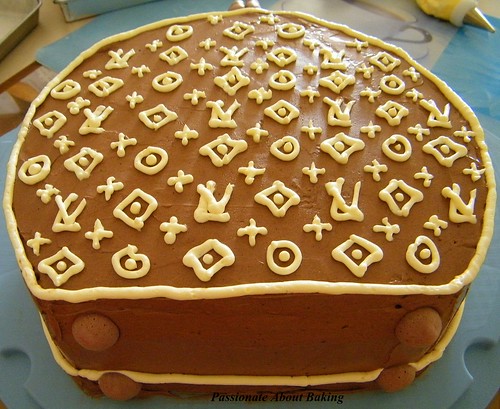
Louis Vuitton Monogram "Bag"

Do you own a Louis Vuitton bag? I don't. Perhaps many of you considered it to be an investment to buy LV bags. I might invest in it one day, who knows. But for now, I'm happy just to look at one.
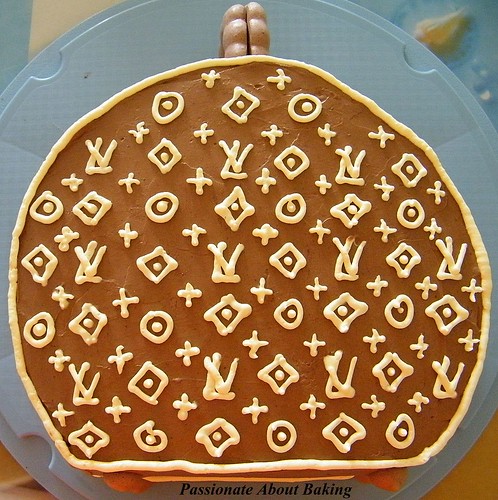
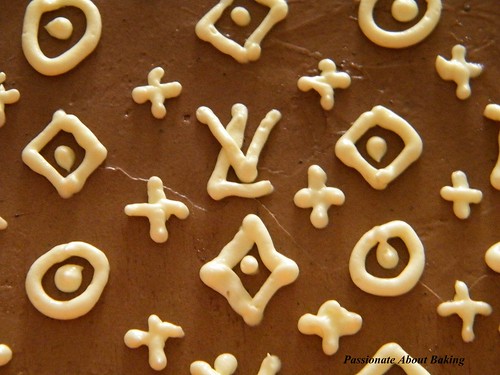
cake_LV3 Cannot own a LV bag? Nevermind, I'll just make one. However, it won't be for me. It'll be for my mum and my sister for Mother's Day celebration. It's alright, they can share the "bag". I'm sure they will arrange amicably who to "carry" it when. :) I hope they will like it.

I made this "LV" cake with four layers of chocolate sponge. Frosted it with chocolate swiss meringue buttercreams. And decorated the handle and the base with chocolate meringue sticks. I took short-cuts, I didn't decorate the sides. I hope by doing it, it's not seemed as imitations.
cake_LV4 cake_LV1 Happy Mother's Day to all the great mothers, including myself! ;)
cake_LV2 cake_LV5

Wholemeal Salt Buns

I bought this book during Page One's closing down sales - Bake! by Nick Malgieri. It was 50% off. I couldn't resist the good deal. I finally decided to try his bread. The instructions were pretty straight forward, however, there are multiple simple steps.
bread_wholemealsalt1
The ingredients are simple, the steps are not difficult, and there is no kneading required. Won't that sound good to you?

The buns were soft when eaten on the day when it's baked. However, on the following day, even though it remained soft, it became more dense. I like the salty taste of the bun crust. I had it with honey. The combination of sweet and salty was really good! I'm sure this won't be last time I'm baking these salty buns!
bread_wholemealsalt3
Recipe for Wholemeal Salt Buns, adapted from Bake! by Nick Malgieri.
Makes 12 regular buns

Ingredients:

130g Wholemeal flour
345g Bread flour
1 1/2tsps Rock salt/Sea salt
7g Instant yeast
315g Warm water, not exceeding 40C
1 tbsp Olive oil
Extra olive oil to oil the bowl
1 Egg white, beaten
Coarse sea salt or rock salt

Method:

1. Mix the flour and salt together in a small bowl and set aside.
2. In a large bowl, whisk the yeast into the water. Wait 30 secs, then whisk again to make sure all the yeast is dissolved. Whisk in the oil.
3. Use a large rubber spatula to mix in half the flour to make a paste. Add about half the remaining flour, mixing it in by repeatedly digging down to the bottom of the bowl with the spatula until the spatula is parallel to the bottom of the bowl and folding upward.
 
4. Add the last of the flour and repeat the folding motion until all the flour is absorbed and there are no dry bits stuck to the side of the bowl.
5. Cover the bowl with a clean tea towel or clingwrap and let the dough rest for 15mins.
6. Repeat the digging and folding motion in the dough. Cover and let the dough rest for 15mins.
7. Lightly oil a large bowl. Scrape the dough onto a lightly floured work surface. Floured your hands and pat the dough into a rough rectangle.
8. Fold one of the narrow ends of the dough over the middle, then fold the other end over to make 3 layers. Turn the dough 90 degrees so that the folded side is facing you and repeat the folding.
9. Invert the dough into the oiled bowl and cover it with tea towel or clingwrap. Let the dough rest for 15mins, then repeat the folding.
10. Turn the dough over, oiled part faced the top. Cover with tea towel and let the dough rise until it has doubled in size, about one hour.
11. Turn the risen dough onto a floured work surface, without deflating it too much, cut the dough into 12 pieces.
12. Round each piece of dough under the cupped palm of your hand. Then placed them in an oiled baking tray to proof further for 45-60mins.
13. Brush the doughs with egg white and sprinkle rock salt on top.
14. Bake in a preheated oven of 190C for about 20-22mins, or until it's crusty and light browned.
15. Cool the rolls on a rack.
bread_wholemealsalt2

Kueh Seri Muka

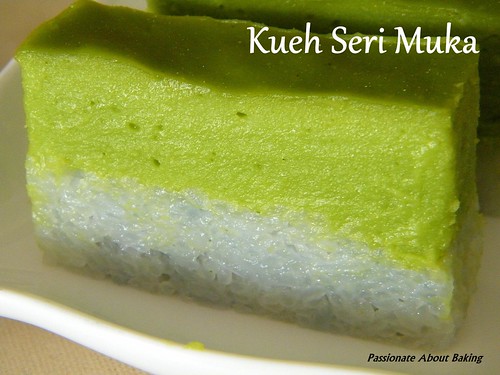
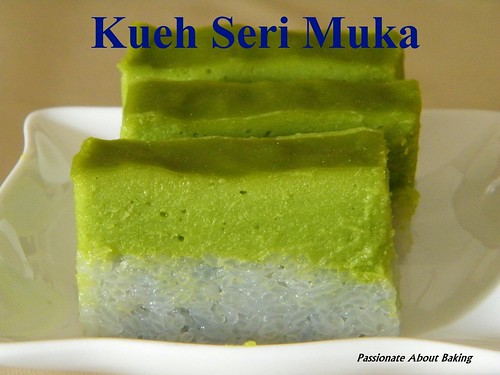
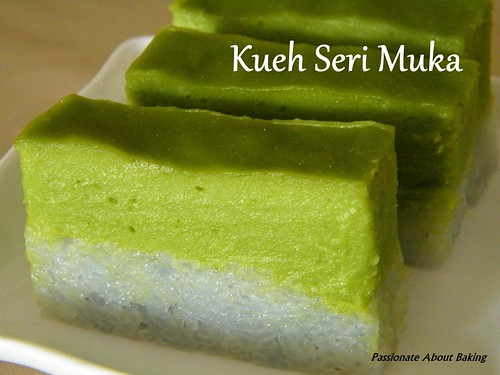
When I saw Doris making her Kueh Seri Muka, I can't help but to drool at it. I like this kind of kueh - glutinous rice and kaya custard. When I have a craving for such kuehs, I will buy them from a famous local nonya bakery store. However, it's not cheap to eat them, even though a small piece will be filling. Since I don't usually make such kuehs, I decided to have a hand in making this. Furthermore, I still have some leftover glutinous rice.
kueh serimuka04
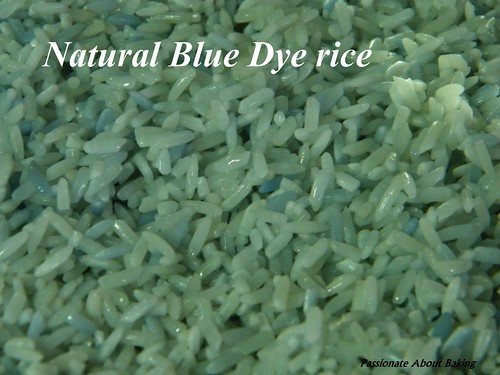
I adapted the recipe from Sonia as she made it in larger quantity. It's really not difficult to make them. As I have dried blue pea flowers in the fridge, I decided to make my glutinous rice blue to give it a nice "nonya" type colour. The kueh seri muka turned out to be really good. The rice was coconuty and salty enough. The pandan coconut layer was firm, but soft and full of pandan and rich coconut taste. The difference in the texture was really good! This is definitely a keeper, and can be made for functions to impress too!

I'm extracting the recipe for my own reference.
kueh serimuka03

Recipe for Kueh Seri Muka, adapted from Nasi Lemak Lover.
Makes a 8" x 8" pan

Ingredients:

Bottom Layer
350g Glutinous rice, soaked with blue pea flowers (optional) for at least 4 hours, then drained [I soaked mine overnight]
200ml Thin Coconut Milk (100ml thick coconut + 100ml water)[I used 200ml Ayam Lite coconut milk]
1tsp salt
kueh serimuka01 kueh serimuka02
Top Layer
2 Whole eggs
130g Caster sugar
100ml Thick pandan paste + pandan water (Blend about 10 pandan leaves with water, then extract the thickest part together with the pandan water to make 100ml
400ml thin coconut milk (200ml thick coconut milk + 200ml water)[I used 200ml Kara coconut cream + 200ml Ayam Lite coconut milk]
120g All-purpose Flour
25g Tapioca Flour [I mixed tapioca & potato flour because I ran out of tapioca flour]
¼ tsp salt

Methods:

1. Bottom Layer: Steam glutinous rice with coconut milk and salt for 30 minutes. Rest for about 10 minutes, then transfer and press steamed rice onto a bottom of a 8" square pan.

2. Top Layer: In a mixing bowl, whisk eggs with sugar until sugar is dissolved. Add in pandan water, coconut milk, salt and pandan paste. Mix well.

3. Sift in flours and whisk till well combined. Strain the mixture in a saucepan and rest for 10 minutes. 

4. Cook the mixture over low heat, stirring all the time to ensure it doesn't burn until it thickens slightly. Remove from heat. 

5. Pour the mixture on top of cooked glutinous rice, smooth the top and steam over medium heat for 30 minutes (do not steam over high heat).

5.Cool completely before slicing and serving. kueh serimuka05

Steamed Pumpkin Cake

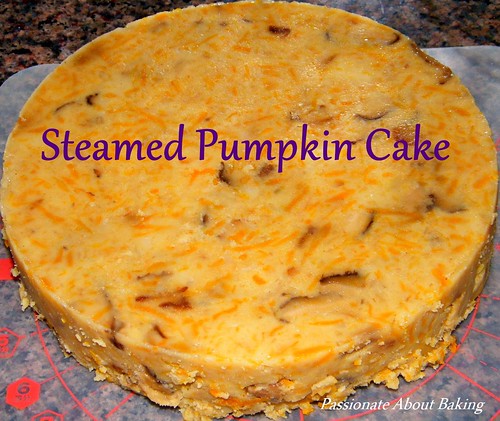
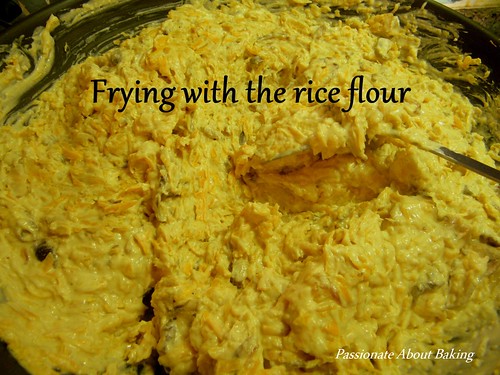
I bought a whole two weeks back and decided to make steamed pumpkin cake. My mother makes very good steamed pumpkin cakes. She hasn't been free to make it recently and I missed it very much. Then I decided I shall make it myself. Most of us know that our older generation cook or bake by estimations. Similarly, my mum couldn't specify exactly how much water I should put to the rice flour. So I decided to use the Daikon Pudding recipe from Corner Cafe, modified it to make my Steamed Pumpkin Cake.
steamed_pumpkincake03
Recipe for Steamed Pumpkin Cake, modified from Corner Cafe.
Makes a 9" 3" tall, and 8" 3" tall round

Ingredients:
(A)
1kg Shredded pumpkins (approximately 1 small pumpkin)
4 tbsp Cooking oil
5 Shallots, peeled and sliced
80g Dried shrimps, soaked and pounded
12 Large mushrooms, soaked and cut thinly

(B)
1000g Water
1pc Chicken stock cube
Salt, to taste
Pepper, to taste
Soya Sauce, to taste

(C)
720g Rice flour
240g Corn flour
1250g Water
Slowly pour the water into the rice and corn flour and use your hands to feel the lumps to mix well.


Method:

1. In a heated large wok, add oil and stir fried the shallots until golden brown.
2. Add in the pounded dried shrimps and stir fried till fragrant.
3. Add in the mushrooms and stir fried.
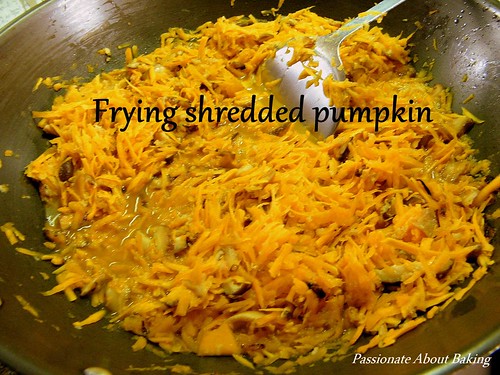
4. Add in the shredded pumpkin, followed by water from (B).

steamed_pumpkincake01
5. Add in the remaining ingredients from (B), mix well. Bring to a boil.
6. Then slowly add in ingredients (C).
7. Stir well until it thickens.

steamed_pumpkincake02
8. Scoop and pour them into the two prepared pans.
9. Steam them in a prepared pan for 1 hour.
10. Remove from the steamer and let it cool thoroughly before removing it from the pan.
11. Slice and serve.
12. Keep the remaining steamed cakes in the fridge.
steamed_pumpkincake04