Recently I have been attending customised Japanese cuisine workshops. So when my husband went to Shanghai few weeks back, I requested him to buy some bento boxes for me from JD.com. Although they were smaller than the ones I used during my workshops, the quality was good. Therefore, it was worth to get them.
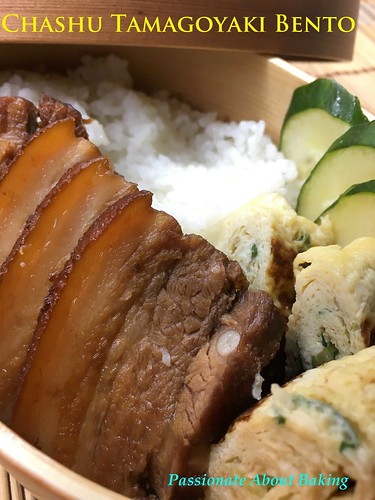
Many of us like to buy such kitchen wares or baking wares, thinking we will use them one day. Well, some became white elephants, while others were used past their usefulness. In order for my husband to see that I will use what I bought, I decided to make a bento set lunch. I made Chashu with tamagoyaki bento set lunch. The chashu was really tender and juicy. I overcooked my tamago and it tasted a bit dry. Overall, I must say it was a good attempt on my first bento set.
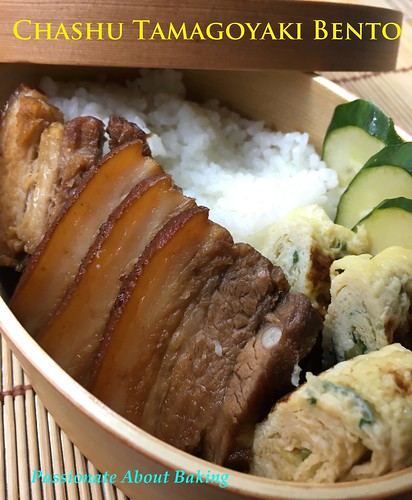
Recipe for Chashu, adapted from Just One Cookbook.
(Makes for 6 persons)
Ingredients:
1kg Pork belly block (I cut into half)
3 tsp Salt
1½ tbsp Cooking oil
2 inch Ginger, sliced
Seasonings
570g Kombu Dashi (original use water)
1 cup Cooking sake
1 cup Soy sauce
9 tbsp Sugar
Method:
1. Peel and slice ginger.
2. Sprinkle and rub the salt on the pork belly.
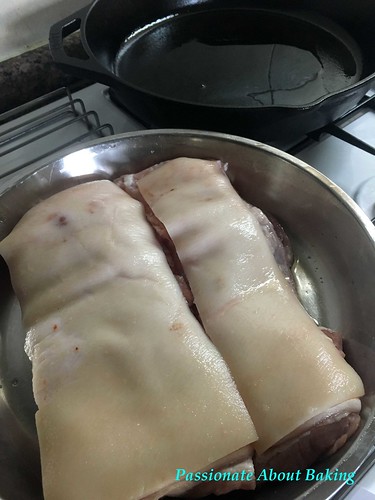 3. Heat the oil in a cast iron skillet over high heat and brown the fat side first, then flip over to brown the other side. It’ll take about 15 mins.
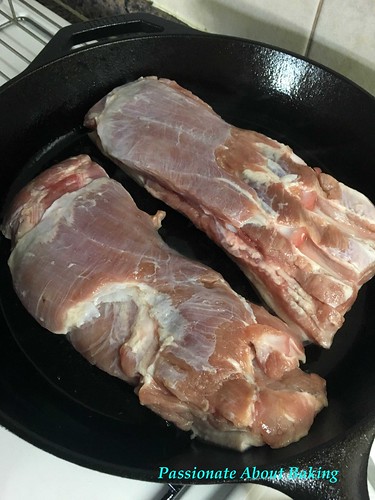
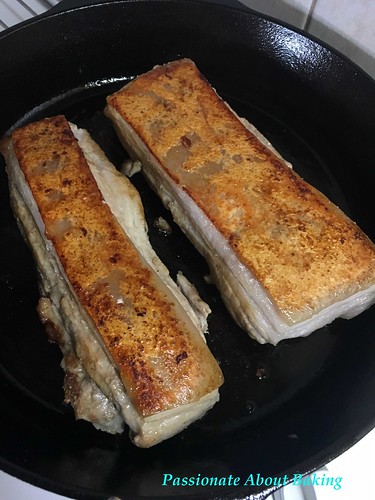 4. While browning, put all the ingredients for seasonings in a heavy-bottom pot, including sliced ginger.
5. Place the pork belly in the pot and bring it to a boil.
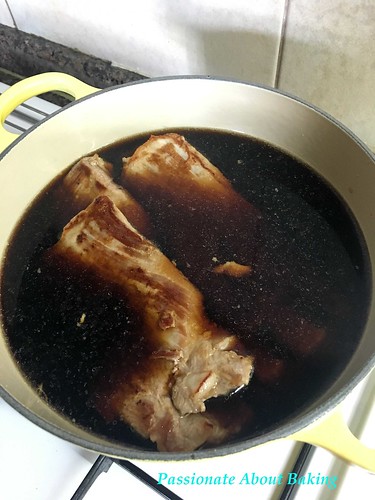 6. Place an otoshibuta (drop lid) on top of the meat. If you don’t have one, make one out of aluminum foil (and here’s how). To learn more about what Otoshibuta does, click here. (I used a loose cake pan base as the cover.)
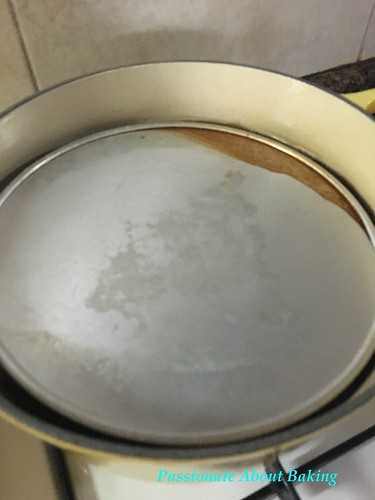 7. Lower the heat to medium low and simmer, occasionally turning, for about one hour.
8. Remove the otoshibuta and take out the meat and cut into thin slices.
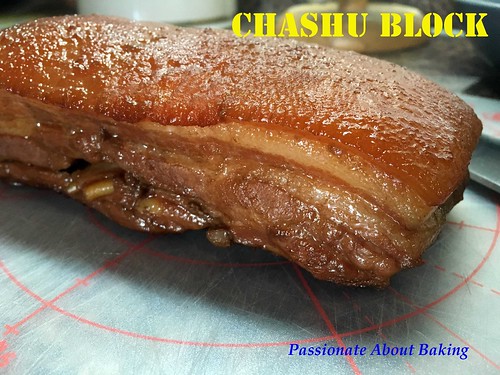
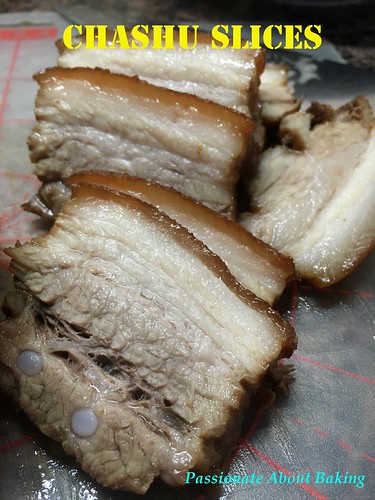 9. Reheat your skillet and place some sauces into it. Place the cut meat into the skillet and let it coat with the sauces, turning it. Total time to simmer is about 2 mins.
10. Remove them and set aside.
11. Reserve the thicken sauces for the rice later.
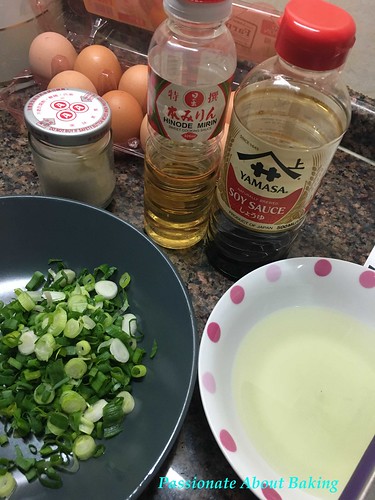
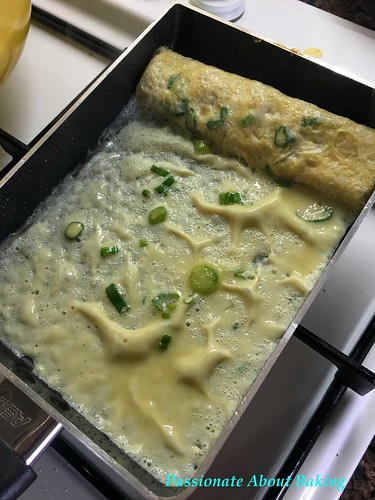
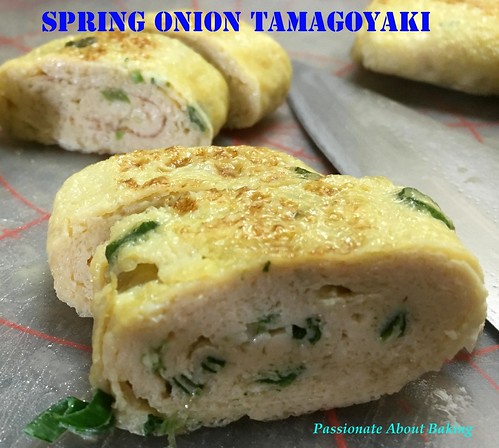
To make tamagoyaki, click here. I used the recipe from my workshop and made spring onion tamago. I also use dashi for my tamago.
To make sushi rice, click here.
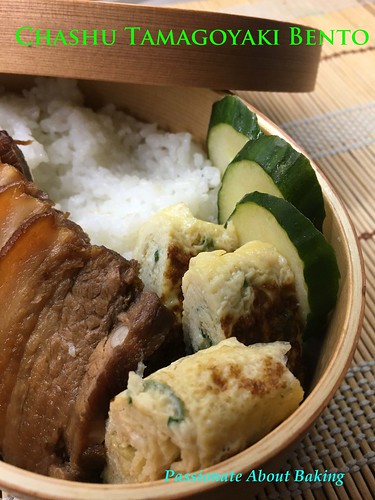
To assemble, scoop the rice to the left corner of the bento box. Then arrange chashu and tamagoyaki on the sides and the right side of the bento box. Add sliced cucumber or any other fresh vegetables of your preference. Serve and enjoy.
An accidental discovery I had when I ran out of pandan leaves one day while deciding to cook nasi lemak. In the end, I used lemongrass and the taste was fantastic! The first time my helper cooked, the coconut taste was not so prominent, but the coconut was very fragrant. The lemongrass smell was not prominent but there was a nice after taste.

Then we did it again for a family dinner. This time, my helper cooked five cups of rice with 200g Kara coconut cream and a packet of 50g Santan Coconut powder with two stalks of lemongrass. It was very nice and well received by my family. Dad who initially took a little of the rice, decided to go for second helping. Some of us who usually didn't take rice, took some too! In the end, the rice wasn't enough and my helper had to cook another round.
We bought some food for our Nasi Lemak, while the rest was cooked by my helper - Fried Selar fish, Fried Drumsticks, Fried eggs and Green vegetables. We also bought fishballs, beancurd fishcakes, otah, ikan bilis and sweet sambal chilli. Enjoy your nasi lemak with lots of dishes and chilli! Also to include cold Yuzu drinks to complete the meal. Sedap!


When Edith first mentioned about Heritage Food Trail, I thought it was a good idea to learn more about my heritage foods. By the way, I'm a true blue Hokkien. However, I only know how to eat and don't really know how to make my own dialect foods.
As far as I know, both sides of my grandparents came from China. The Hokkien group which I belong to is known as "Ang Kui". Both of my parents are of Hokkien heritage too! When I married my husband, I learnt from my parents in law that they belonged to this same group too! However, when it comes to speaking Hokkien, I'm not as proficient as my husband. Many times, when my parents-in-laws and my spouse spoke Hokkien, I'll give them a blank look!
When I was younger, my parents spoke to us in Hokkien and Mandarin. Therefore, I didn't get to learn Hokkien dialect as much as I have to. It was just enough to converse with them and the elderly.
Hokkien dialect has a wide variety of foods, ranging from the most popular Hokkien Mee, Lor Mee, Prawn Rolls to Ang Ku Kuehs. As I didn't have the time to prepare these delicious Hokkien dishes, I decided on making Hokkien Alkaline Rice Cake instead.
I will be submitting this to Precious Moments' Heritage Food Trail.
Recipe for Hokkien Alkaline Rice Cake, extracted from "Delightful Snacks & Dim Sum" by Agnes Chang.
Makes a 9" pan.
Ingredients:
300g Rice flour
2 tbsp Corn flour
1200ml Water
1 tsp Alkaline Water
1 tsp Salt
2 tbsp Oil
Method:
- Mix rice flour, corn flour and water together in a saucepan. Stir well to mix.
- Add alkaline water, salt and oil. Stir well.
- Cook over medium heat until half cooked.
- Pour the batter into a greased 9" round steaming tray (or cake pan).
- Steam on high heat for about 45mins until cooked.
- Leave to cool completely before serving.
- Best to serve with stewed meat gravy. Or served with any other salty sauce.
Note:
- For step #1 above, you may strained the mixture if you like. I strained and found that the step was unnecessary.
- The rice cake is very soft when it's cooked. After it has cooled down, it will become tougher. So do not over-steamed, 45mins will be more than enough.
- The rice cake on its own taste terrible! It must be eaten with savoury gravy. I had mine with the "Yong Tau Foo" brown sauce and HK "chilli oil" and it was very tasty.
- You can served this chilled alkaline rice cake with gula melaka syrup as a nice sweet temptation.
Do join us for this Heritage Food Trail. I hope to learn more about other dialect groups and races too!
Since I started working part time, it also mean that I have more time to myself. Why so? Because when I'm coaching my son, I will give him time to do his work. Then, I will have some time to do my stuff. So what I usually do during this short period of time, is to look for new recipes for dinner. It means it's either I make the dinner, or give instructions to my helper to prepare dinner. Whatever it is, it'll be something new and fresh for the family.
Last Monday, I tried something new - to wrap fried rice with eggs. I thought it should be an easy feat, however, it turned out otherwise. My first output was simply...ugly. The batter was too thick (I thought I wanted to give my eldest son more eggs since it's his favourite). Then I had to flip it, and the cheese was too cooked. Because of the thickness of the omelette, it was simply too difficult to "wrap" the rice. So instead of giving my picky son a nicely presented cheese omelette rice, his was a bit messy. Fortunately, he didn't complaint. In fact, he still thanked me and said that it was so much better and nicer than Swensen's! Talk about tactfulness!
The subsequent ones turned out to be better in terms of presentation and taste. I was pleased with the outcome. Even so, I believe I still need a lot of practice!
Recipe for Fried Rice wrapped in Cheese Omelette
(Makes for 5 persons)
To prepare first:
1) Fried Rice - any fried rice to your liking. My fried rice include minced pork, button mushrooms and french beans.
2) Basil Tomatoes - Marinate cherry tomatoes with sweet basil leaves and olive oil.
Ingredients for Cheese Omelette:
(A)
8 Large eggs
50g Whole milk
70g Whipping Cream
Dash of Black pepper
Dash of Salt
(B)
250g Cheddar cheese block, shredded
(C)
Pizza toppers
(D)
Cooking oil
Method:
- Mix (A) thoroughly.
- In a saucepan, heat up the cooking oil. Add the egg mixture onto the pan. Do not scoop too much as you won't be turning it over. Leave it thinly and let it cook.
- When you noticed that the egg is about to cook, sprinkle shredded cheese generously on the omelette.
- When the egg is cooked, ie. no more liquid and wobbly, scoop the fried rice sparingly in the centre of the omelette.
- Sprinkle pizza toppers onto the fried rice.
- Then using your spatula, flip one side of the egg over to cover the centre, which is where the fried rice is.
- Then repeat #6 for the other side.
- If your omelette is thin, it should not break when you fold over. It should also stay and stick to the rice in the centre as the cheese melts.
- Then slowly push it onto your plate. Try not to scoop it up to prevent the eggs from falling apart. This needs some practice.
- Then topped the centre with basil tomatoes and enjoy. It's really heavenly!
Note:
When you add whipping cream, spots of browns appearred very fast. This does not equate to charred. You may omit milk or whipping cream if you prefer just eggs. I realised that the whipping cream sort of "thicken" the omelette and does not break when I tried to fold it over. So I'll still stick to adding whipping cream in my omelettes.
The basil tomatoes goes well with the egg and the fried rice. The different taste and texture makes the combination really interesting. I would definitely make this again!
When I saw Jess' Satay Drumsticks and Pandan Rice lately, I just yearned to have some pandan rice. Then it occured to me that it did looked like nasi lemak. I like to eat nasi lemak. It's the only food which I eat that contains rice. Otherwise, I usually will not order any rice dish when I'm dining outside.
So there I was, dreaming up of preparing nasi lemak already. Taking some reference from her post, I went to search for nasi lemak recipe. As I've not prepared this before, I wanted a recipe that will at least guide me on making the chilli, the rice and perhaps, marinate the chicken or kuning fish. Somehow, I didn't manage to find one complete recipe. In the end, I just based on my gut feel (equal to "aga-ra-tion") to come up with my own version of nasi lemak. One thing I like about cooking is, there no hard and fast rule to follow the ingredients closely, quite unlike baking.
These were the different combinations of my homemade nasi lemak. Guess which set is mine?
Here's sharing how I made them, what went wrong and what was nice.
1. Pandan coconut rice - I cooked two cups of rice. Added four tbsp of pandan juice and 100ml of Ayam coconut cream (plus enough water to cook the rice). I also added three pandan leaves tied in a knot into the rice cooker. Overall, the rice wasn't very fragrant. The rice colour was a faint green and the coconut taste was mild.
You can find very useful information from Wendy as she explained how to extract pandan juice. Very informative, thanks Wendy!
My verdict: I will make two cups of rice with 200ml (one packet) of Ayam coconut cream and six tbsp of pandan juice. Then topped up with enough water to cook the rice. I'll add in the knotted pandan leaves also.
2. Ikan bilis (fried anchovies) - A handful of ikan bilis was washed and fried. This consistently has been tasty, and prepared by my helper.
3. French beans and carrot - A packet of french beans and half a carrot was shredded and stir fried. This was also prepared by my helper. It is my favourite.
4. Fried eggs (sunny side-up) - I fried five eggs individually with my egg frying pan. Fast, easy and fun! However, my children said they preferred omelette! *sigh*
5. Spiced drumsticks - I marinated them with 5-spice powder, curry powder and salt for about two hours. Then I baked them in the oven for 45mins at 220C. They liked it very much. My elder son commented that it was very nice. I was glad they liked it. Initially I wanted my helper to fried them, but I realised they were too huge, and also the fish needed to be fried and it would take up a lot of time. So in the end, I decided to bake it instead. Wise decision. :)
6. Spiced kuning (fish) - I marinated them similarly to the drumsticks. My helper fried them. They were very crispy and tasty. My spouse even eat up the fish heads. It was that crispy and good! I simply loved them.
7. Chilli sauce - I got to admit this wasn't well done. I used one packet of dried chilli, two small red onions, one piece of ginger and one clove of garlic to grind my chilli. Then I cooked it in the wok. I didn't add too much oil, so it was quite dry. I had to add more oil in between. The chilli absorbed the oil very quickly. After I finished cooking, then I realised I have forgotten to add salt!
My mum taught me to add sugar to a small portion to be used for nasi lemak only. So I kept a small portion in the wok, added some sugar and some fried onions to mix them together to be used as my nasi lemak chilli.
My verdict: My chillli was too dry. It is neither smooth nor tasty. Salt should also be added as a form of preservatives too. I also felt that I didn't cook long enough. My mum commented that my chilli was still too raw. For the next round, I would use the same portion of ingredients, poured in more oil, add some salt and cook it longer. For chilli that is not cooked long enough, it will turn bad very quickly. I put the rest of my chilli in the freezer to preserve it.
Overall Verdict: I guess it was a good attempt for a nasi lemak meal, though not perfect and well done. A lot of improvements are required. I hope I can help others to learn from my experience too. As a consolation, all food were finished at that time.
I had the set 3, without the chicken drumstick and with lots of french beans. I try to avoid meats if I have the choice. I'll go for anything fish or seafood.
After spending the whole morning preparing nasi lemak, I continue with my preparation for chee cheong fun, also known as rice rolls. I had cooked my sauce and chilli the night before, only the batter to be made that day. It took me almost two hours to make about 30 rolls! I used up a packet of 600g rice flour, which explained why there were so much rice rolls to be made!
I added spring onions to some of the rice rolls. The first few rice rolls were rather thick. Subsequent ones were thinner. It also required the skills of unmoulding them and rolling them up. Some were quite well done, others were not. Therefore, those truly up to standard ones, were only about 10 rolls! I just needed more practice on estimating the batter and the unmoulding part. Having said that, I doubt I'll make it again in months to come, as standing in a 'sauna' kitchen for two solid hours is truly not my idea of spending a Saturday afternoon!
Making the rice rolls is perhaps, worth once a quarter's sacrifice. LOL. My poor family had to sacrifice their tummy to taste my unsightly rice rolls. Fortunately, the sauces were good enough to make up for the look of the rice rolls!
These were the sauces I gave to my parent and siblings. Unlucky Lucky them!