Showing posts with label steamed. Show all posts

In Collaboration With Floral Garage Singapore

This post is in collaboration with Floral Garage Singapore.

Floral Garage Singapore is an established Singapore florist company comprised of a team of passionate floral hobbyists and professional florists. They offered wide range of flowers from hand bouquets to table centrepiece to standing flowers and even gifts. They also served corporate clients and individuals, and does delivery in Singapore. They are also looking for opportunities to franchise their business.
cake_steamedchocolate03

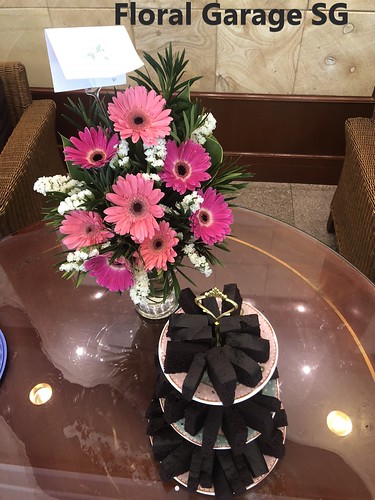
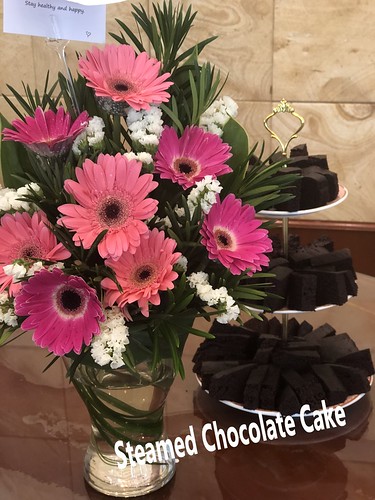
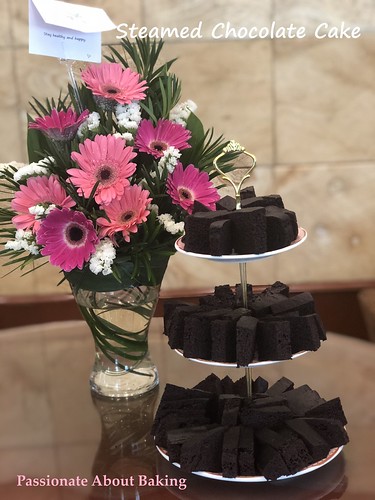
I had the opportunity to collaborate with them recently, using their flower centrepiece to compliment my cake presentation. Their flowers bright and fresh. It made my cake stands out more. The flower display recommended by them is called Martial. Thank you Floral Garage SG for this wonderful opportunity.

For this function of mine, I made Zoe’s Steamed Chocolate Cake. There were only good reviews on this cake from my guests. For your next function, why not try this combination - flower centrepiece from Floral Garage SG and Zoe's Steamed Chocolate Cake. It is easy to make and taste delicious without frostings.
cake_steamedchocolate01 

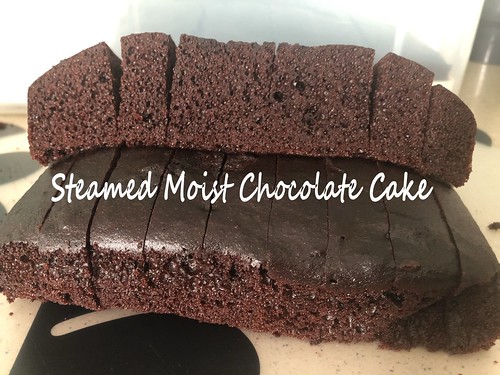
Recipe for Steamed Moist Chocolate Cake, adapted from Bake for Happy Kids

(Makes a 10x10 and 6x6, serves at least 60 people)

Ingredients:

200g Unsalted butter
120g Caster sugar
100g Light brown sugar
360g Evaporated milk
4 large eggs, about 70g each with shell and lightly beaten
2 tsp Vanilla extract
200g Plain flour

100g Cocoa powder, preferably Dutch process (I used Valrhona)
2 tsp Baking powder
1 tsp Baking soda
1/2 tsp Fine sea salt


Method:


1. Line the bottom of the square pans with a piece of baking paper. Preheat steam oven.
2. Add butter, both sugars and evaporated milk in a large saucepan. Place the saucepan over a low heat and use a hand whisk to whisk mixture while cooking until sugar is completely dissolved and mixture is smooth.
3. Remove saucepan from the heat. Allow mixture to cool until it is nearly like room temperature or cool enough to touch.
4. Add eggs and vanilla into the butter mixture and whisk until combined.
5. In another bowl, combine flour, cocoa powder, baking powder, baking soda and salt. 
6. Sift flour mixture into the butter mixture and whisk until all are just combined. Do not over mix. Cake batter is runny.
7. Pour batter into the prepared pan and place the pans into the steam oven. Cover pan with a large piece of foil.
8. Set the steam oven for 45mins at 100C.
9. Remove the cake from the oven and allow it to cool completely in the pan before removing it onto a wire rack. 
10. Slice the cake into 1cm thick and 3cm long each. 
11. Arrange them into the tier cake display, together with Floral Garage flowers.

cake_steamedchocolate04 cake_steamedchocolate02

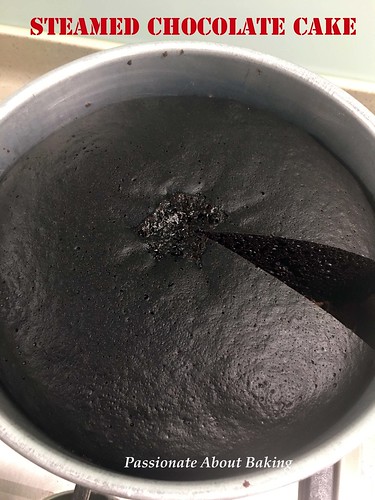
Steamed Chocolate Cake

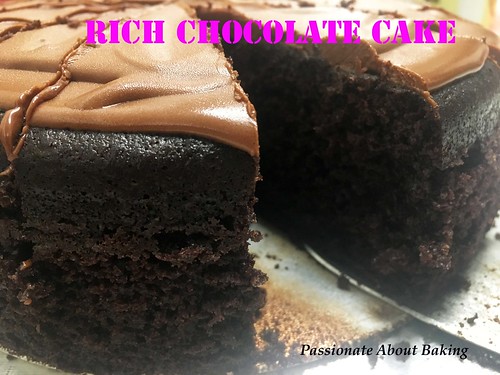
A frosted cake is made usually with an occasion or a request. However, I had a sudden urge to bake a nice chocolate cake recently. One recipe that got me tempted was this One-Bowl Milk Chocolate cake. But at that time, my helper was on home leave, so I couldn't find the time to bake it. Then, I saw Zoe's post on this Steamed Chocolate Cake and I was sold! 
cake_steamedchoc01
It answered my temptation for baking a good chocolate cake. So I decided to bake Zoe's cake instead. It was really simple, and it tasted moist and soft too! I really like her recipe and I'm sure to make it often to satisfy my craving for chocolate cakes! Recording the recipe for my own reference. I strongly encourage you to try this cake. You'll be hooked.
cake_steamedchoc02
Recipe for Steamed Chocolate Cake, adapted from Bake for Happy Kids.
(Makes an 8" round cake)

Ingredients:
180g Unsalted butter
60g Caster sugar
60g Light brown sugar
180g Evaporated milk
2 Large eggs, about 70g each with shell and lightly beaten
1 tsp Vanilla extract
100g Plain flour
50g Dutch process cocoa powder
1 tsp Baking powder
1/2 tsp Baking soda
1/4 tsp Fine sea salt

Method:

1. Line the bottom of the pan with a piece of baking paper. Preheat steam oven.
2. Add butter, both sugars and evaporated milk in a large saucepan. Place the saucepan over a low heat and use a hand whisk to whisk mixture while cooking until sugar is completely dissolved and mixture is smooth.
3. Remove saucepan from the heat. Allow mixture to cool until it is nearly like room temperature or cool enough to touch.
4. Add eggs and vanilla into the butter mixture and whisk until combined.
5. In another bowl, combine flour, cocoa powder, baking powder, baking soda and salt. 
6. Sift flour mixture into the butter mixture and whisk until all are just combined. Do not over mix. Cake batter is runny.
7. Pour batter into the prepared pan and place the pan into the steamer. Cover pan with a large piece of foil.
8. Set the steam oven for 70mins at 100C. 
9. Remove the cake from the oven and allow it to cool completely in the pan before removing it onto a wire rack. 

Chocolate Frosting

Ingredients:
50g Dark chocolate, 55% cocoa & above
60g Unsalted butter, soften at room temperature
1/4 tsp Vanilla extract
30g Icing sugar, sifted
1 tsp Boiling hot water

Method:

1. Place chocolate in a heat-proof bowl and melt chocolate by stirring it over a pot of simmering water until just melted. Set aside for the chocolate to cool slightly.
2. Using a whisk, beat butter, vanilla and icing sugar until light and creamy. 
3. Add warm chocolate and hot water into the mixture and mix until just blended. 
4. Do not whip! Spread immediately on the completely cooled cake.
cake_steamedchoc03
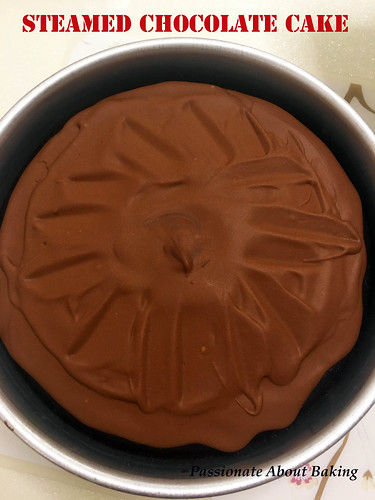
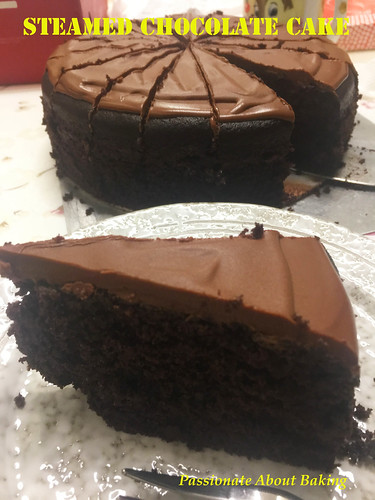
The frosting was very runny. However, it hardens when refrigerated. What is nice about the frosting is, even after taking out from the fridge, it turns soft and can be eaten immediately. I find that the proportion of the frosting to the cake is just nice...on the surface is more than sufficient. Enjoy!
cake_steamedchoc04
Updated  a week later:
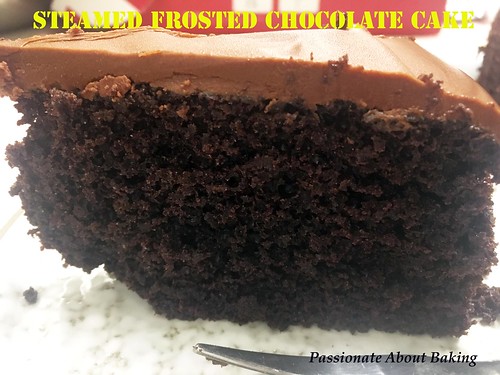
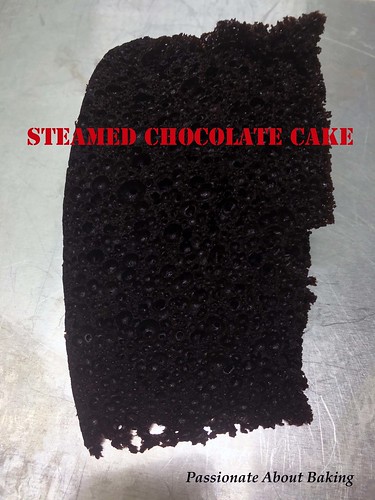
After finishing this cake, I was addicted and tempted to bake this again. I tried the 2nd recipe this time, and it tastes just as good (on its own too!) However, I found that this 2nd recipe yields a more "holey" texture and feels fluffier. I made it into a 8" cake without frosting and it was just as nice. My conclusion is, the 2nd recipe seems to yield a lighter cake for me. I will stick to it for now. 😄 You just have to try it
cake_steamedchoc05 cake_steamedchoc06

马来糕 Ma Lai Koh (Steamed Cake)

This post is sponsored by Liv butter. Try Liv today!
Liv Butter - Salted & Unsalted-001
My transport mate was sharing with me that she liked the pau recipe from "Delightful Snacks & Dim Sum" by Agnes Chang. I told her that I also had this book and likes her recipes too. So this evening, when I decided to do a steamed cake, I thought of this book almost immediately. And so, I chose this Steamed Cake, 马来糕.

This recipe is very simple, and the result was a light, fluffy and custardy steamed cake. It was really nice.
steamed_malay02
Recipe for 马来糕, Steamed Cake, adapted from "Delightful Snacks & Dim Sum" by Agnes Chang
Makes a 8" round basket.

Ingredients:
(A)
120g Bread flour, sifted
90g Plain flour, sifted
1 tbsp Custard powder, sifted
(B)
200g Caster sugar
120g Liv Unsalted butter, melted
3 Eggs, mixed with 1 tsp vanilla extract, beaten lightly
180g Whole milk
(C)
3 tsp Baking powder
1/2 tsp Dark soya sauce
Some sunflower seeds (or other nuts)

Method:
  1. Sift ingredient A into a big mixing bowl.
  2. Add in ingredients B and mix thoroughly.
  3. Add in ingredients C and mix well.
  4. Pour into an 8" round basket lined with baking paper.
  5. Sprinkle some sunflower seeds on top.
  6. Steam with high heat for 35mins until cooked.
  7. Cool, cut into pieces and serve.
steamed_malay01 steamed_malay03

Steamed Pumpkin Peanut Butter Buns

After making my pumpkin cupcakes, I was left with some (canned) pumpkin puree. As I didn't want to waste it, I decided to make some pumpkin buns. Deciding between HBS's Soft Pumpkin Milk Loaf or Pumpkin Pork Floss Steamed Buns. Since I still have a packet of Hong Kong flour, I decided to make the Steamed Buns instead.

However, as I had no Pork Floss on hand, and not wanting to have plain steamed pumpkin buns, I decided to spread some peanut butter on the dough instead.
steamed_pumpkinbun1
Recipe for Steamed Pumpkin Peanut Butter Buns, adapted from Honey Bee Sweets.
Makes 40 buns

Ingredients:
Starter dough:
120g Hong Kong flour
1/2 tsp Instant yeast
80g Warm water
pinch of salt

Method:
  1. Knead all the ingredients together till it comes together to form a soft, smooth dough. Chill in the fridge up to 6-8hrs before use.

Main dough:
200g Starter dough (all of starter dough)
3tsp Instant yeast
600g pau flour
360g Steamed pumpkin (I added half canned pumpkin puree & fresh steamed pumpkin. I added slightly more pumpkin than the recipe. Therefore, the dough was slightly moist)
40g Water
80g Caster sugar
1/2tsp Fine salt

Creamy Peanut Butter

Method:
  1. Place everything in a large mixing bowl and knead till it comes together. Continue kneading till it is elastic and smooth.
  2. Place the dough in a greased bowl and let proof till double in size. Punch out the air and divide the dough into 4 portions. Roll round and let rest for 5 minutes.
  3. Take a dough portion and roll it out with into a big flat rectangle. Spread them with creamy peanut butter. (I made two rolls of plain buns and two rolls of peanut butter buns.)
  4. Roll it up from the long side like a swiss roll and then slice it up into 10 equal portions. Place on a grease proof paper and let proof in the steamer (cold) for 10 minutes.
  5. Start the stove fire, once the water boils, lower it to medium low and let steam for 10 minutes. Then turn off the fire and let the buns stay into the steamer for another 5 minutes before taking them out. (As I need to steam twice, I removed the buns immediately after steaming and put in the second batch.)
steamed_pumpkinbun2

Steamed Pumpkin Cake

I bought a whole two weeks back and decided to make steamed pumpkin cake. My mother makes very good steamed pumpkin cakes. She hasn't been free to make it recently and I missed it very much. Then I decided I shall make it myself. Most of us know that our older generation cook or bake by estimations. Similarly, my mum couldn't specify exactly how much water I should put to the rice flour. So I decided to use the Daikon Pudding recipe from Corner Cafe, modified it to make my Steamed Pumpkin Cake.
steamed_pumpkincake03
Recipe for Steamed Pumpkin Cake, modified from Corner Cafe.
Makes a 9" 3" tall, and 8" 3" tall round

Ingredients:
(A)
1kg Shredded pumpkins (approximately 1 small pumpkin)
4 tbsp Cooking oil
5 Shallots, peeled and sliced
80g Dried shrimps, soaked and pounded
12 Large mushrooms, soaked and cut thinly

(B)
1000g Water
1pc Chicken stock cube
Salt, to taste
Pepper, to taste
Soya Sauce, to taste

(C)
720g Rice flour
240g Corn flour
1250g Water
Slowly pour the water into the rice and corn flour and use your hands to feel the lumps to mix well.


Method:

1. In a heated large wok, add oil and stir fried the shallots until golden brown.
2. Add in the pounded dried shrimps and stir fried till fragrant.
3. Add in the mushrooms and stir fried.
4. Add in the shredded pumpkin, followed by water from (B).

steamed_pumpkincake01
5. Add in the remaining ingredients from (B), mix well. Bring to a boil.
6. Then slowly add in ingredients (C).
7. Stir well until it thickens.

steamed_pumpkincake02
8. Scoop and pour them into the two prepared pans.
9. Steam them in a prepared pan for 1 hour.
10. Remove from the steamer and let it cool thoroughly before removing it from the pan.
11. Slice and serve.
12. Keep the remaining steamed cakes in the fridge.
steamed_pumpkincake04

Steamed Chocolate Mantous... again!

After my last attempt on the mantous (buns), I know I can't get enough of these! So after baking the chocolate sables, I decided to make more mantous! Partly also I wanted to make some to give away. The original recipe is from Honey Bee Sweets. She made an assortment, whereas, I stick to chocolate swirl again because my children don't really fancy mantous with fillings.

Here is sharing how I made the pure chocolate swirl buns. I'm reproducing this recipe for my own reference.

Recipe for Steamed Chocolate Swirl Buns, extracted from HBS.

Ingredients:

Starter dough:
120g Hong Kong flour
1/2 tsp Instant dry yeast
70g Warm water
A pinch of salt

Method:
  1. Mix the warm water with the yeast. Mix well.
  2. Then add in HK flour and salt.
  3. Knead all the ingredients together till it forms a soft, smooth dough.
  4. Chill in the fridge overnight. Can store up to 5 days in the fridge.
Main Dough:

(A)
All of the above starter dough, approximately 190g
1 1/2 tsp Instant dry yeast
450g Hong Kong flour
260g Whole milk
70g Caster sugar
1/4 tsp Salt
74g Unsalted butter, room temperature

(B)
2 tbsp Cocoa powder

Method:
  1. Place all the (A) ingredients in a large mixing bowl except the butter.
  2. Knead them together until it forms a dough. Then add in the butter and continue to knead for at least 5 mins until it is elastic and smooth.
  3. Remove 1/3 of the dough and place in a bowl. Cover with cling wrap to proof.
  4. For the remaining 2/3 of the dough, add in (B) and mix well to incorporate completely. Then cover with cling wrap to let it proof for 60mins, or until double in size. (I was busy baking my sables that I let it proof for 80mins. 60mins is suffice.)
  5. When it has double in size, punch out the air.
  6. Roll out both the doughs separately into a rectangle.
  7. Then place the plain dough on top of the chocolate dough.
  8. Roll it out like a swiss roll.
  9. Using a scraper, cut out the dough and place them on a cut rectangular piece of baking paper.
  10. Then place them in a wok, cover and let it proof for 40mins.
  11. Without removing the proofed dough from the wok, turn on the heat and steam for 18mins.
  12. For the second batch (if your wok is not big enough to accomodate all, like me), steam for 12mins.
This time, my swirls definitely looked nicer and neater! Eat with some discipline required, because it is addictive! Enjoy!

I'm submitting this to the Aspiring Bakers #7 - Chocolate Delight (May 2011)!

Steamed Chocolate Swirl Buns

When I saw HBS's post on fluffy and soft buns (mantous), I was sold! My children have been requesting me to buy mantous from the supermarket. So her post was just in time for me to make for my children. My steamed buns were not as pretty as hers, however, nobody is complaining about the look!
True to her comments on the buns, it was really very fluffy and soft. Even when it had cooled, you can still feel the fluffiness of the buns. The chocolate taste was mild. The buns were not very sweet. I think my children will prefer it to be sweeter, and so do I! As the buns were very light, I can have at least three at a go!
Do give this bun a try, it's well worth it! I'll be making some again next week! Maybe I'll make more and store in the freezer, so that when my domestic helper goes back for her home leave, I can just take it out from the freezer and steam!

You may refer to the recipe at HBS's blog.
I'm submitting this to Aspiring Bakers #7 - Chocolate Delight (May 2011).

Steam Pandan Coconut Rice Cakes

This week is totally out of work for me. I had scheduled for an operations for my precious daughter. When she was born, she had lower eyelashes growing inwards. The medical term is called Entropion - is the turning in of the edges of the eyelid (usually the lower eyelid) so that the lashes rub against the eye surface. Long term, it will cause cornea dryness and irritation, which may increase the risk of Cornea abrasions, Cornea ulcers and eye infections. One of the treatment is to have surgery to correct the position of the eyelids. A couple of years ago, she was referred to KKH Specialist for her eye condition. The doctor did mention about the operation, as an option, to us though. However, at that time, she was still very very young, we didn't want her to go through the operation.


Then early last year, when she entered primary school, the health check referred her to Refraction Clinic. After the check in Refraction Clinic, she was highly recommended to wear spectacles. When we brought her to an optometrist, he strongly encouraged us to send her for an operation. He told us that her cornea has been very badly scratched, if  such continue, she might go blind in her later years. That scared us! The seriousness of going blind wasn't mentioned to us when we brought her to KKH. And for her condition, the optometrist had to prescribe a transition lens. Her astigmatism was over 300 degrees. He said that under such condition, she will be very sensitive to lights, therefore, it'll be better for her to wear transition lens. A letter from the optometrist had to be given to the school for her to wear transition lens as mandatory, and not for beauty purpose.


Since then, we made appointment to go back to KKH to review her condition and requested for an operation. The date had been scheduled, and finally, she undergone the operation. She was put through the general anesthesia. I hope that after the operations, her eye problem will be a history. I shall spare the details of the operations.


On the 3rd day, the stitches actually came out itself...notice the yellowish "thread"?
Since I was home for the past two days, I decided to steam some cake. After I bought the "Magic Steamed Cake" by Alex Goh, I've not tried any of the recipes. So this is the best opportunity to do some steaming instead of baking. I decided on the steamed rice cake. However, since I still have my pandan leaves and coconut cream, I made Pandan Coconut Rice Cakes. I found that the coconut was a tad too faint. The taste was rather subtle. I will like it to be richer though. I will increase the coconut cream by at least another 50g in future.
Recipe for Steamed Pandan Coconut Rice Cakes, modified from "Magic Steamed Cake".
(Makes approx. 18 regular cupcakes. Mine was of various sizes)


Ingredients:
195g Rice flour
80g Plain flour
50g Pandan juice
80g Coconut cream
200g Water
30g Brown sugar
80g Fine sugar
3 tsps Baking powder


Method:
  1. Mix all the ingredients together. Mix well till no lumps.
  2. Pour into the cupcake mould till about 90% filled. You may lined the cupcake moulds. For me, I brushed the moulds with oil.
  3. Steamed on medium high for about 23mins.
The day before my daughter's operation, it was a public holiday. In order to avoid crowded places before her ops, we spent a lazy day at home. I made dinner for my family. The dinner include tomato rice wrapped in omelette, grilled cheesy dory fish and spicy fries. Besides the store-bought spicy fries, the rest were specially cooked by me. Though there were quite a fair bit of work, the healthy combination was truly worth the effort!

Chocolate Steamed Buns (man tou)

Me: "I thought you didn't want to make any more mantous?"
Myself: "If I don't make, I'm afraid the kids have nothing to eat in the morning."
Me: "There're still some more breads in the container."
Myself: "Nevermind, I'll just make some and keep it in the fridge, so that they can eat anytime!"

Do you often have self talks? Well, I do, once in a while. Not exactly in this case actually. I hesitated a little before deciding if I should make lots of them. As you know, I have a large family. Erm...not actually very large. Okay, correction needed. I have three small mouths to feed. However, when it comes to foods that the three small mouths like, one small mouth can eat three shares! So you can imagine, sometimes, I really need to "mass produce" or bulk purchase!
In the end, I managed to convince myself to make chocolate steamed buns for my children. They loved these chocolate buns very much! They were pretty small when I made it, so the boys could eat at least four of these at one time! It didn't take long to finish them though. I took this recipe from Florence's blog. Thanks to Fiona who recommended me to try it!

Steamed Swirly Mantous

Okay, I just to admit that sometimes, it's "人算不如天算" (meaning rather to leave it to the God to plan, than I plan). During my last post about steamed buns (mantous), I said I won't make anymore. Then I made another batch when my poor boy couldn't eat with normal rice due to his HFMD. So I had to give him steamed buns to enable him to fill his stomach, and he liked it too. After he finished the last slit buns, he called me in the office and told me he wanted more steam buns. *sweat*
Since he has requested for it, I simply couldn't reject a cute sick boy's request. So I bought more HK flour and made more steamed buns. This time, I used Gina's recipe for the mantous. As discussed in my previous post, I separated the dough and added 1.5 tbsp cocoa powder to one of the separated dough. Then I rolled it up like swiss rolls. The dough looked nice before it was steamed. However, after steaming, it cracked. The steamed bun also were not evenly rolled out based on the thickness of the colours you see. That means, I really needed more practice... This was one of my better looking steamed swirly chocolate bun.

Yammy Yams

I had yam overdose today when I was home.

I had my yam mooncake for breakfast. The crispy skin with the soft centre was really pleasant to the palate.

Then for lunch, I pan fried my steam yam cake. I made the yam cake last week when I was home attending to my children. I thought I could make some for them to eat. However, my twins can't eat as taking yam when they have blisters will cause them to itch even more. My mum gave me this piece of good advice. Prevention is better than cure right? Therefore, there was a lot of leftovers. Okay, I'm not complaining about it. I'm more than happy to have them all by myself. I love to fry them with sweet sauce and lots of eggs. See the amount of eggs I added?
As I had some yam paste left over from making my yam mooncake, I decided to try Shirley's Teochew Yam Paste (Or Nee). However, I didn't follow her last step to push it through the sieve. So I can say, it's not as smooth as hers, but the taste is pretty good. I also didn't add gingko nuts. After taking the Or Nee, I told myself, enough yam for the day!

Steamed Pandan Mantous

My youngest boy didn't have to wait that long. It was on a lazy Saturday when I decided to make steamed pandan mantous for him. Sorry to disppoint all of you. I didn't make the swiss roll kind. I chose a simple way out.
Instead, I made the steamed pandan mantous from Wendy's blog. I have everything that was required. And from the instructions and her pictures, it looked really good. It's like calling out to me to make it. So I couldn't resist trying it out.
In between the proofing, I took out my fondant and decided to do some practice. Rolling and moulding. I couldn't decide what else to bake or cook for that day, otherwise, I would have been tolling in the kitchen, rather than sitted at the table playing with my fondant.
The steamed pandan mantous were soft and fragrant. The fragrant came from the coconut milk I used. The pandan smell was there, but couldn't taste it. Probably I didn't use enough leaves to blend it, therefore the smell was not strong. The mantous were actually light green, it didn't showed up in the pictures though. They were also not as nicely rolled as Wendy's. So what was the verdict from my youngest son?
He said,"mummy, it's very very nice. Hmm..." He took two, and asked for third one. I rejected it flatly, and told him it'll be too much. Well, his actions speak louder than words. He is satisfied now. He shall have them all during school holiday next week.

Plain Mantou

My youngest boy has been bugging me to buy mantous for him to eat. I told him I will try to make one of these days for him as I don't have the right flour at home. It didn't happen over the next weeks. He bugged me again. I didn't know he can be so persistent.

Then one fine day, my colleague told me he bought a packet of HK flour because it was on cheap sales. He asked me what can it be used for. I told him it can be used to make pau, or tim sum etc. The next day, he brought the packet of flour to office and pass it to me! Now, should I say it's coincidental or my son can make things happen his way??

I have tried making paus before, but not mantou. Then I recalled seeing some recipe on some blogs. I went through a few blogs and found a mantou recipe on Gina's blog. Ah, this is what I called "God's will"! The recipe didn't seemed that difficult. So I tried attempting it on a weeknight (it won't happen on weeknight if much proofing is required).
Immediately after steaming, I let my children try, in particular my youngest boy. I told him that since he like mantou, I have fulfilled my promise and made it for him. He agreed that the mantou did taste nice. I tried a bite size, and liked it too. Then he said to me,"but mummy, I want those mantou like swiss roll kind!" *faint* *pengz* *roll eyes*
I must say, he is really a very demanding boy and knows exactly what he wants! I told him I'll make it for him another time. So you can be assured, I should be attempting mantous again... (but might not be so soon!)

Water Chestnut Kueh

After I have attended the Tim Sum workshop, I was tempted to try the Water Chestnut Kueh because it was assumed to be the easiest amongst the three recipes!

It's always good to attend workshops with friends. Why? Because when your friend tried the recipe before you, you can always relied on their experience to help you.  This was very much so for my water chestnut kueh. My friend, Sharon, tried the recipe almost immediately after the workshop. And so, she shared her experience with us. Like what size of pan is needed, how much sugar, how much water chestnut etc etc. She made so often she updated me each time on this recipe. Thanks for sharing your tips, Sharon.


Unfortunately, I think I didn't do it as well as hers. It seemed that my water chestnut was not enough to fill up the kueh. I gave some to my colleagues and they liked it. As for me, I've not tried it yet. I'll try to pan-fried it as it was supposed to taste better this way!