Apple Cinnamon Custard Pie

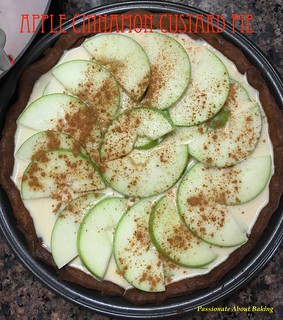
When weekends come, I usually like to bake some desserts to bring over to my mum's place to share with my parents and family members after dinner. Sometimes, there will be request for birthday cakes. These few weeks were not as challenging as there was no requests. So then, it depends on my mood for desserts. Recently, I was quite hooked on watching Korean dramas, so I'll choose to bake easier desserts. :p *confession* This weekend, I decided to make an easy apple pie.
pie_applecustard03
Recipe for Apple Cinnamon Custard Pie, modified from Alex's Irresistible Pastry.
(Makes a 9" pie)

Ingredients:
Shortcrust pastry
35g Icing sugar
75g Butter, softened
1 Egg yolk
130g Plain flour

Method:

1. Using a spatula, mix softened butter with icing sugar till light.
2. Add in egg yolk and mix well.
3. Stir in flour and mix till all incorporated.
4. Using a cling wrap, wrap the dough and refridgerate for at least 30mins.
5. Take out and roll between 2 sheets of plastic wrap to about 3mm to fit the 9"pie pan.
6. Chill in the fridge for about 20mins.
7. Meanwhile, preheat oven to 180C.
8. Line the pastry shell with parchment paper and baking beans.
9. Bake in the oven for 18mins, then remove the baking beans and continue baking for another 8 mins.
(My crust was a bit overcooked, therefore, it tasted bitter. The timing above has already been reduced to prevent overcooked.)

Filling
2 Green apples, sliced thinly (or any apple of your choice)
2 Eggs
100g Milk
30g Sugar
100g Whipping cream
1 tbsp flour
1 1/2 tsp Cinnamon powder (optional)

Method:
  1. Mix the ingredients well (except apples) and strain into the pie shell.
  2. Arrange the apples into the pie. Sprinkle with some cinnamon powder.
  3. pie_applecustard01
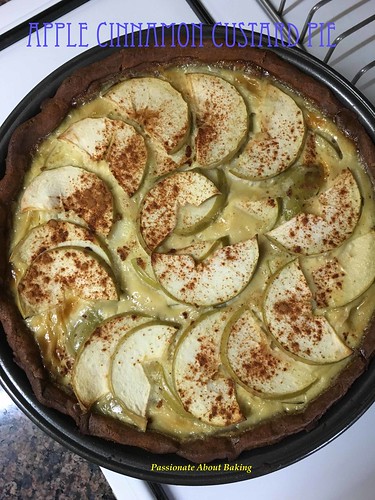
  4. Bake at 180C for 25mins or until the custard set.
  5. Refrigerate before serving.
  6. pie_applecustard02
    pie_applecustard04

Classic French Bread

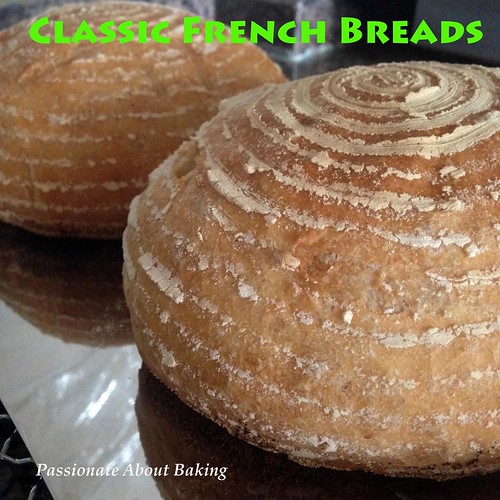
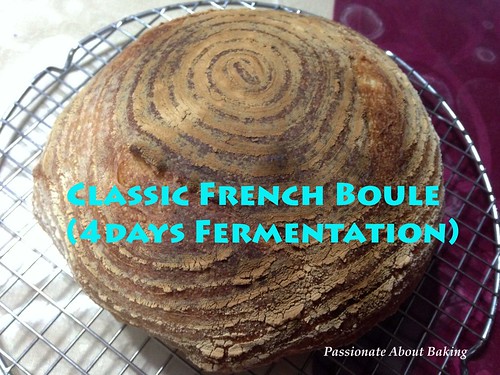
I'm just so into bread baking lately. Experimenting with new recipes whenever time permits. Next up is Peter Reinhart's Classic French Bread. This recipe made four small loaves. The original calls for overnight fermentation in the fridge up to 4 days. However, after mixing the dough, I split into two. One batch, I baked on the same day, and the other batch, I baked on the 4th day from the fridge. 
bread_classicfrench04
Recipe for Classic French Bread, adapted from "artisan breads every day" by Peter Reinhart.
(Makes 2 large loaves or 4 small loaves. I made 3 loaves)

Ingredients:
480g Bread flour (original uses 680g bread flour)
200g Plain flour
7g Instant yeast
14g Salt
454g Cold water (original uses warm water)

Method:
  1. Combine all of the ingredients in a mixing bowl. Use the paddle attachment and mix on the lowest speed for 1 minute. The dough should form a coarse shaggy ball. Let it rest, uncovered, for 5 mins.
  2. Switch to the dough hook and mix on medium-low speed for 2 minutes. The dough should be smooth, supple and tacky, but not sticky.
  3. Cover the bowl with plastic wrap, then immediately refrigerate overnight or up to 4 days. [I divided the dough into half - one refrigerate and the other to bake the same day.]
  4. Same day bake: Do two sets of stretch and fold with 40mins resting time. After the second stretch and fold, rest for 15mins.
  5. Carefully transferred the dough onto a worktop. Divide the dough into two.
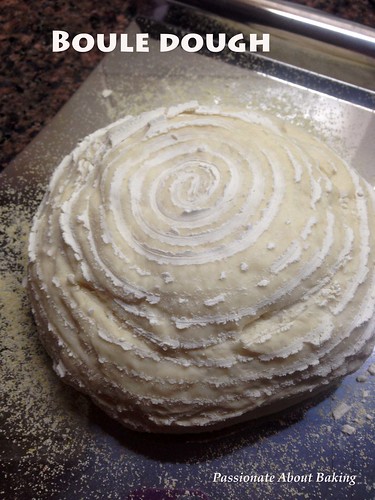
  6. Shape the dough round and placed it in a floured banetton. 
  7. Let it proof at room temperature for 1 hour or when increased to 1 1/2 times its original size.
  8. Preheat oven to 230C with cast iron pan. 
  9. Prior to baking, transfer the dough into a floured peel. Score the dough with a lame. 
  10. bread_classicfrench01
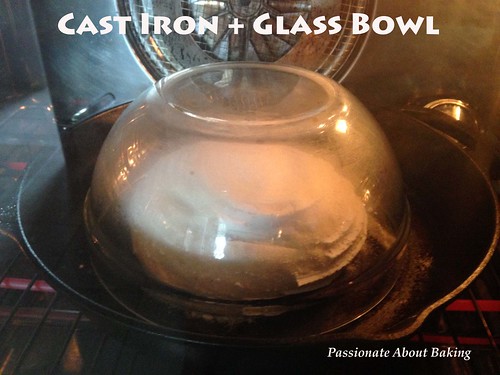
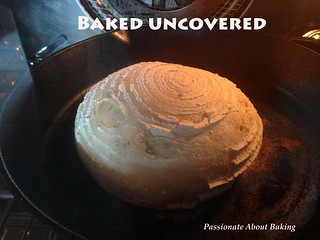
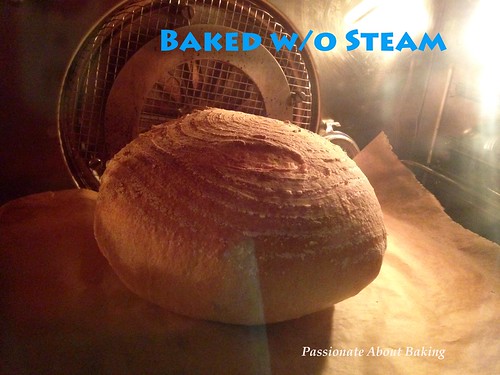
  11. Remove the cast iron pan from the oven. Transfer the dough to the pan. Cover it with a stainless steel bowl or a glass bowl.
  12. Bake for at 220C for 15mins covered, remove the glass bowl and rotate the pan, then continue baking for another 10-12mins uncovered.
  13. bread_classicfrench02 bread_classicfrench03
  14. Remove from the oven immediately and let it cool completely before slicing.
  15. bread_classicfrench05 bread_classicfrench06
  16. 4th day bake: Remove the dough from the refrigerator about 2 hours before you plan to bake. Gently transfer it to a lightly floured work surface, taking care to degas it as little as possible.
  17. Shape the dough round and placed it in a floured banetton. 
  18. Let it proof at room temperature for 1 hour or when increased to 1 1/2 times its original size.
  19. Preheat oven to 230C with a baking stone. After 10mins, placed a pan of water into the oven and let it boil.
  20. Prior to baking, transfer the dough into a floured peel. Score the dough with a lame. 
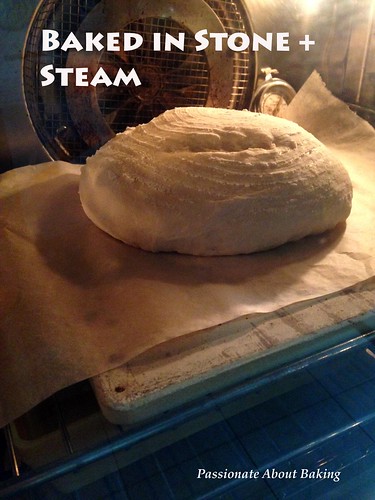
  21. Transfer the dough to the baking stone. Bake at 220 with steam for 15mins. After 15mins, remove the pan with water. Rotate the pan and continue baking for 10-12mins.
  22. bread_classicfrench07 bread_classicfrench08
  23. For a crispier crust, turn off the oven and leave the bread in for another 5 mins before removing.
  24. Cool the bread on a wire rack for at least 45mins or completely before slicing.
  25. bread_classicfrench09 bread_classicfrench10
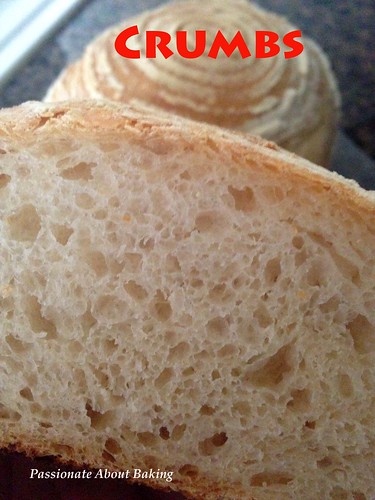
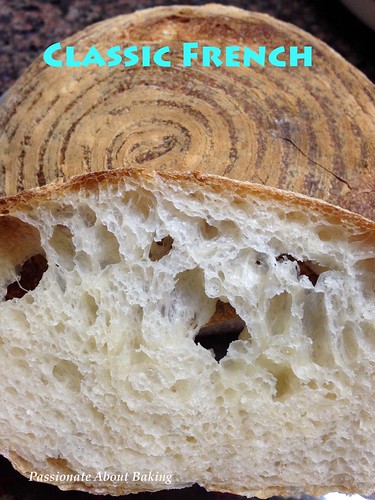
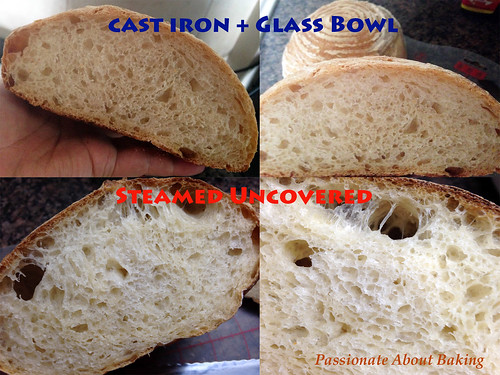
Based on the crumbs, you can actually see that both methods of baking produced almost the same crumbs. However, the covered boule has more consistent crumbs. It could also due to the fermentation duration. The dough which was left to ferment for four days have strong yeast reaction smell. But after baking, it tasted good, like the previous boules. Overnight fermentation was supposed to be more flavourful. However, I really cannot taste the difference. You decide for yourself if overnight fermentation is what you like. What I know is, this kind of lean bread is definitely healthier and better than sweet doughs.
bread_classicfrench11

Lavender Yogurt Bread

Breads are staple. But rice is not for me. I need to have my daily bread, but I don't have to take rice to survive. That's me. I've been using 吴宝春金牌土司 as my bread base for most of the breads I baked in the evening. It's the easiest bread I've done so far and the usual result is a soft bread.

With more time during the weekend, I would like to explore other bread recipes, especially those that required some preparation the night before. This Lavender Yogurt bread from Alex Goh's "The Art of Making Bread" is one of those recipe which required to prepare an "old dough" the day before. It was supposed to let it rest 24-48hours, but I used it within 12hours. Hmm...now I wondered what is the difference between an "old dough" vs a "preferment".

The bread was really very soft after baking. It is fluffy and light. The lavender smell filled the air when baking. Enjoy this as a sandwich or on its own.
bread_lavenderyogurt08
Recipe for Lavender Yogurt Bread, adapted from "The Art of Making Bread" 无添加剂面包 by Alex Goh.
(Makes 2 regular loaves)

Ingredients:

Laomian老面
100g Bread flour
70g Ice cold water
2g Instant Yeast
  1. Put the flour and yeast into a bowl. Add cold water and mix to form a dough.
  2. Cover with cling wrap and leave to ferment for 4 hours. (I ferment mine for 2 hours only)
  3. Remove the fermented dough from the bowl, place it into plastic container and press to degas it. Cover with cling wrap, keep it in the refrigerator for 24-48hours.
  4. If not use within 48hours, divide it into required weight, wrap it with plastic bag and keep it in the freezer. Use it within 30 days. 
  5. Before using, remove from the freezer, leave it at room temperature and let it thaw for 30mins.
Main dough
400g Bread flour
100g Plain flour
8g Instant yeast
1 tbsp (12g) Dried lavender
80g Honey
8g Salt
170g Laomian (refer to the top)
50g Cold eggs
150g Cold water (total weight of eggs and water should equate to 200g as sometimes, the eggs maybe heavier and you can use them all.)
100g Plain yogurt
80g Unsalted butter

Method:
  1. Put all the ingredients except butter, in the same order, in a mixing bowl. Using a dough hook, knead to form a dough.
  2. Add butter and knead until smooth and elastic. Leave to ferment for 45mins.
  3. bread_lavenderyogurt01
  4. Divide the dough into 8 portions and mould them round. Leave it to rest for 15mins.
  5. Flatten the dough, then make 3 fold. Flatten lightly and roll it up like swiss roll.
  6. bread_lavenderyogurt02 bread_lavenderyogurt03 bread_lavenderyogurt04
  7. Put the dough into the rectangular regular loaf pan.
  8. bread_lavenderyogurt05
  9. Leave it to proof for 45mins.
  10. Meanwhile, heat up the oven to 220C.
  11. Bake at 220C on the lowest rack for 23mins. Tent the bread after 10mins if the top turns dark.
  12. bread_lavenderyogurt06
  13. Remove from the loaf pan immediately after baking. Cool completely before slicing.
  14. bread_lavenderyogurt07
  15. Enjoy with butter.
  16. bread_lavenderyogurt09

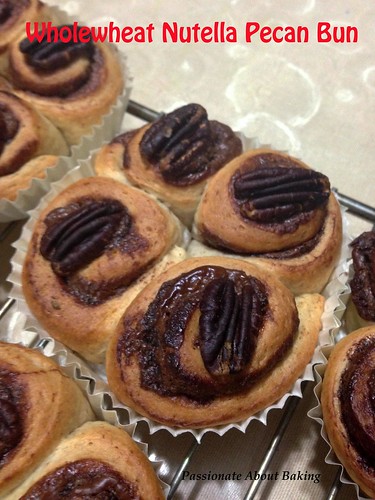
Wholewheat Nutella Pecan Buns

bread_nutella05
Recipe for Wholewheat Nutella Pecan Buns, modified from 天然蔬果酵母麵包. 
(Makes approx 16 pcs)

Ingredients:
400g Bread flour
100g Wholewheat flour
40g Sugar
10g Honey
125g Whipping Cream
150g Cold water
1 Egg (approx. 50g)
60g Unsalted butter

Nutella spread
Some Pecans

Method:
1. Knead all the ingredients, except butter, with a dough hook on slow speed for 3 mins. 
2. Add butter, continue kneading for 1 min, then turn to medium speed for 8 mins. Test for window pane. Then proof for 60 mins or double the size.
3. Weigh out each dough to 60g, shape it and it rest for 10 minutes.
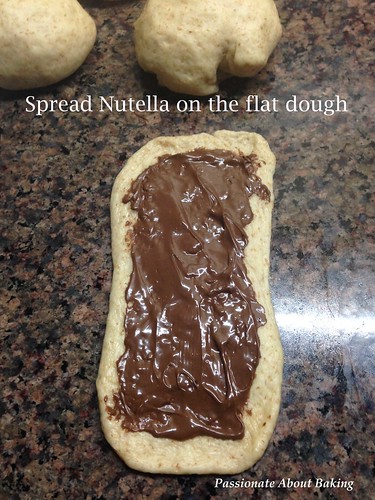
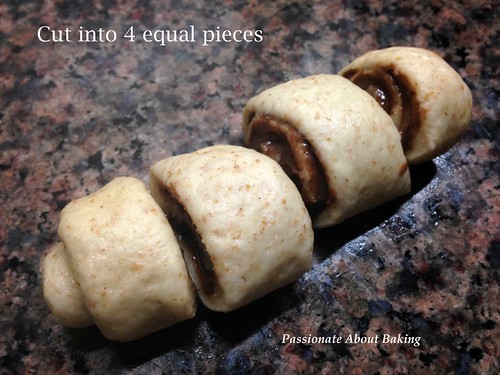
4. Then roll it flat, spread Nutella on it generously. Roll it up like swiss roll.
bread_nutella01
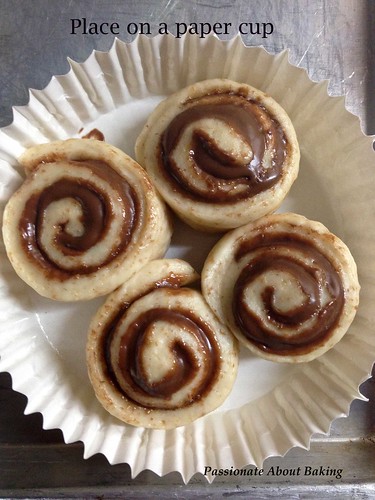
5. Cut into 4 equal portion. Place it on a paper cup. Do it for the rest of the dough.
bread_nutella02
6. Let it proof for at least 45mins or until the dough doubled.
bread_nutella03
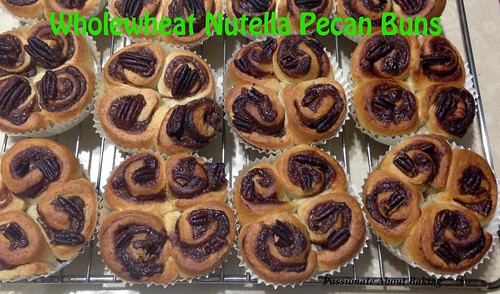
7. Top with pecans. Preheat oven to 190C.
bread_nutella04
8. Bake for 16 minutes. Tent the top if it gets too dark.
9. Let it cool completely before serving.
bread_nutella06

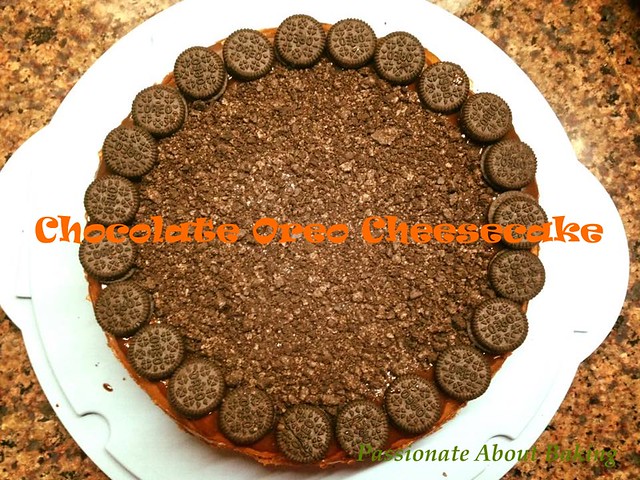
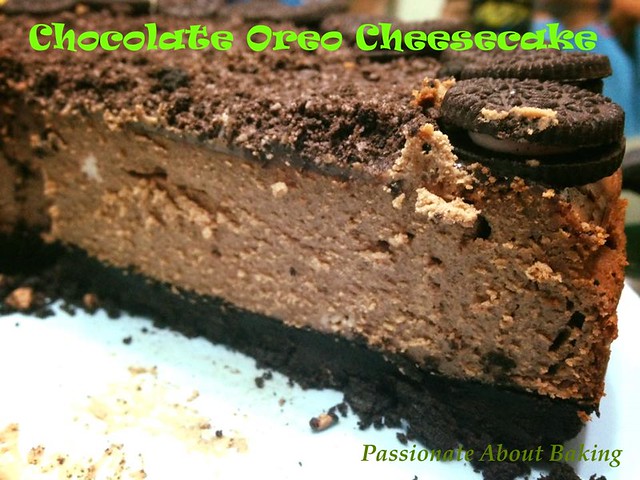
Chocolate Oreo Cheesecake

There are some not-so-healthy snacks which many people still like to indulge - Nutella for one, Oreo for another. Being a health conscious person, one would rather make their own of similar type, but the taste might or might not be the same. Somehow, I still prefer to buy these if I need them. As much as I try not to eat too much, often, I have request to use them for baking some goodies.

This time, the request was to bake a Chocolate Oreo Cheesecake for my nephew's birthday. Requests for birthday cakes from my family members was something I simply couldn't refuse. In anyway, I'll try my best to bake the cake according to their preference. And I know they will appreciate my efforts whether it turns out perfect or imperfect. :)
chocoreochcake01
Recipe for Chocolate Oreo Cheesecake.
(Makes a 9″ round cheesecake)

Ingredients:
Crust:
450g Oreo biscuits, finely grind
75g Salted butter, melted

1. Mix crushed biscuit crumbs with the soften butter until it resembles the texture of wet sand.
2. Using the back of your fingers, press the mixture into the base of a springform pan until the base is firm and compact.
3. Baked in a pre-heated oven of 160C for 5mins.
4. Remove from oven and let it cool.

Filling:
750g Cream cheese, softened
120g Fine sugar
4 Eggs, room temperature
130g Dark chocolate, melted
2 tbsp Rum
1 packet Mini Oreo

Decoration:
Some chocolate ganache
Some crushed Oreo biscuits
1 packet Mini Oreo

Method:
1. Beat cream cheese and sugar in a mixer until it is smooth without lumps.
2. Add eggs in one at a time, beating until well combined. Remember to scrape down the sides of the bowl regularly to ensure an even mixture.
3. Add in the melted chocolate gradually. Ensure to mix well. Add in rum and mix till incorporated.
4. Pour half of the cheese batter into the pan. Arrange the mini Oreo randomly. Then carefully add the rest of the batter.
5. Bake in the preheated oven of 160C for 40mins. 
6. Once done, turn off the oven and let the cheesecake cool in the oven completely. (I left it overnight.) The cheesecake cracked with humps.
7. Remove the cheesecake from its pan and chill for at least 4 hours.
8. To decorate, spread the ganache to cover the top completely. Arrange mini Oreos around the perimeter of the cake. Then sprinkle crushed biscuits in the centre. Refrigerate well.
9. Before serving, remove from the fridge and left it outside for at least one hour. Slice, serve and enjoy!
chocoreochcake02 chocoreochcake03

Blueberry Pecan Cast Iron Cake

I was hoping to use my cast iron pan more often since I got it almost a year ago. As my helper seldom use the cast iron pan, I was afraid it might become white elephant at home. So I figured I'd better use it more often. 

A sudden craving for cake made me bake a blueberry skillet cake with added pecans. The verdict for this cake is really good. With loads of blueberries and pecans on the cake, it gives really good texture. I would exclude caramelising if I were to make this again. The caramelised sugar didn't turn out too well for me since I reduced the quantities. I also made some changes to the steps.
blueberrypecancake01
Recipe for Blueberry Pecan Cast Iron Cake, modified from Taste of Home.
(Makes a 10" cake)

Ingredients:
30g Unsalted butter
90g Brown sugar
1 tsp Lemon juice
2 packets (250g) Fresh blueberries
80g Toasted pecans, coarsely chopped

188g Plain flour
80g Sugar
2 tsp Baking powder
1/2 tsp Salt
1 Egg
130g Plain Yogurt
113g Unsalted butter, room temperature
1 tsp Vanilla extract

Method:

1. Preheat oven to 190°C. 
2. In a 10" cast iron, melt butter over medium-low heat; stir in brown sugar until dissolved. Remove from heat. Stir in lemon juice; sprinkle with blueberries, then pecans. [Can skip caramelising the sugar. Can just melt some butter then sprinkle blueberries and pecans.]
3. In a large mixing bowl, cream butter with sugar till light and creamy. Add in egg and mix well.
4. Alternate yogurt with flour. Mix until incorporated. Pour over blueberries. Spread out evenly.
5. Bake for 20 mins or until a toothpick inserted in center comes out clean. Cool 10 minutes before inverting onto a serving plate.