A colleague of mine ordered a flourless orange cake from me for her son's birthday. As she requested to have it decorated with strawberries, I bought two punnets of strawberries and chose the best decoration for her. As I found USA strawberries not as sweet as Korean ones, I decided to "get rid" of the remaining strawberries. Hahaha...
There's not much variety to bake with strawberries. Instead, I cook it into strawberry coulis and make a cheese tart just for my strawberries. To my surprise, the combination was really good, I'm happy with my strawberry cheese tart.

Recipe for Strawberry Cheese Tart
(Makes for a 9" flan tart)
Almond Tart Crust
57g Ground almonds
142g Plain flour
45g Fine sugar
100g Unsalted butter, cold & cut into cubes
1/8tsp Salt
Method:
1. In a large mixing bowl, add in the dry ingredients.
2. Add the butter and use fingers to gently rub it into small bread crumbs.
3. Gather the crumbs together to form a dough. Do not overmix them.
4. Place the mixture into a plastic bag, and press it together.
5. Refrigerate for at least 30mins or until firm.
Cream Cheese Fillings
250g Cream cheese
30g Sugar
25g Liv unsalted butter, room temperature
1 Egg
25g Whole milk
20g Plain flour
1. Cream cheese, sugar and butter until light and smooth. Add in egg and cream until well blended.
2. Add in milk and mix until well combined. Lastly add in flour and mix until well incorporated and smooth.
Strawberry Coulis
450g Fresh Strawberries, cut cubes
100g Sugar
2 tsp Fresh Lemon juice
1. In a medium saucepan, combine the strawberries, sugar, and lemon juice. Bring to a boil over medium-high heat and continue stirring for about 8-10mins on low heat. (Do not stir or boil too long as it will create a lot of liquid).
2. Turn off the heat and let it cool completely before refrigerating.
Method:
1. Remove tart crust from the fridge.
2. Roll it and fit it into a 9" flan pan.
3. Fill up with cheese filling.
4. Bake in a preheated oven of 190C for 20mins, or when the cheese filling start to brown.
5. Remove from the oven and let it cool completely.
6. Refrigerate the tart.
7. Before serving, topped the tart with strawberry coulis completely. Drizzle the sauce when served.

Somewhere near my office was a bakery that sells good Blueberry Cheese Tarts as proclaimed by many of my colleagues. However, when I tried it, I seriously don't think it's as good as so many of them claimed. To me, the tart were just ordinary. Wonder what was so good about it.
I decided to try baking Blueberry Cheese Tarts using my homemade blueberry jam. I realised that I'm quite bad at moulding tart shells. I really need some workshop to learn rolling and moulding. The fillings were just enough to fill up the tarts. Truthfully, these blueberry tarts were very good. They were very well received by my family members!  Recipe for Blueberry Cheese Tarts, adapted from Irresistible Pastry by Alex Goh.
(Makes 27 regular tarts)
Ingredients:
Sweet Pastry
100g LIV Unsalted butter
45g Icing sugar
1/4 tsp Vanilla extract
1 Egg, small
210g Plain flour
Method:
1. Cream butter, sugar and vanilla and add in egg.
2. Add in flour and mix until well blended.
3. Press it into the tart mould. If not using immediately, refrigerate it until ready to use.
Fillings
250g Cream cheese
30g Sugar
25g Liv unsalted butter, room temperature
1 Egg
25g Whole milk
20g Plain flour
Blueberry jam or fillings
Method:
1. Tart shell: Press the sweet pastry into the tart mould. Prick some holes onto the pastry shell and bake at 190C for 13 mins or until light golden brown. Leave it to cool.
 2. Filling: Cream cheese, sugar and butter until light and smooth. Add in egg and cream until well blended.
3. Add in milk and mix until well combined. Lastly add in flour and mix until well incorporated.
 4. Scoop a teaspoon of the cheese fillings into the par baked pastry shells. Place some blueberry jam onto it and swirl it into a marbling effect.

 5. Bake at 190C for 10mins.


This post is sponsored by Liv butter. Try Liv today!
 My dear friend Doris, likes to tempt me with her bakings. Not tempting me with the eating of the food, but rather, more to inspire me to bake with her yummy bakings.
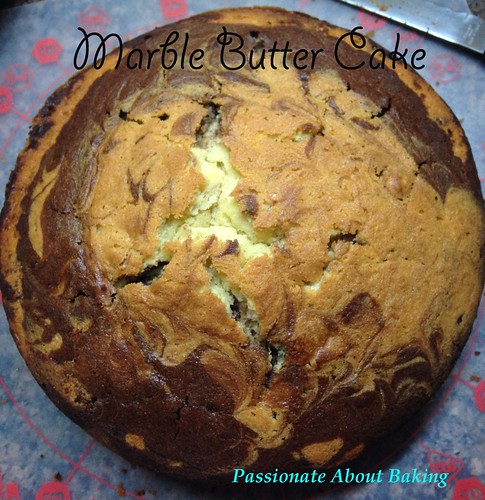
She mentioned about Nasi Lemak Lover cake and I assumed it was the Marbled Butter Cake. Turned out that she baked the Zebra Cake which was light and buttery, while I baked her Marbled Butter Cake, which was moist and buttery. We both liked the recipe we tried. Heehee.... The butter cake turns out to be really fragrant and moist. Even my children enjoyed it too!
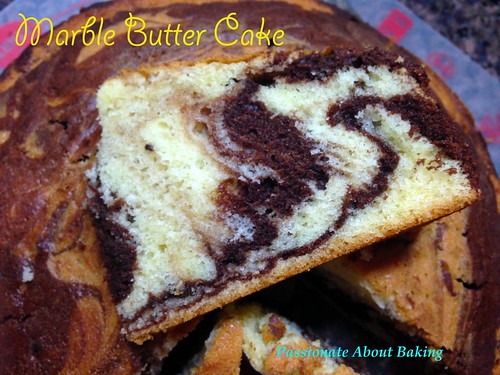
Recipe for Marble Butter Cake, adapted from Nasi Lemak Lover.
(Makes a 8" round cake)
Ingredients:
250g Liv salted butter, soften
150g Caster sugar
4 Eggs
1 tsp Vanilla extract
230g Cake flour, sifted
1 1/2tsp Baking powder, sifted
60g Whipping cream (original was 4 tbsp milk)
1 tbsp Cocoa powder + 1/2 tsp coffee powder + 2 tbsp milk – mix together
Method:
1. Place the butter, sugar and vanilla in the bowl of an electric mixer and beat until light and creamy.
2. Add one egg at a time, beating well after each addition. After well combine, slightly increase speed and beat for 1min till fluffy.
3. Add the flour and baking powder (sifted together) and beat well to combine, fold whipping cream alternately and combine well.
4. Remove 250g of plain batter and place in another clean mixing bowl, mix well with cocoa mixture.
5. Spoon the two batters, plain and chocolate batter, alternately into the prepared cake pan. Using a skewer, gently swirl it around the mixture in the tin a few times to create a marbled effect. Tap the tin to remove any air bubbles.
6. Bake at preheated oven at 160C for 50-55mins or until a skewer insert and come out clean.
7. Cool it completely before cutting.
This post is sponsored by Liv butter. Try Liv today!
Red Velvet Cake craze has never died off in my family for their birthday request. For the past years, it was those dense sponge cakes which are pretty heavy. This year, my sister's boyfriend happened to be in town and he requested for Red Velvet Cake again. I went online to check if there is a lighter version.
I found a Red Velvet Chiffon Cake recipe and decided to modify it. I used this cake as my sponge cake base. I also modified the usual cream cheese frosting to make it lighter for the chiffon sponge. This cake was very well received by my family members. They liked the light cake texture with the lighter cream cheese frostings. They added that this cake shall be the future RVC for them.
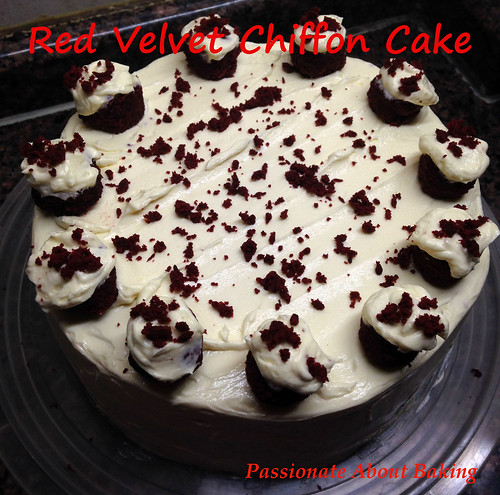
Recipe for Red Velvet Chiffon Cake
(Makes an 8" round cake)
Chiffon Cake, modified from LY's Kitchen Ventures.
Ingredients:
48g Unsweetened cocoa powder
112g Hot water
68g Buttermilk (64g whole milk + 4g fresh lemon juice)
80g LIV unsalted butter
1/2 tsp Fine rock salt
1 1/2 tsp Vanilla extract
2 tsp Red colouring gel
144g Cake flour
8 Egg yolks, room temperature
8 Egg whites, room temperature
170g Caster sugar
1 tsp Corn flour
Method:
1. Preheat oven to 160C. Prepare two 8" round cake pans. Line the bottom but do not grease.
2. Dissolve the cocoa powder in the hot water.
3. In a small pot over low heat, warm the milk, butter, salt and cocoa mixture to about 60C or until the butter melts completely.
4. Add the vanilla extract and red colouring gel. Stir and ensure everything is mixed thoroughly. Remove from heat. Set aside.
5. In a large mixing bowl, add the flour and colouring mixture and whisk thoroughly. The batter will become slightly thick.
6. Next, add the egg yolks one by one while whisking the mixture. Set it aside.
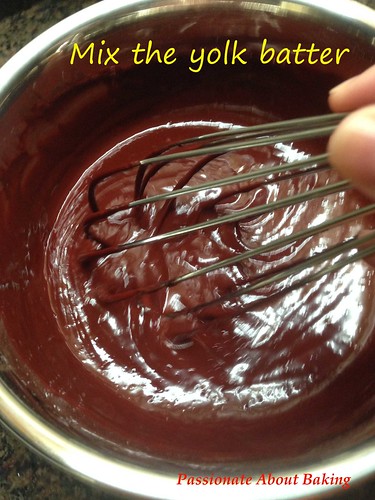 7. Using a mixer on medium speed, beat the egg whites. Mix corn flour into the sugar well.
8. When they turn foamy, add the sugar and flour mixture gradually until soft peaks. Fold 1/3 of the egg whites into the red velvet batter using a whisk. When the mixture is just combined, pour the batter into the meringue and fold well.
9. Pour half the batter into the two pans respectively. Bang slightly to remove bigger air bubbles.
10. Bake for 10 minutes before reducing the temperature to 150C for another 27 minutes. This prevents the cake from burning. DO not open the oven door while baking or the cake will deflate.
11. Check if the cake is done by piercing a skewer through it. The skewer should come out clean. Remove the cake from the oven and invert them. Remove the pans and let them cool completely.
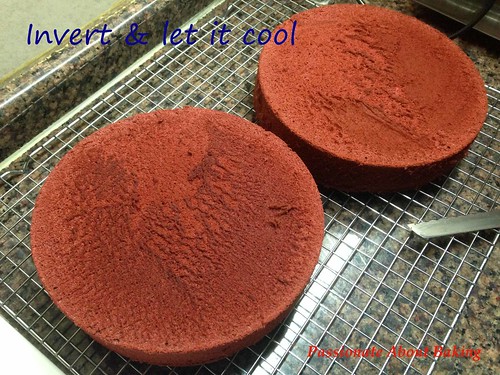
12. Refrigerate to enable easier slicing.
Cream Cheese Frosting
500g Cream cheese, room temperature
125g Liv unsalted butter, room temperature
120g Whipping cream
1 1/2 tsp Vanilla extract (I used lemon oil)
200g Icing sugar (I used only 70g as I had ran out of them.)
Method:
1. In a cold mixing bowl, beat whipping cream till stiff. Transfer to a smaller bowl and keep in the fridge for later use.
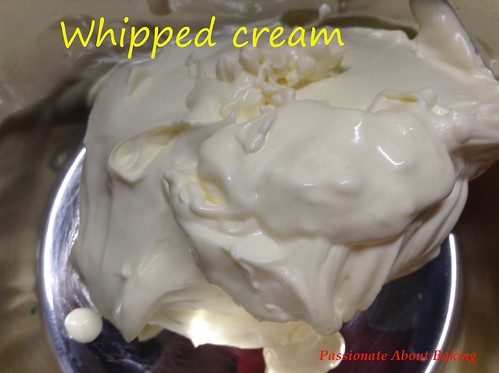
2. In the same bowl, combine the cream cheese and butter on medium speed, just until blended.
3. Stop and scrape down the sides of the bowl. Add the vanilla and beat until combined. With the speed on low, add the icing sugar in 4 batches, beating until smooth between each addition.
4. Fold in whipped cream. Chilled if not ready to frost yet.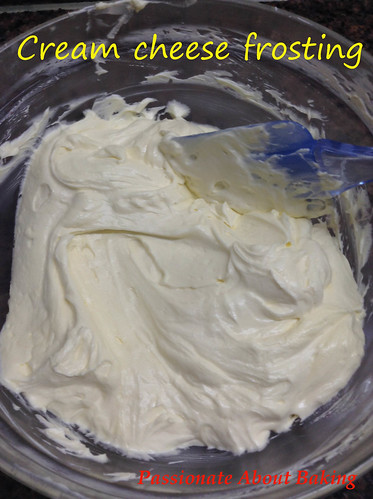
To Assemble:
1. Slice each chilled cake into two equal layers. Slice the dome off for decoration later.
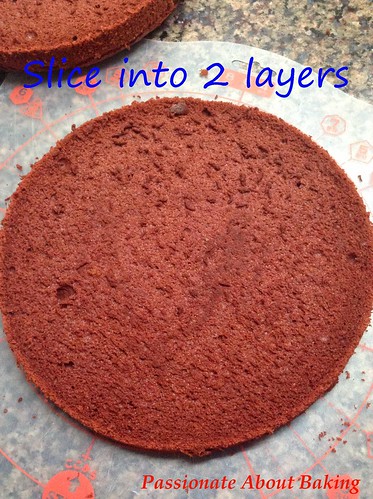 2. Place one cake layer on a serving plate/tray and spread some cream cheese evenly. Repeat this process until all cake layers are stacked.
3. Frost the cake completely.
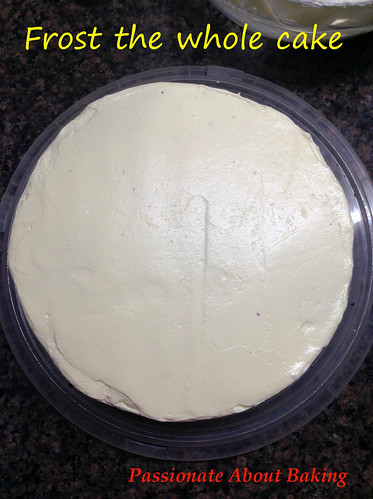 4. With the remaining cake crumbs, add in some frosting, mix well and roll into 12 balls (I rolled 11).
5. Topped the balls with some frosting and placed it around the cake as decoration.
4. Chill the cake to set the frosting. Need not thaw before consuming.


In remembrance of our late founding father, Mr Lee Kuan Yew, who had passed away on 23 March 2015, 3.18am. I chose this photo to remember him as I had always perceived him to be a very wise man, deep in thoughts and always thinking how to bring the best to his countrymen, Singapore.
I perceived him as stern, and will not tolerant nonsense. It was usually the public side of him which I remembered, and was exposed to. His legacy will continue to live in us, the next generation of Singapore. Rest in peace, Mr Lee.
 Quote from The Straits Times:
"Dr Lee Suan Yew recalled mealtimes with his brother and sister-in-law: "When it came to dessert, he had a soft spot for chocolate cake and Mrs Lee, in her diplomatic way, would say, 'Oh Harry, I'll have half of that'. He couldn't say no. So he would say, 'OK, OK, you take half.' What she was trying to do was to cut down his weight and calories."
Therefore, in honour of this great man of the century, I baked his favourite chocolate cake.
 Recipe for Chocolate Cake with Walnuts
(Makes an 8" square cake)
Chocolate Cake, adapted from Bake for Happy Kids.
Ingredients:
250g Liv unsalted butter
120g Bittersweet chocolate, chopped (or dark chocolates)
100g Dutch-processed cocoa powder
225g Plain flour
1 1/2tsp Baking powder
1tsp Baking soda
1tsp Salt
4 Large eggs, room temperature
2tsp Vanilla extract
280g Caster sugar
250g Sour cream
Method:
1. Line two 8" square baking pans with baking paper. Set aside.
2. Melt the butter, chocolate, and cocoa together in a pot over low heat with constant stirring.
3. In a medium bowl, whisk the flour, baking powder, baking soda, and salt together.
4. In a large bowl, whisk the eggs and vanilla together by hand until uniform. Whisk in the sugar until combined. Whisk in the cooled chocolate mixture until combined.
5. Sift about a third of the flour mixture over the batter and whisk in. Whisk in the sour cream. Sift the remaining flour mixture alternating with the sour cream and whisk until completely incorporated. Do not over-mix.
6. The batter will be thick and so it is always good to give the batter a final stir with a rubber spatula to make sure that all ingredients are thoroughly combined.
7. Divide the batter equally into the two prepared pan, smooth the top, and gently tap the pan on the counter to settle the batter.
8. Bake the cake at preheated oven of 160C on the lower rack until a skewer inserted in the center comes out with a few moist crumbs attached, 25-30mins if using two pans, or 45mins if using one pan.
9. Let the cake rest and cool slightly in the pan for about 20-25 mins. Remove the cakes and leave to cool on a wire rack for at least 2 hours. The baked cake for each of the two cakes is about 1.5inch.
 Swiss Meringue Buttercream
Ingredients:
8 Egg whites
180g Caster sugar
450g Unsalted butter, soft but still cold
200g Melted chocolate
Method:
1. Whisk the egg whites and sugar over a double boiler until sugar has dissolved.
2. Remove from heat and whisk continuously until it's cooled and the peaks are stiff and glossy.
3. Add the butter in 3 batches, ensuring that it is well incorporated before adding another batch.
4. Continue beating until it becomes creamy and fluffy.
5. Lastly, add in the melted chocolate and continue beating until the buttercream is uniformly smooth.
100g Walnuts, toasted
To assemble:
1. Trim the top of one layer of the cake.
 2. Transfer 1 layer to a serving platter, and spread buttercream generously over the top.
 3. Break the walnuts evenly over the buttercream, and to cover the whole area.
 4. Top with another cake layer and spread with buttercream.
5. Frost all around with buttercream.
6. Pipe a rosette at four corners and the centre, and place a whole walnut on top.
 7. Decorate as desired.
 8. Remove the cake from the fridge half an hour before serving.
 This post is sponsored by Liv butter. Try Liv today!
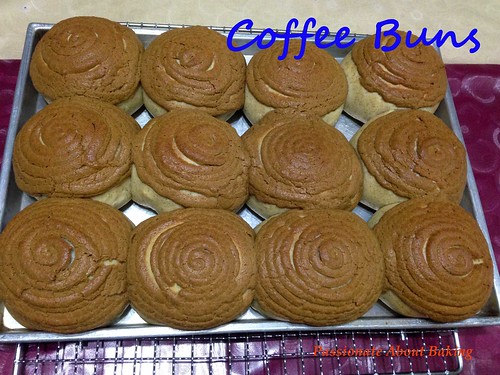
It is the first term school break this week. My children are home for the whole week with no school activities. Whenever they are home, they will be searching for some snacks to fill their stomach. I made some Mexican Coffee Buns to satisfy their snack hunting should they want to eat them in the afternoon, though it is more for breakfast. My son wanted to eat this for breakfast, after lunch, afternoon tea and after dinner, which I have to stop him! He happens to be a super big fan of this coffee bun.

The bread dough was adapted from my previous preferment coffee buns. Instead of baking them in loaves, I weigh out 50g and baked them as buns. I also added a capsule of Nespresso coffee seeds into the dough. The dough has very fragrant coffee aroma.
As for the coffee fillings, I adapted the recipe from Everybody Eats Well in Flanders. Prepare this topping while the dough is at its final proofing stage.
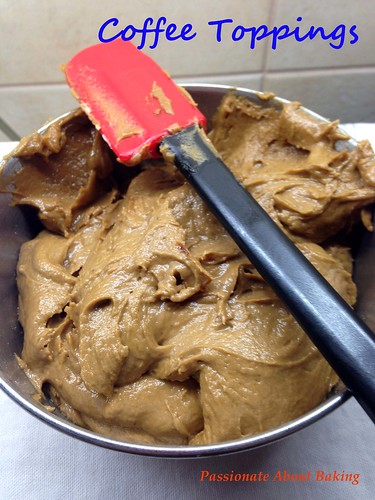
Coffee Topping
(Makes for approximate 26 50g buns, though I had 24 buns)
Ingredients:
125g Liv unsalted butter, room temperature
125g Icing sugar [I used 100g only, and not sweet]
2 eggs
240g Plain flour [I used 230g]
15g Instant coffee powder [dissolved in Kahlua]
1 tbsp Kahlua or other coffee liquer
Method:
1. Cream butter and icing sugar till smooth, using a K beater.
2. Add in eggs, and mix well.
3. Then add in flour and instant coffee and mix until well-combined.
4. Put the coffee topping into a piping bag and pipe a spiral pattern on each bun after the final proof.
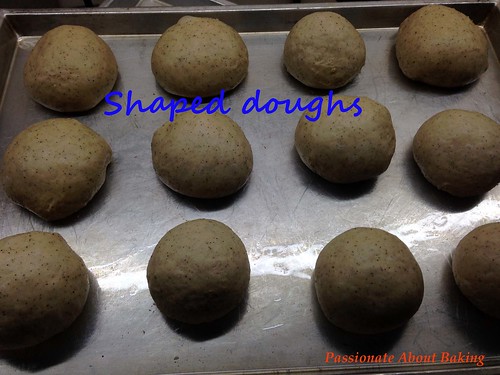
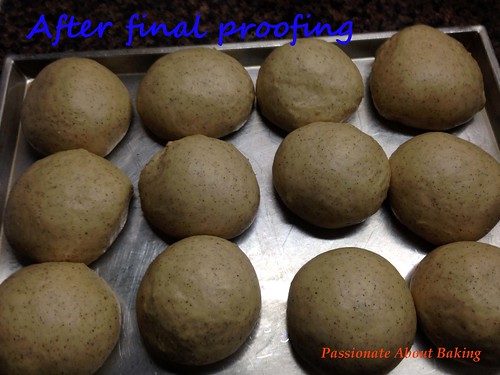
 5. Bake the coffee buns in the preheated oven of 180C for 15 mins.
6. Remove them from the pan immediately and let them cool completely on a wire rack before storing.

This post is sponsored by Liv butter. Try Liv today!
Nutella seems to be everyone's favourite. Besides those who are really conscious of the ingredients present, most people have at least a bottle of Nutella in their kitchen. I'm no exception. Recently, there was some promotion in our supermarket, my sister got me two large tubs. So I decided to use it to bake Nutella Cupcakes as shared by Rumbling Tummy.
As it turned out, it was really a easy to make, and tasty to eat cupcakes. My children loved it and even my helper who brought it to share during her weekly gathering said her friends loved them too!
 Recipe for Nutella Cupcakes, adapted from Rumbling Tummy.
(Makes approx. 19 regular cupcakes)
Ingredients:
280g Liv unsalted butter, softened
160g Caster sugar
6 Eggs
1 tsp Vanilla extract
200g Plain flour, sifted
1/2 tsp Salt
4 tsp Baking powder
Nutella
Method:
1. Preheat oven to 180°C. Prepare cupcake paper cups.
2. Cream together butter and sugar until light.
3. Add in eggs one at a time, until fully incorporated. (as you add the eggs, it might curdle, use high speed to mix it)
4. Add vanilla. Stir in flour, salt and baking powder until batter is uniform and no flour remains.
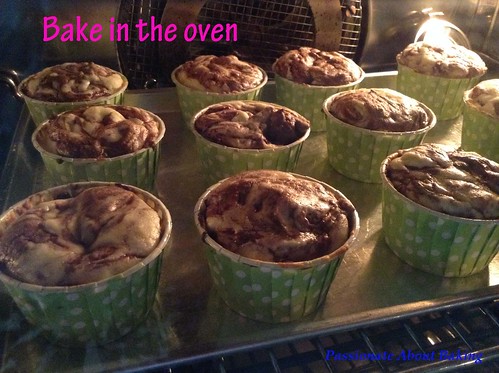
5. Fill each paper cups with batter. They should be ¾ full. (this cake rises quite a lot.)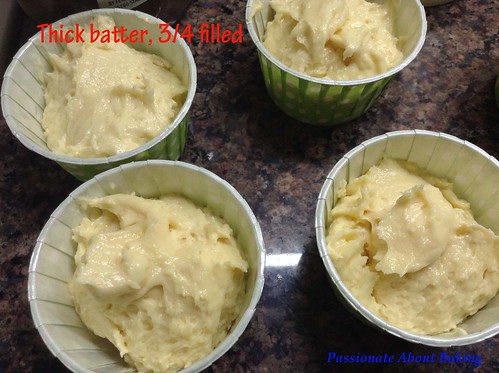 6. Top each cake with 1½ tsp Nutella. Swirl Nutella in with a skewer, making sure to fold a bit of batter up over the Nutella.
7. Bake for 20 minutes or till the top is browned.
 8. Remove to a wire rack to cool completely before serving.

This recipe has been used by many FB bakers for quite sometime. It just "shook" the home-bakers where everyone was baking this bread. It took me a while to realise (late adopter) and decided to have try. This bread was pretty easy to bake, and good thing is, it really produce a very soft and light bread. It's a true keeper.
 Recipe for 吴宝春金牌土司Champion Toast (baked mine in flower mould), adapted from Aunty Young, originated from ccm.
Makes a flower mould (dough weight about 550g)
Ingredients:
300g Bread flour
24g Castor sugar
4g Salt
15g LIV unsalted butter
198g Fresh milk
3g Instant yeast
Method :
1. Mix all ingredients (except butter) into a dough using low speed, then use medium speed to knead it into a shiny and smooth texture.
2. Add in the butter and continue to knead until the dough is pliable (smooth, soft and elastic).
3. Shape into a ball, cover to rest dough for about 1 hour or double in size.
4. Flatten the dough into a rectangular shape. Roll up swiss-roll style.
5. Place the dough into your prepared tin. Cover and leave to proof for about 50-60 minutes.
6. Bake in a preheated oven at 190°C for 30 minutes.
7. Remove from the mould and let it cool completely before slicing.