D Day...Durians and Dining

We had previously wanted to dine out on 6 Aug, which was quite rare as we usually dine in my mum's place. However, I suggested to my sisters to go JB for durians instead. After much discussions and arrangements, the date, the venue and the programme were confirmed!

So, on 6 Aug early morning, a group of 13 of us, in two MPVs, headed to JB, to Dad's friend's place for durians. Dad's friend, Ah Tee, was very kind to wait for us after the Tua's Checkpoint and lead us to his house.
At his place, the durians were already waiting for us. He had bought Mao Shan Wang (MSW), D101 and D13 durians for us the day before. He told us that the durian season was coming to an end, therefore, he could only get us these durians. Ah Tee used to be a durian seller in Singapore. Even though he doesn't sell durians now, he has friends who has durian plantation in Johor. As he pried the durians for us, he shared about his durian experience with us.
A few tips we learned from him about durians:
  1. Durians are best eaten in the day, latest by noon. This is because the sugar content in durian is very high. It needs time to be digested. Eating at night do not allow sufficient time for the durian sugars to be digested.
  2. Durians are not suitable for those with high blood pressure and diabetic. Refer to #1. Eat with lots of moderation required.
  3. The commercial durians have been added fertilisers, which are no good for us. The durians that Malaysians like are "Zhu Jiao" (I don't know if he meant "Pig" 猪 zhu or "Bamboo" 竹 zhu). He mentioned that MSW has a lot of fertilsers.
  4. One of the best durians are actually "shan ba" durians. "Shan ba" 山把 means kampong.
  5. Do not place durians directly on the floor if you do not intend to eat it immediately. The humility of the floor will cause the durians to crack, and make the durians watery. Best to place them either in a plastic bag, or in a carton box like what he did, at least a layer between the floor and durians. Also, he used rubber bands to tie up the base of the durians to prevent them from cracking up.
  6. You can recognise durians' season end when you see small durians instead of huge ones. He called it "liu lian wei" (榴莲尾) durians.
No wonder I've been putting on weight lately, because I've been eating durians at night! Now I know!

After our durian feast at his place, he brought us to "Restoran Kah Kah Loke" for some bittergourd soup. Frankly, I don't really like the dishes. :p The porks served there tasted very porky, which is totally out of my diet! Hahaha... Therefore, I didn't eat much.
After lunch, he left us to go for our shopping at Aeon Tebrau City. Luckily for that, otherwise we would have imposed on him for the whole day! Since I've been to Tebrau almost monthly, we didn't really bother to shop. We ended up in Lavender cafe, spending a leisure afternoon having tea and snacks. I call this pure pleasure! Spending time with my family, drinking tea/coffee, having snacks, and building bonds!
Clockwise from top left: Blueberry cheese cake RM6.00, Seaweed Tuna Spicy Chicken RM3.50, 2C RM2.50, Mascarpone Cheese Mango RM5.80, Almond Peanut Roll RM2.50 and Tiramisu Cake RM5.80.

After our afternoon tea, we proceeded to go to the last stop, grocery shopping before heading back to Ah Tee's place in late afternoon. He brought his family of four, and us to "Yi Jia Restoran" for a good seafood dinner. Ah, this is what I like to have in JB! As we were not familiar in JB (except for Aeon Tebrau City & Aeon Bukit Indah), we didn't dare to venture out anywhere. Afterall, it's not as safe as Singapore! I find that it's always good to know a local person where ever you go. At least, you won't get cheated so easily!
I noticed that the sky was really pretty, with three distinct layers - dark clouds, clear blue sky at the background and white clouds at the foreground.
My twins were playing with their young children. My twins really like younger children!
Clockwise from top left: Yang Chou Fried Rice (big) RM12.00, Salted egg yolk crabs (1.2kg) RM72.00, Vegetable (big) RM16.00 and Shaopi Chicken (big) RM21.00.

There were many other dishes which we ordered, I didn't take pictures because I was busy eating!
Steamed fish (2 plates) RM60.00, Cheese big prawns (big) RM36.00, Fried toufu (big) RM18.50, Three-cup chicken (med) RM15.00, Honey crabs (1.2kg) RM72.00. White rice (big) RM1.00 each, 1 pot of tea RM7.00.
My personal favourite was the cheese prawns and the salted egg yolk crabs! Yummilicious!!

After a satisfying dinner, we went back to his place to pick up the remaining durians that he had bought for us. We requested that he helped to open up all the durians and packed them into containers for us. He obliged readily! Such kind person. Unbelievable, after clearing the durians, there were four big tubs of durians to bring home! After thanking Ah Tee, we left his place and finally head home. It had been a long day for all of us, we were tired but we had a FRUIT-FULL day! 
Guess what, I actually brought home all the tubs of durians as my sisters didn't want them! I already have in mind what to do with those durians. Stay tuned.


Yi Jia Restoran Sdn Bhd
No. 17,19,21,23, Jalan Setia 9/17,
Taman Setia India 81100 J.Bahru
Tel: 07-3597782/012-7187782

Happy 46th National Day, my Singapore!

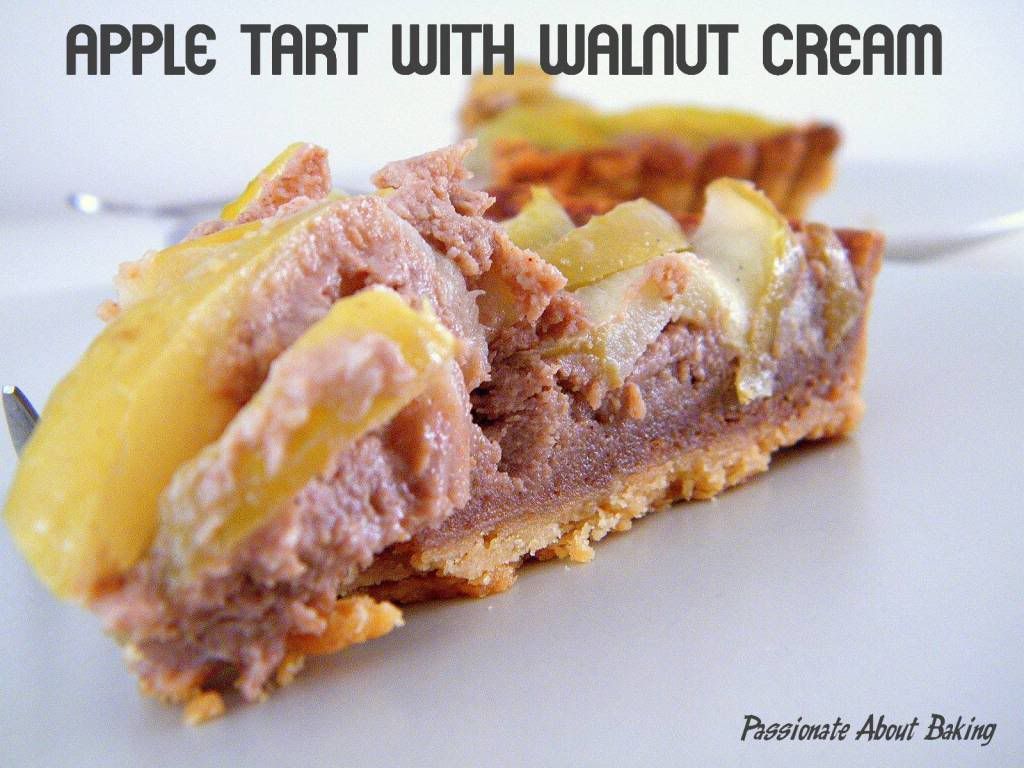
Apple Tart with Walnut Cream

I was half relieved when my son's PSLE Prelim was over this week! I had planned the week before, to visit my dear friend, Grace. She has been so busy with her baby since February that we didn't have the chance to meet up! I was also busy with the preparation for my son's exams during this period too!

I wanted to make something nice for her. I believe she must've missed baking for a long time! After going through a few recipe books, I decided on an "Apple tart with Walnut Cream" as I found it to be very special. Coincidentally, this month's Aspiring Bakers' theme was Easy as Pie.

I'll be submitting this to Aspiring Bakers #10: Easy as Pie (August 2011), hosted by Janine of Not the Kitchen Sink.
Recipe for Apple Tart with Walnut Cream, extracted from "The Pie and Pastry Bible" by Rose Levy Beranbaum with modification.
Makes a 9" Tart

Shortcrust Pastry, extracted from "Irresistable Pastry" by Alex Goh

Ingredients:
250g Plain flour
150g Butter
2 tbsps Sugar
1 Egg yolk
40g Water

Method:
  1. Mix the butter with the flour until crumbly.
  2. Add in egg and sugar first. Then add in water and mix to form a dough.
  3. Shape it into ball and press it flat.
  4. Wrap with plastic sheet and refrigerate for 30 mins.
  5. When ready to bake, floured a worktop, and roll out the dough to 3mm thickness.
* Note: The weight of the pastry is 480g. After using it for a 9" tart, I was left with some dough. Therefore, I made them into a few smaller tart base and kept them.

Poached Apples
3 Green apples (or any other cooking apples)
450g Water
12g Freshly squeeze lemon juice
4 Tbsps Sugar
1 Cinnamon stick
Method:
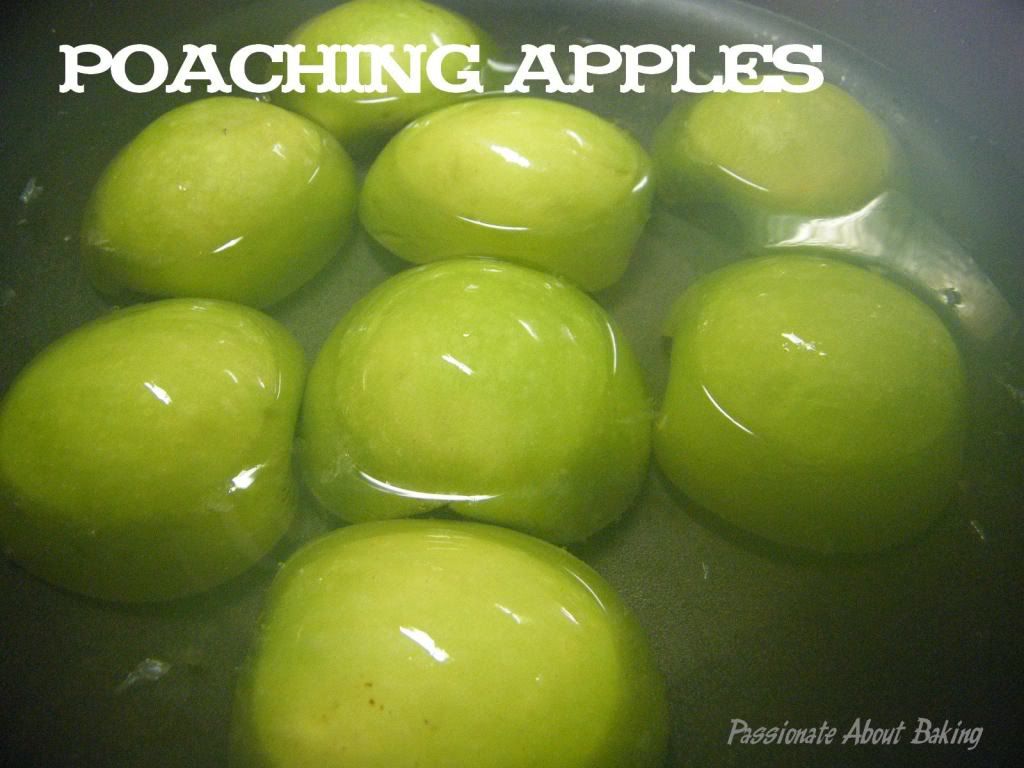
  1. Halved and core the apples before you poach them. (Original instructions was to remove the skin, but I didn't.)
  2. In a pan large enough to hold the apples in a single layer, combine the water, lemon juice, sugar and cinnamon stick and stir to dissolve the sugar.
  3. Add the apples, and bring the liquid to a boil. Simmer over low heat.
  4. Turn the apples and continue simmering for another 4 to 6 mins, or until a cake tester inserted in the thickest part of an apple enters easily.
  5. The apples should still be slightly firm. Remove the pan from the heat and cool completely.
  6. The apples can be used immediately, but they develop more flavour if allowed to sit in the poaching liquid for at least 24 hours and up to 3 days.
  7. Transfer the apples and their liquid to a bowl small enough so that the apples are covered by the liquid.
  8. Cover tightly and refrigerate until ready to use.
* Note:
  • I used four apples, but left 2 halves. So three apples will be sufficient for a 9" tart.
  • The original recipe use a vanilla bean. I omit this totally.
  • I estimated the water, as long as the apples can lay out nicely in a single layer, half covered, it's alright.
  • Do not overcook the apples, otherwise, it won't be crunchy.
  • I made a day before and kept it in the fridge for at least 24hours. It made a lot of difference to the apple as it has a very rich cinnamon taste!
Walnut Cream Fillings
100g Walnuts halves, lightly toasted
60g Fine sugar
18g Plain flour
1/2 tsp Ground cinnamon
100g Unsalted butter, softened
2 large Eggs
1/2 tsp Vanilla extract
Method:

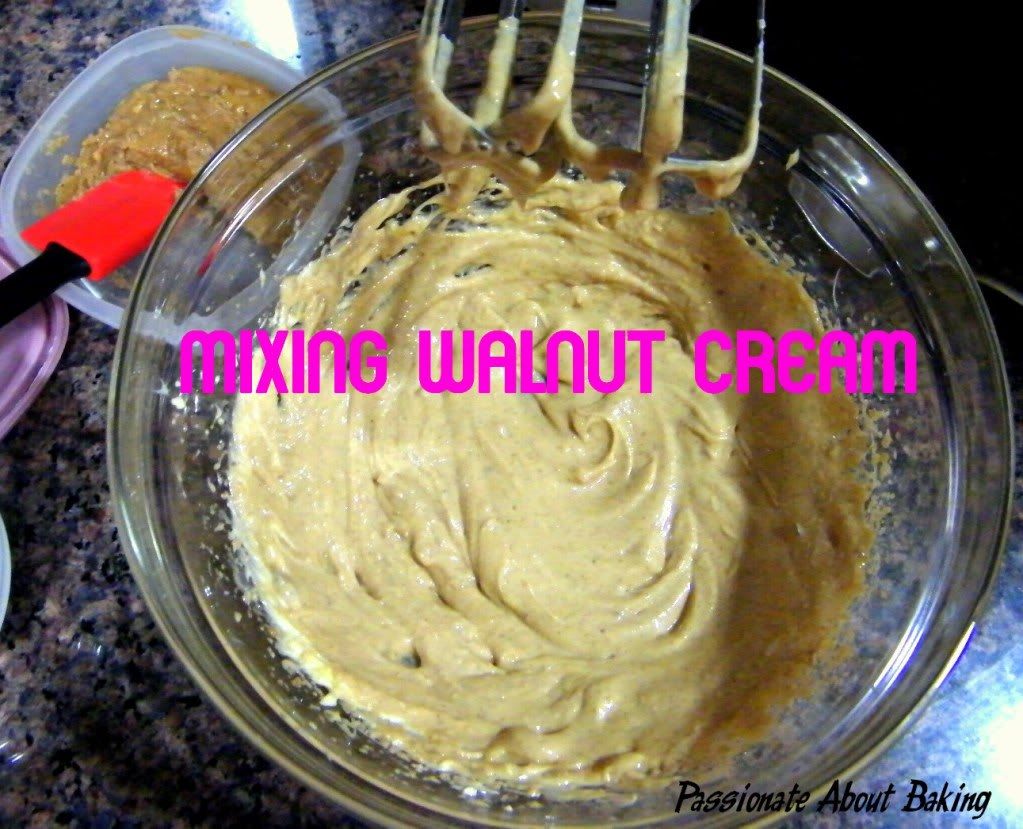
  1. In a food processor fitted with the metal blade, place the walnuts, sugar, flour and cinnamon and process until the walnuts are very fine.
  2. Empty the mixture into a bowl and set aside.
  3. In a medium mixing bowl, beat the butter until creamy.
  4. Beat in about 1/2 cup of the nut mixture until incorporated.
  5. Beat in 1 egg along with another 1/2 cup of the nut mixture.
  6. Then beat in the second egg with the remaining nut mixture, together with the vanilla extract.
  7. Refrigerate until about 10mins before assembling the tart.
* Note:

  • After mixing all together, the walnut cream was liquid.
  • Place them in the fridge to firm up. Take them out of the fridge 10mins before you start assembling the tart. When it firm up, it's easier to spread. The cream will be thicker and easier to handle.
Assemble the tart
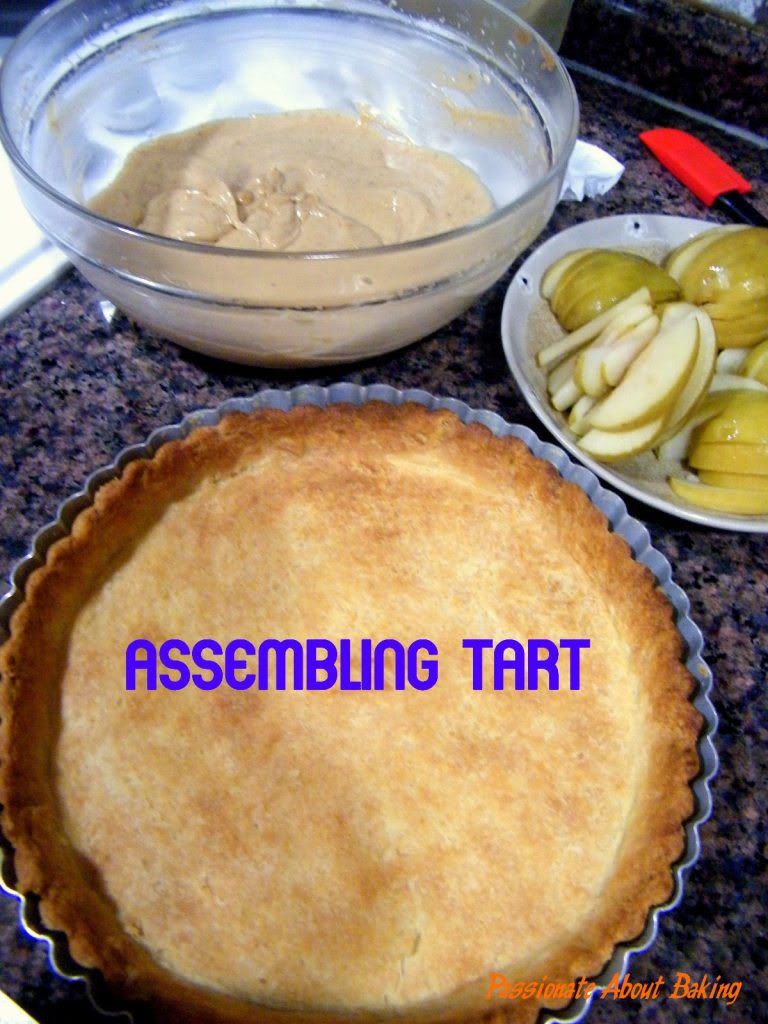
  1. Drain the apples well on paper towels. Reserved the poaching syrup.
  2. Using a sharp thin knife, slice each apple crosswise into thin slices.
  3. Spread the walnut cream evenly in the cooled baked tart shell.
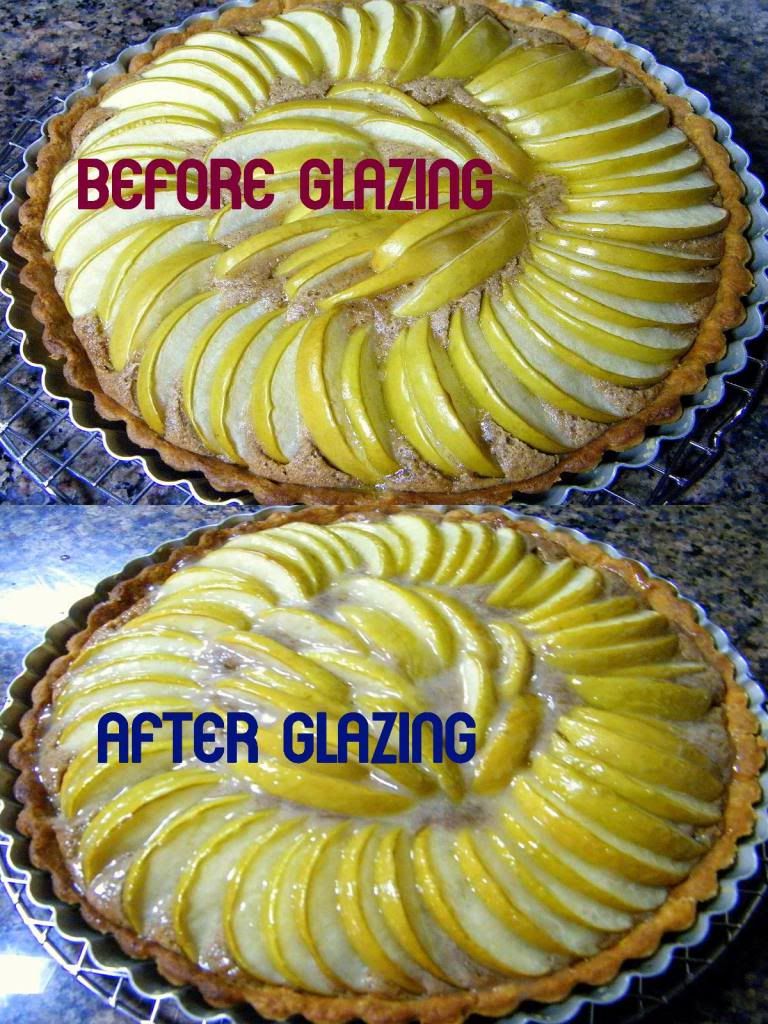
  4. Arrange the apples neatly on the walnut cream.
  5. Bake in the oven of 180C for 30mins, or until the walnut cream puffs slightly, surrounding the apples and turns golden brown.
Glaze
1/2 cup Reserved syrup from poaching
1/2 tsp Cornstarch
1/2 tsp Vanilla extract

Method:
  1. In a small saucepan, add in all the ingredients. Stir to incorporate.
  2. Heat the mixture till it boils. Stir constantly.
  3. Simmer for a few seconds, then remove from the heat.
  4. Pour into a small cup.
  5. Use a brush to coat the apples and the walnut fillings well.
  6. Unmould the tart and serve immediately.
  7. It can store in room temperature up to 1 day, or refrigerated up to 3 days. Allow the tart to come to room temperature before serving.
The tart truly delivered what it promised. The apple was still crunchy and developed a full cinnamon flavour. The walnut tart was very fragrant from the ground walnut, and creamy. The sweetness of the overall tart actually came from the walnut cream. However, as I had already reduced the sugar, the sweetness was acceptable. The tart crust was very crispy. Both of us loved the crust very much too! I was glad the tart turns out to be delectable! I would definitely make this again, however, this time, I will use the original tart crust from Rose!

The Roti Prata Woman

After viewing Dr Leslie Tay, famously known as ieatishootipost, on Channel U Ladies Nite, making the roti pratas, I can't help to drool over it! Being convinced by Dr Tay that this is actually very easy to do, I decided to attempt this (only to realise it wasn't as it seems!)
Extracting the recipe from ieatishootipost, I increased the recipe to meet the demands from my household. From his post, there were tonnes of information, and one need to read it carefully to understand them. I had always thought roti prata dough is not so difficult, it's the skill in flipping them. I was proven wrong. Even the dough itself need to be made carefully.


You can find the recipe from Channel U Ladies Nite, or from his blog post. Or watch the video from Ladies Nite.


Here's sharing how I made it, though quite a fair bit of work, but the result was satisfactory, considering this was the first time I made roti prata!
Reposting the recipe for Roti Prata, extracted from ieatishootipost.
(Makes approx 16 pcs)


Ingredients:
1000g Prima Plain flour
450g Water
130g Condensed milk
25g Oil (or melted butter)
2tsp Salt
83g Eggs


Method:

  1. Mix all the liquid ingredients together - water, condensed milk, oil, eggs and salt.
  2. Pour the flour into a large mixing bowl. Then add in the liquid mixture into the mixing bowl.
  3. Using a dough hook, start mixing at low for 5mins. Rest for 5mins. Then repeat it for another 2 times. (So total 15mins kneading time, 10mins rest time)
  4. Using a cling wrap, let the dough rest for 30mins.
  5. After the resting time, floured a worktop, and knead the dough till smooth.
  6. Divide the dough equally, weighing approx. 100g per dough ball.
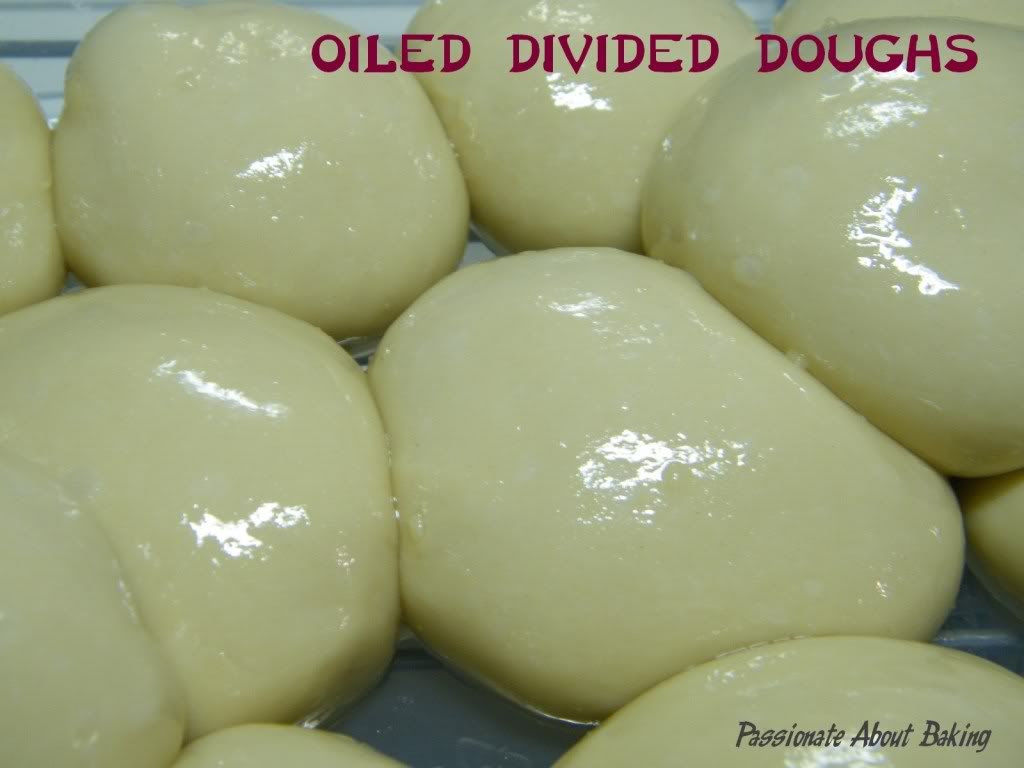
  7. Shaped it round, then oil it and place into a container.
  8. Leave it in the refrigerator overnight, or at least 8 hours.
Fillings (your personal preference)
Variations of what I made:
  1. Egg only
  2. Cheese only
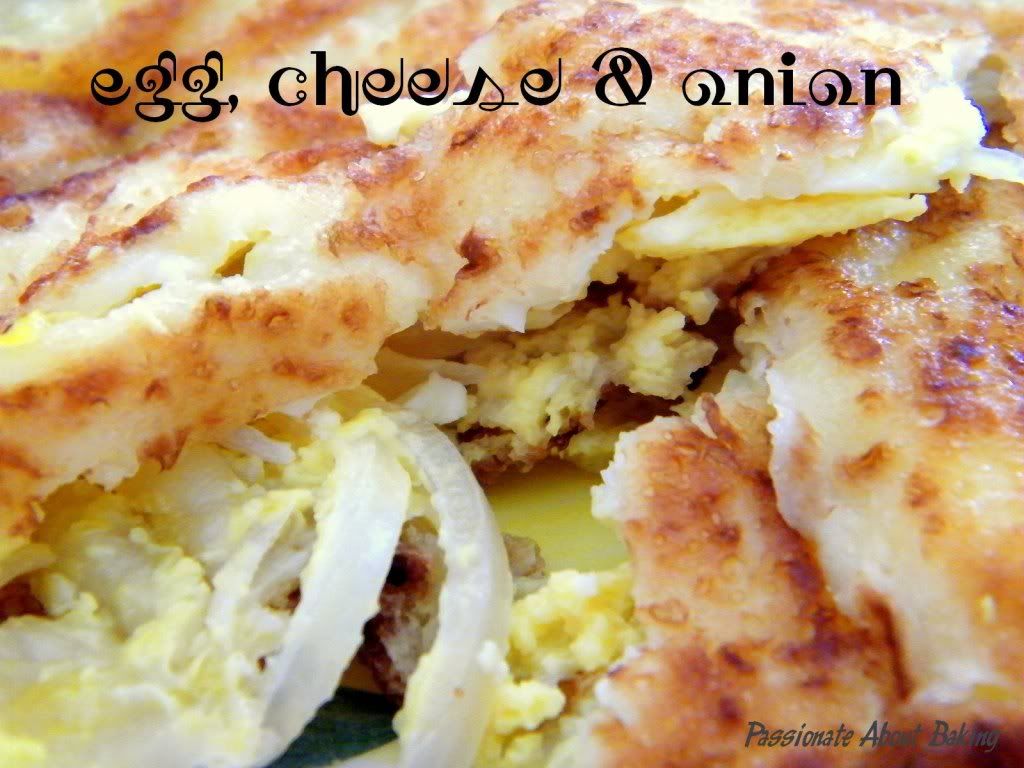
  3. Egg, cheese and onions
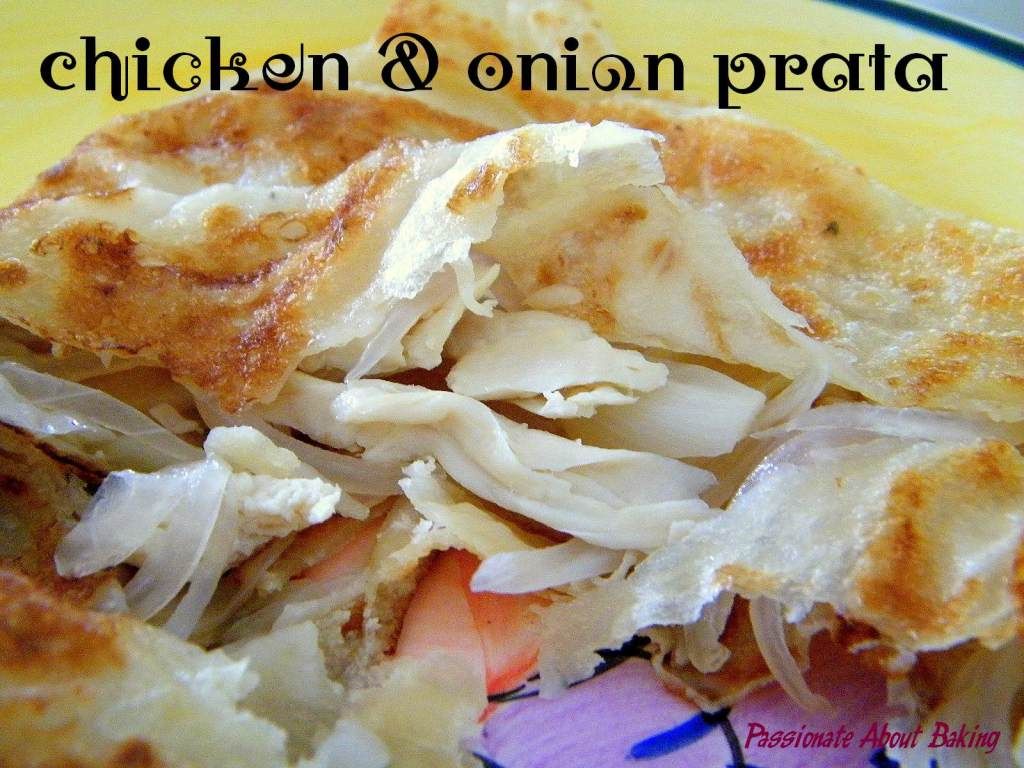
  4. Shredded roast chicken (leftover from the night before) and onions
  5. Plain
Making pratas:
  1. Bring out the dough from the fridge one hour before making.
  2. Oil your worktop well. Prepare your frying pan.
  3. Refer to the below video for the novice way to make the stretched dough. If you want to try flipping like a pro, refer to this video link.
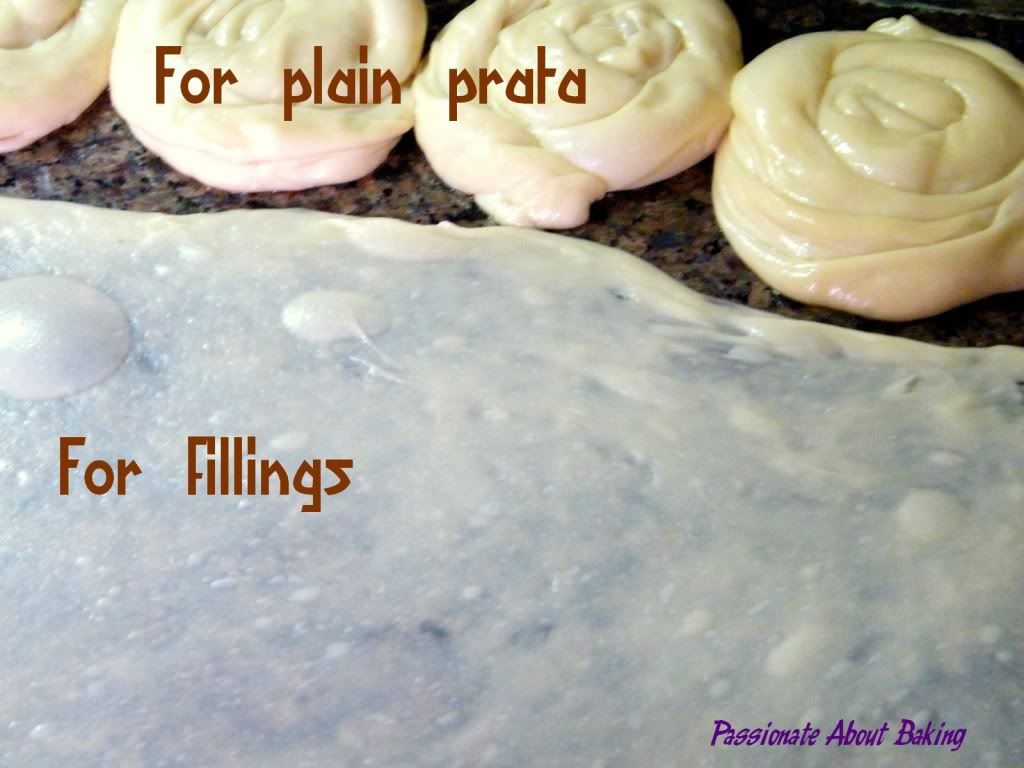
One of my nicer membrane dough (limited by the space I have!!)
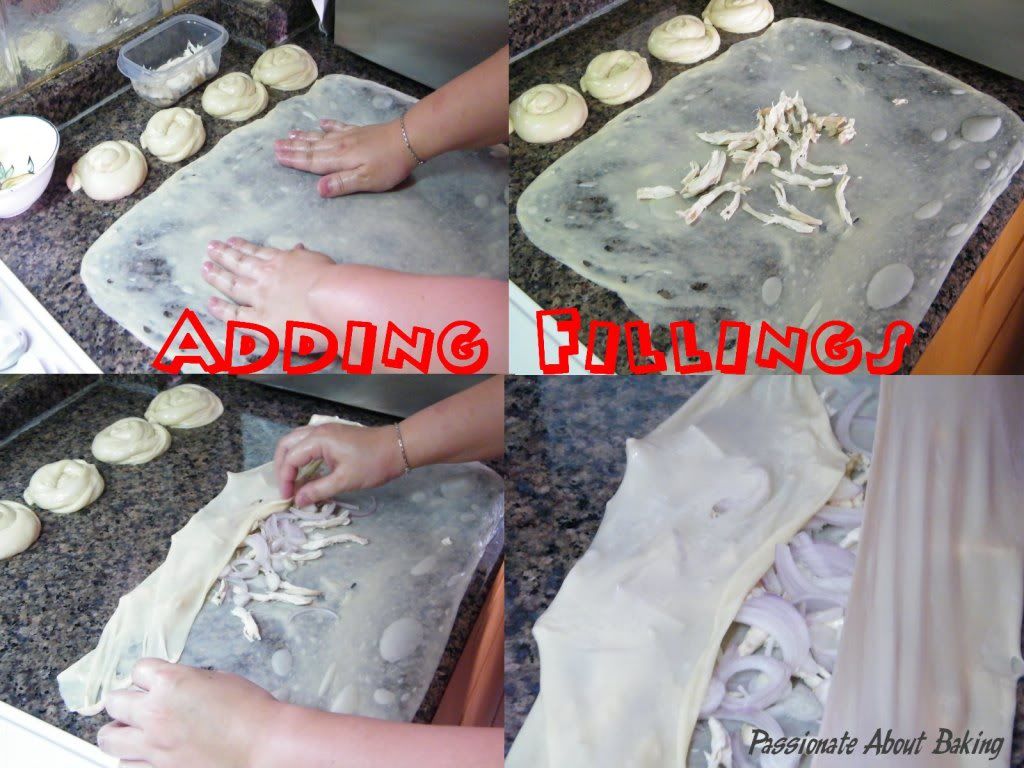
Once you have expanded your dough into a thin membrane, you can start adding the fillings in the centre.
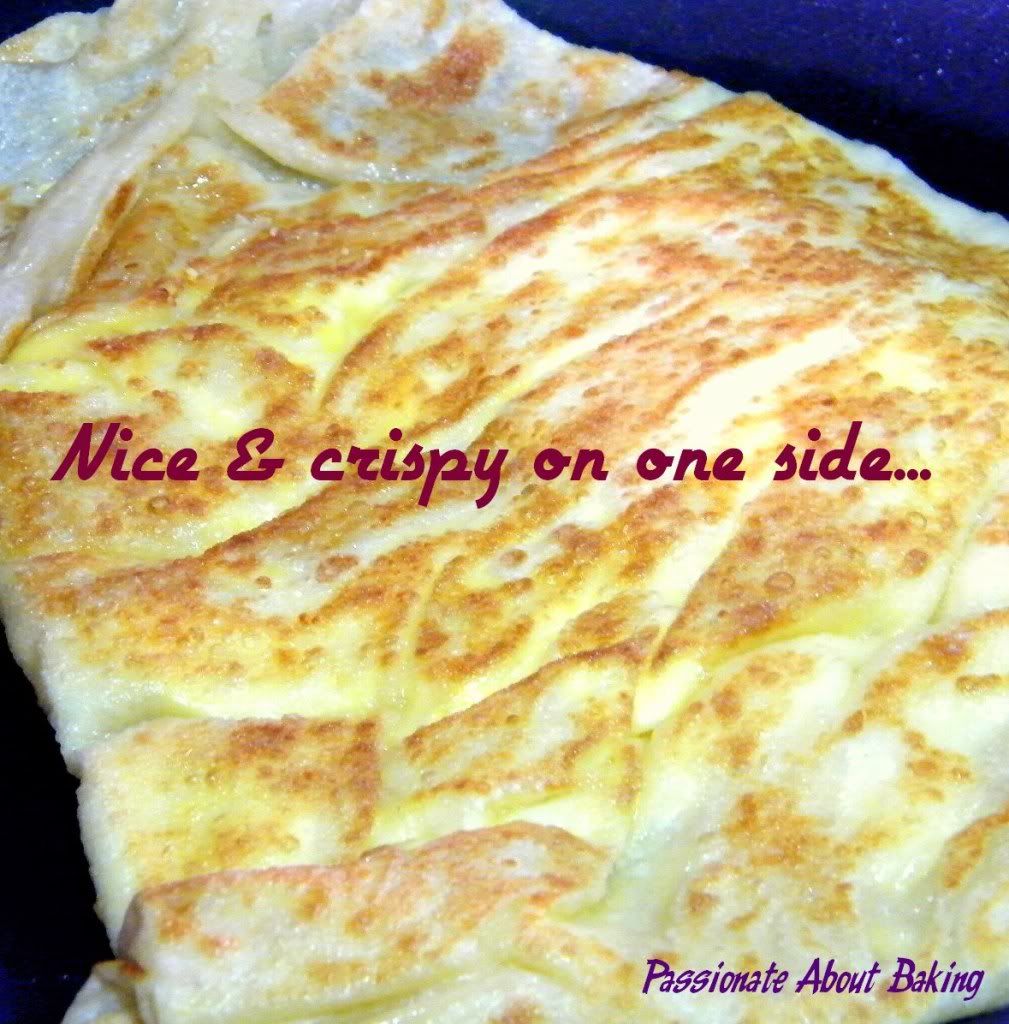
Then fold up the dough and fried it until brown.
Enjoy while hot!
I thought that since I have fillings in my pratas, I can omit the curry gravy. However, when I tasted it, I found something amiss. Curry gravy is still needed somehow! The prata was thin, sweet and crispy, even though the folded sides were a bit chewy and thick though. As I only tried it after I finished frying all, they had turned cold. I believe when consumed hot, it will be even nicer!

Have enough oil in the pan when frying the prata, otherwise, it can get charred pretty fast. Also, when stretching the dough, try to stretch it as thin as possible. Don't worry about the pockets of breakages. As long as the breakages are not in the centre, you can safely fold it and cover them.

My favourite combination was the egg, cheese and onion prata. The egg was moist, and the onion was sweet. It was very appetising. My children had their plain pratas with chocolate syrup, and they loved it!

Durian Swiss Rolls

I completely agree with Jean! It's truly a month of durians, durians and more durians! I have been eating durians non-stop, at least twice a week since two weeks ago! Even the $2/pc tasted good, don't need to indulge too much on MSW (猫山王), even though I will still yearn to have some during its season!
After my failed attempt on the durian chiffon cake, I still have some durians pulps left over. I decided to make durian swiss rolls. It seems that, there are endless options of using durians nowadays, compared to previously, where only durian puffs, durian swiss rolls and durian crepes were available commercially! Nowadays, you can still bake durian cheesecake with it!

I made my durian swiss roll using Pook's soft sponge cake recipe. The sponge cake is really very soft, however, I found that it's a bit "rough" for swiss rolls. Perhaps, this recipe wasn't meant for swiss rolls, more suitable for trifles or other whole cakes! Somehow, I found that using whole eggs and separating eggs really made a lot of difference to the texture of the cakes, especially swiss rolls. I still prefer swiss rolls using the traditional chiffon method, followed by separating the egg yolks and egg whites method, and finally the whole eggs method. The whole eggs method is less cumbersome though.

I hope you can try out this sponge cake recipe for swiss rolls and see if you agree with me!
Recipe for Durian Swiss Rolls 

Soft Sponge Cake, extracted from Daily Delicious
Makes approximately 13" x 11" sheet pan

Ingredients:
4 nos  Eggs
85g Fine sugar
80g Cake flour, sift
A pinch of salt
40g Whipping cream (warm)
Method:


  1. Whisk the eggs until lighten, then add the sugar gradually and beat till thick and lighten (Thick ribbon stage).
  2. Sprinkle the sifted flour and salt over the egg batter and fold to combine.
  3. Take 1/4 cup of batter and mix with the warm whipping cream, fold to combine. Pour the batter back, and fold to combine.
  4. The batter will be smooth and thick.
  5. Pour into a lined sheet pan, and bake it at preheated oven of 180C for about 12mins.
  6. Let it cool completely before frosting.
Fillings:
200g Fresh durian pulps
200g Whipping cream
20g Caster sugar

Assembly:
  1. Beat whipping cream with caster sugar till thick (soft peak).
  2. Place the cooled cake on a silicon paper. (I merely used back the lined sheet which was used to bake the cake).
  3. Spread the durian pulps on the cake evenly and thorougly.
  4. Then spread the whipping cream on the cake evenly.
  5. Roll it up tightly.
  6. Let it chill in the fridge before slicing. (I omitted this part and found they were very messy!)
  7. Consume within 2-3 days as fresh durian pulps are perishable, unless it is frozen.
I'm submitting this entry to the Aspiring Bakers #9 - Swiss Rolling Good Times hosted by Obessedly Involved with Food.

Durian Chiffon Cake with a T...

What do you think of the outlook of the durian chiffon that I made? Looked pretty on the outside right? Right! When I overturned it to cool, it stayed nicely and neatly on the tube pan too! Never did I expect it to have flaws! I tried this recipe some years back, and it failed. I wanted to give it a try again, thinking that it was perhaps I didn't do it well. I've been successful in chiffons, and I don't think it was due to my skills! *grin*
Anyway, back to this recipe from Kevin Chai's book, I suspected the recipe might not be that good. The last time, it was too watery, so this time, I added slightly less milk to the batter. Still the chiffon didn't work.
On one side of the chiffon...
Any veteran chiffon bakers that can help to advise on what caused the tunnel in the chiffon? Partly also because the pan I used was slightly too small for it to expand. Even so, I believe that was not the reason for the big deep tunnel to form... 
on the other side.

Roasted Garlic and Rosemary Bread

Roasted Garlic & Rosemary Loaf
When Laureen said it's very very good, I really believe it had to be very very good! Bake with one of my two favourite ingredients - garlic and rosemary, it definitely cannot go wrong! I've never explored roasted garlics before. All I had tried was just sauteed garlic or fried garlic as garnish. Roasted garlic? It is truly heaven sent!

I've been baking sweet buns since the day I found the perfect recipe for it! So it's time to cut down on sugars...I just couldn't wait to try the Roasted Garlic and Rosemary Bread when I saw it! Now, it says two heads of garlic...hmm, what does two heads means? Two small  cloves? Or two big garlic cloves? Ah...luckily I still have sanity check. Looking at the ingredients of using 560g of flour, how would two small cloves provide enough taste? So I decided to use two large garlic cloves, unpeeled. Through that, I've learnt two new things - heads of garlic, and roasting garlic.
I'm a lover for herbs, especially rosemary. I like to buy them too! However, because I know I don't usually use them up fast enough, I will just keep them in the freezer. And I'm happy to just do that so that I can have fresh herbs as and when I want. Well, it might not be as good as freshly plucked ones, but who can tell the difference? :p
You can find the original recipe at Eat and Be Happy. For me, I used a mixture of wholemeal wheat flour, bread flour and plain flour. It turned out to be perfect. I like wholemeal wheat flour in my breads, it made me feel less guilty when eating them! And yes, the recipe really made a HUGE enormous loaf! I will make it into two loaves the next time I baked. It's a rustic dense soft loaf!
*~*.................................................................*~*
Roasted Chicken & Wrap
If you asked me, I have no inspirations lately. However, my love for eating never dies. So what happens when my inspirations are out? Well, just check out other bloggers' and follow them. That was what happened on Friday when I made the Crispy Roast Chicken from Happy Home Baking. Thanks to her detailed explanation, I was able to make wonderfully roasted herbed chicken. Since I used rosemary in my rustic bread bake above, I decided to use fresh thyme for the chicken instead. It turned out to be truly good.
Instead of having roast chicken with the usual rice, I decided to have it with wholemeal tortilla wraps (as suggested by HHB too!) As I've not tried making tortillas, I decided to buy them instead. Just in case it didn't turn out good. Slice out the chicken pieces, place them on the wrap with lettuce, cheese and button mushrooms, then wrapped them up... Hmm, you'll have a wonderfully satisfied healthy meal! Enjoy!