It's scones craze for me lately. Probably because there was demand for it, by my sisters. When there is demand, there'll be motivation to bake. That explained why I've been baking so much scones lately. I "discussed" with NEL about baking scones and she also shared some tips with me. Thanks NEL again! :)
I had wanted to try her recipe, but changed my mind as I had a baking book with me. I tried this Leon's Scones from bake-a-boo bakery cookbook.
Previously, I read some information about scones like, don't knead, don't use your fingertips etc. However, this book seemed to do all the opposite about what I knew! Out of curiousity on how it will turned out, I tried it. Surprisingly, besides being really bland, it smell milky and nice. You definitely need some whipped cream and jam to go with this scone.
Recipe for Leon's Scones, extracted from bake-a-boo.
(Makes approx. 18 mini scones)
Ingredients:
375g Self raising flour
1.5 tsp Baking powder, heaped
75g Unsalted butter, cubed
2 Eggs
110g Whole milk
Method:
1. Sift the flour and the baking powder in a large mixing bowl, then rub in the butter with your fingertips until the mixture resembles fine breadcrumbs.
2. Make a well in the centre and pour in the beaten eggs and milk. Mix with a wooden spoon, starting from the centre of the well and stirring outwards until you have a sticky dough. Cover the bowl with clingfilm or a damp cloth and leave to rest for 5 mins.
3. Lightly dust a work surface with flour, then knead the dough vigorously for 2 mins until it is smooth and elastic. Rest the dough for another 5 mins.
4. Roll out the dough to approximately 1/2 inch thick and use a 2 inch fluted cutter to cut out the scones, rerolling the trimmings as necessary.
5. Place it on a baking tray and brush with milk. Bake in the preheated oven of 200C for 10-12mins or until it's golden brown.
6. Serve warm with whipped cream and jam.
I also proceed to try NEL's recipe. However, I tweaked it and added more ingredients to make it more interesting. This definitely tastes better than the plain scones I made earlier!
Recipe for Wholemeal Cranberry Scones, modified from NEL's scones.
(Makes approx. 15 regular scones)
Ingredients:
105g Unsalted butter, cold and cubed
230g Top flour
100g Wholemeal flour
6 tsp Baking powder
1/8 tsp Salt
70g Caster sugar
180g Whole milk
37g Instant oat
80g Cranberries
Method:
1. In a large mixing bowl, sift together top flour and baking powder. Add in wholemeal flour.
2. Mix in sugar and salt.
3. Using a scraper, mix in the cold butter into the dry ingredients until the mixture resembles coarse crumbs.
4. Mix in the instant oat and cranberries.
5. Make a well in the centre and add in milk. Stir with a spatula until just combined. Knead gently a few times. The mixture will be a little sticky, moist and lumpy. If dough is not firm enough, chill it first. (Though I proceed to roll it out on a flour-dust top, which explained the shape of my scones).
6. Roll the dough into a round disc about 3/4 inch thickness.
7. With a round cutter, cut out the doughs into 15 pieces.
8. Place the scones on a greased baking tray, place them close to one another. Brush the tops with some milk.
9. Bake in preheated oven at 190C for about 15 minutes or until they are well risen and the tops are a light golden brown. Remove from oven and place on a wire rack to cool. Serve warm.
This is good enough to eat it on its own!
This is my submission to Small Small Baker's Aspiring Bakers #1: Chiffon Cakes.
This is one good opportunity for me to practice my chiffons too! Lately, I've been baking quite a lot of chiffon cakes, not because of this event, but because I like chiffons. They were mainly banana chiffon and orange chiffons.
For this event, I made some changes to this recipe that I've been using. I found that by adding Grand Marnier to the orange chiffon, it really gives out a very nice orange aroma that lingers for a longer time! Do try it and you'll feel the difference with the added orange liquer!
Recipe for Grand Marnier Orange Chiffon Cake, modified from Kevin Chai's "Chiffon is Done".
Ingredients:
(A)
6 Egg yolks
25g Caster sugar
(B)
1/4 tsp Salt
45g Cooking oil
(C)
1 Orange zest
55g Fresh orange juice
2 tsp Grand Marnier
(D)
95g Self-raising flour
(E)
6 Egg whites
1/2 tsp Cream of tartar
60g Caster sugar
Method:
(1) Whisk ingredients (A) till light.
(2) Add (B) into (1) and mix well.
(3) Then add (C), mix well, followed by (D). Ensure that they are thoroughly mixed.
(4) Whisk egg whites from ingredient (E) with cream of tartar till foamy then gradually add in sugar and whisk till soft peak.
(5) Scoop a third of egg whites and into mixture (3) and fold them together.
(6) Pour the mix in (5) into the remaining egg whites and fold them thoroughly and quickly.
(7) Pour into a 9" tube pan.
(8) Bake at 170C for 45mins or till cake is cooked through.
(9) Remove from oven and invert the cake (still in the pan) onto a bottle and leave it to cool down completely.
(10) Remove cake from tube pan and slice.
The temptation to bake and eat scones started last week when my sisters and I had scones at The Pavilion, Sentosa Resort and Spa. We were still harping over how good the scones tasted. That prompted me to venture to Bakertan and Happy Home Baking's blog. I recalled they had very detailed write up on their experience with scones. Thanks to them, I don't have to surf further to understand more about scones! Finally, to replicate what I had at Sentosa, I used HHB's Cranberry Oatmeal Scones recipe. The result? Divine! Recipe for Wholemeal Scones, modified from HHB's Cranberry Oatmeal Scones recipe.
Ingredients:
(makes 12 3" round scones)
300g Top flour
100g Wholemeal wheat flour
4 tsps Baking powder
4 tbsps Caster sugar
1/8 tsp Salt
130g Unsalted butter, cold, cut into small cubes
40g Instant oat
180g Whole milk
100g Raisins
Method:
1. Soak raisins in some water for 15mins. Drain well and set it aside.
2. In a large mixing bowl, sift together top flour and baking powder. Add in wholemeal flour.
3. Mix in sugar and salt.
4. Using a scraper, mix in the cold butter into the dry ingredients until the mixture resembles coarse crumbs. (I learn this from Rei, so as to prevent the butter from melting.) It is important that the butter should be cold so when it is cut into the flour mixture it becomes small, flour-coated crumbs.
5. Mix in the instant oat and raisins.
6. Make a well in the centre and add in milk. Stir with a spatula until just combined. The mixture will be sticky, moist and lumpy.
7. Gather up the mixture and place it on a lightly floured surface and give it a few light kneading (not more than 10 seconds) so that it comes together to form a dough. Do Not over work the dough. (Only mix the dough until it comes together. Too much kneading will cause gluten to develop, and the resulting scones will turn hard and chewy. Knead only until the ingredients come together into a combined mass.)
8. Pat the dough into a round disc about 3/4 inch thickness.
9. With a round cutter, cut out the doughs into 12 pieces.
10. Place the scones on baking tray, space them apart. Brush the tops with some milk.
11. Bake in preheated oven at 200 degC for about 12 minutes or until they are well risen and the tops are a light golden brown. Remove from oven and place on a wire rack to cool. Serve warm.
Thanks Bakertan and HHB for sharing so generously!
I was happy to have borrowed this book from the library - Cakes & Bakes, published by Parragon Books Ltd. The recipes in the book looked simple and good. Therefore, I was tempted to try it last night. I decided on Ginger (Topped) Fingers. Instead of adding the toppings, I left the shortbread as it is. It was crispy and fragrant. However, it was also very crumbly.
My colleagues tried them and commented that they will be good as cheesecake base. I also agree. Therefore, the next time when I bake cheesecake, I will likely use this shortbread as the base. Try it and you know what I meant.
Recipe for Ginger (Topped) Fingers or Shortbread, extracted from Cakes & Bakes.
(Those in brackets are from original recipe.)
Ingredients:
175g Butter, plus extra for greasing
225g Plain flour
1/2 tsp Ground ginger (1tsp Ground ginger)
1/2 tsp Ground cinnamon (without this)
75g Brown sugar (85g Golden caster sugar)
Method:
1. Preheat the oven to 180C. Grease a 9" round tart pan.
2. Sift the flour, ground ginger and cinnamon into a bowl and stir in the sugar.
3. Rub in the butter until the mixture begins to stick together.
4. Press the mixture into the prepared tin and smooth the top with a palette knife.
5. Bake in the preheated oven for 40mins, or until very lightly browned.
Ginger Toppings (which I totally left out, for your reference)
1 tbsp Golden syrup
55g Butter
2 tbsp Icing sugar
1 tsp Ground ginger
Method:
1. Place the syrup and butter in small suacepan over a low heat and stir until melted.
2. Stir in the icing sugar and ginger.
3. Remove the shortbread base from the oven and pour the topping over it while both are still hot.
4. Leave to cool slightly in the tin, then cut.
5. Transfer to wire racks to cool completely.
When the sisters have their day out, it was all about eating, chatting and enjoying one another's company!
I'll have to admit, I'm very fortunate and happy that I have three sisters. Yes, 四朵金花 (four golden flowers) as what many relatives called us. When my parents had my elder sister and myself (I'm #2), they wanted to have a boy. So my younger sister (#3) was born. Amongst us, we were like one or two years apart. Then after seven years, my youngest sister was born. My parents hoped that it will be a boy, but it wasn't. Thank God!
We always tease my youngest sister that fortunately she wasn't a boy. She was already spoilt by my parents since she is the youngest. If she was a boy, we couldn't imagine what kind of treatment that will be. (Did you taste sour grapes?) Anyway, growing up years weren't very pleasant. Amongst us, of course, there were the siblings rivalry. I shall spare the details.
However, in the recent years, when my younger sister and myself got married, all of us become closer. When we don't normally go out together while staying under the same roof, we meet up more often when we are living apart. All of us are married except for my elder sister. However, she has also moved out on her own. It was also her initative to have sisters meal at least once a year. Each of us takes turn to pay. And usually, my elder sister initiate a session when she spots good dining deals! She has appetite for good quality stuffs!
This time, it was my turn. I was back at Il-Lido again. In fact, it was her recommendation a month back that lead me to have the degustation meal with my spouse at Il-Lido. This time, we were there for the set lunch.
For the set lunch ($38++), there was a choice of soup or salad for the appetiser, lamb, fish or pasta for the main course. Boring as we can be, we had the same selection-Salad and fish. This was also a 1-for-1 deal if using Citibank credit card.
A bowl of Zwieback bread was served after we had our orders taken. This was refillable. :)
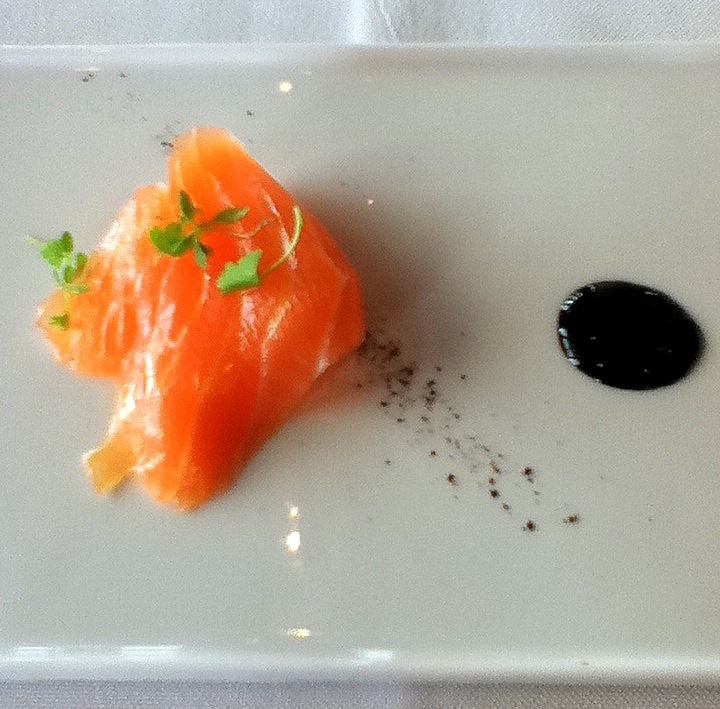
Complimentary from the chef was Raw Salmon. The balsamic vinegar at the side was thick and slight sour. It went very well with the raw salmon.
Appetiser was Prawn Salad with Balsamic Vinegar. The prawns was succulent and fresh. It was soaked in balsamic vinegar. The salad was fresh and sweet. The raspberry sauce and the other sauce was a good dip for the prawns.
Main course was Fried Sea Bass. The skin was thick, crispy and salty. The fresh was soft and bland. However, that was okay because the fish can be dipped in the carrot sauce at the side. The blanched spinach was very sweet. The fish fillet portion was quite big and thick.
Then, we were served our desserts, Chocolate Tart with Raspberry Ice Cream. The tart base was soft, not very crispy. The chocolate fillings was smooth and soft, something like mousse. It wasn't firm. Despite the texture, the taste was good. Raspberry ice cream was more sweet than sour. I would prefer it to be sour so that it goes better with the slight bitter chocolate tart. I had freshly brewed Italian coffee to go with my tart.
We sat there to chat until they closed for lunch. That was around 3.30pm. We moved around Sentosa for a while before we settled in Sentosa Resort & Spa. It wasn't intentionally. We were lured by the beautiful hi-tea set in The Pavilion, that we decided to order a set and shared.
We actually hesitated for a while before we decided on a set. It was like four little girls discussing how not to get scolding from their mum for some undesirable behaviour they had! LOL. It was quite funny!
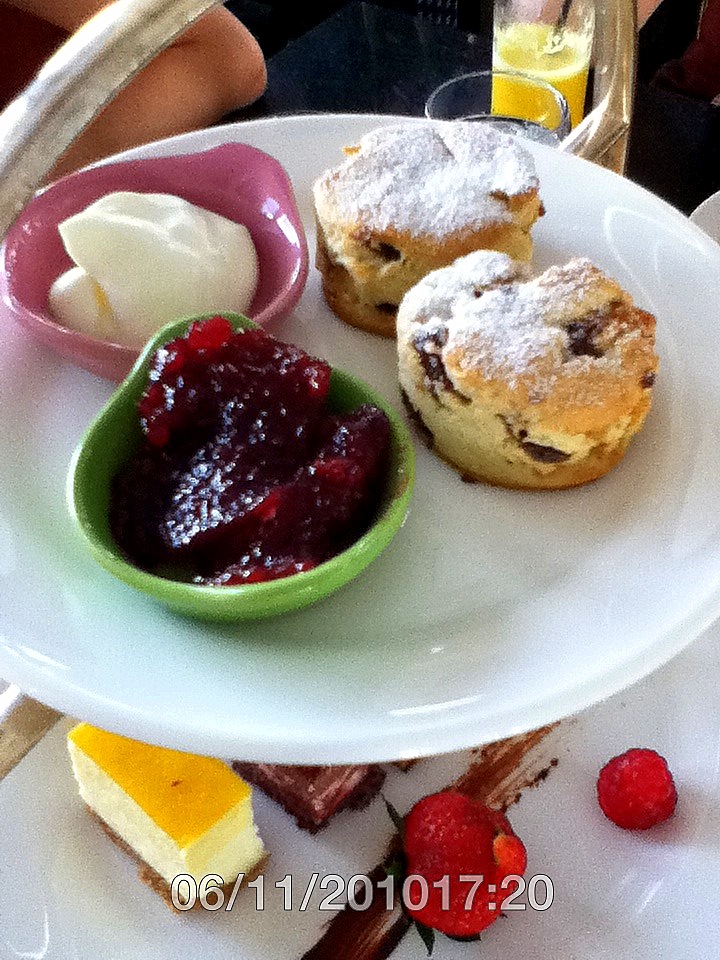
The Hi-tea set ($25+++) consisted of three layers. Top tier was two mini raisin scones, with whipped cream and fresh strawberry jams. The scones were very crispy and warm. Each of us had half. The strawberry jam was very fresh and went well with the scones.
Second tier consisted of sweets. A berry macaron, two cups of desserts, a choc-dipped marshmallow, a white chocolate truffle, a slice of passionfruit mousse cake, a slice of chocolate and raspberry cake, a slice of kueh lapis, a butter cookie, a fresh strawberry and two fresh raspberries. You won't believe it if I were to tell you, we shared equally for most of the items! Hahaha... The macaron was really good.
The last tier had four different types of bread and fillings. Different fillings in each bread include chicken meat, smoked salmon, beef and cheese. The breads were soft and tasty with the savoury fillings!
The hi-tea set come with a choice of hot drink. My sister ordered the hot chocolate ($8.50+++), while I ordered the TWG Geisha Blossom Tea ($8.50+++), and the other two sisters ordered fruit juices ($8.50+++ each). The tea came in a pot. It is a green tea with a fruity smell. Even though the tea had a very nice strong smell, the taste was very light.
By the time we finished our hi-tea, it was evening, which means, time to return to our parents' house and meet our respective family. We had a great time bonding together. We'll be looking forward to our next gathering...which won't be long.
It was Deepavali holiday.
We decided to bring the children to JB to reward them. The exams are over, and it's time to let our hair down. We would expect traffic jams at the causeway since it's going to be a long weekend and many people would have planned their holiday to Malaysia. So instead of going in the early morning, we decided to set out only after lunch.
There was the usual jam at Woodlands towards JB. We went to Tesco Tebrau City first, before hopping over to Aeon Tebrau City mall, which is my favourite mall in JB. There are many eateries in Aeon Tebrau City. However, I went back to Lavender Bistro for dinner as I wanted to try their food. The last time when I was there, it was only for desserts.
Caesar salad (RM10.90). The portion was not very big. Could be good for one person as entree. There were some shredded chicken pieces on the romaine lettuce. The caesar dressing was nice though. The lettuce was fresh. What was lacking was parmesan cheese powder.
Fried Chicken Rice (RM10.90). This overall set looked good. My spouse had this. He commented that the chicken rice tasted better than the chicken.
Hainanese Chicken Rice (RM10.90). My youngest son had this. He loved the chicken rice and finished them all. There were a few cubes of bean curd in the soup. He didn't finish the chicken meat. The meat was tender and fragrant.
Nasi Lemak (RM5.90). As my daughter is a very small eater, she decided to have nasi lemak as each of the condiments didn't look intimating to her. The nasi lemak consisted of fried silver fish, peanuts, a sunny-side up and the sambal chilli. If I may comment, the coconut rice is very fragrant and tasty. Once you have tasted it, you'll be hooked! The sambal chilli had small anchovies and it's not spicy at all! She liked her rice, even though she gave me her sambal chilli.
Teriyaki Chicken Rice (RM11.90). Big whole pieces of grilled teriyaki chicken on top of thinly shredded omelette on rice. According to my eldest son, he said it was very tasty and he really proved it by finishing the whole big bowl! However, I found that the rice pales in comparision to the coconut rice of the nasi lemak.
Penang Fried Kway Teow (RM7.90). I had wanted to order the curry chicken with tasty buns, but it was sold out. So, I ended up having the Penang Fried Kway Teow. It came with chilli and cockles. I counted the number of cockles, there were at least 15 baby cockles. I gave all of them to my helper as I don't eat them. The noodles was wet and sweet. Very similar to our char kway teow. I like the wetness in them, and the taste of the egg shreds. It wasn't spicy, so I added the sambal chilli from my daughter's nasi lemak. It tasted even better!
We ordered drinks. Hot chocolate (RM10.90) was really chocky and creamy. It was quite a large glass and my daughter couldn't finish it by herself.
Youngest boy, as usual, ordered his Cappuccino (RM6.90).
My spouse and I shared the Camomile Ginger Tea (RM8.90) again. The service staff topped up the hot water when we finished it.
We also ordered some desserts to share. Blueberry cheesecake (RM5.80) was just alright. The cheesecake wasn't very cheesy, it was mild and creamy. It wasn't too thick. The biscuit base was really thin. The size of the cake was rather small, but good enough for an after-meal dessert. Blueberry was just the swirl on top of the cheesecake.
Apple pie (RM5.30) was ordinary. It was served cold with vanilla custard. The fillings tasted a little like cheesecake. The sliced apples on top was quite hard. It lacked the cinnamon taste that I love. I also like my apple pie warm. This is only available during weekends and public holidays.
Not to mention, I also bought my favourite bamboo mochi bread (RM2.90) from the bakery after my dinner! Dining at the bistro will have to include their service charge and the GST.
Lavender Bistro & Bakery
Aeon Tebrau City
Opposite Jusco Supermarket Entrance
JB