Almost McDonald's Apple Pie fillings

My eldest son loves McDonald's. He usually orders its fish fillet with extra tartar sauce, apple pie and ice cream. But not necessary in that combination. On one Sunday, after our lunch at a food court, he suddenly feels like having McD's ice cream and apple pie. So we went to buy. As he ate his apple pie, he raved about the fillings, the crust etc. So I told him that after we got home, I'll make him an exact McDonald's apple pie confidently.

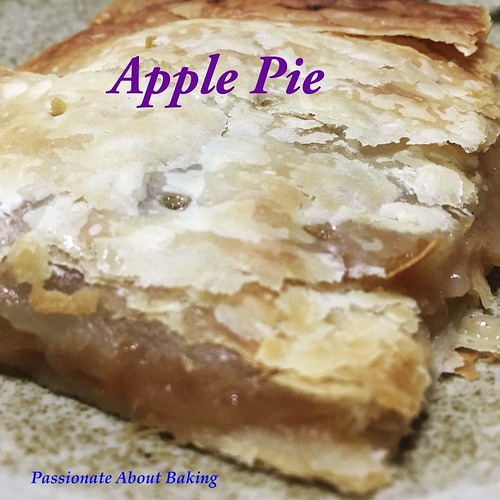
After searching online for a copycat recipe, I realised the secret ingredients was the apple cider. As I wanted it to be quick, I used storebought puff pastry since I wanted to try out the apple pie fillings first. After my son tried the apple pie, he said he likes the crust. >_<" However, he feedback that it was more sourish. Otherwise, he thought the apple pie was nice...close, but needs some improvement. I told him I'll improve on it the next time!
pie_apple03
Recipe for Apple Pie fillings, adapted from Babble
(Makes one 7" square pie)

Ingredients:
2 Apples (I used green apples), chopped to 1/2″ squares 
1/2 cup apple cider 
1/4 cup sugar 
1 teaspoon cinnamon 
zest and juice of 1 lemon 
big pinch salt 
2 tablespoons flour 

2 puff pastry sheet

Method:
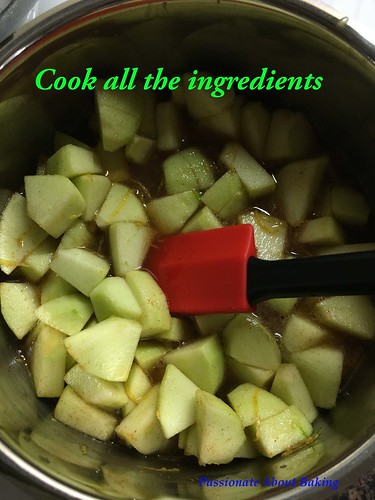
  1. Combine the apples, cider, sugar, zest and juice, and salt, and cook over medium heat. 
  2. pie_apple01
  3. The mixture will bubble, and cook down. 
  4. After about 15 minutes the apples will soften, but still have a little texture. Stir in the flour and cook for a minute or two more. 
  5. Remove from heat and set filling aside to cool. 
  6. Preheat oven to 180C.
  7. Place a puff pastry sheet on a baking tray. When the filling is cooled slightly, scooped the fillings on the centre of the puff pastry.
  8. Place another puff pastry to cover the fillings. Seal the sides and pierce holes on top.
  9. Bake in the oven for 22mins or browned.
  10. Let it cool slightly before cutting and serving.
pie_apple02
Notes:
  • The filling was a bit sour. I reckon it was due to the lemon juice and using of green apples. However, as you eat, it became better. The sourness was only during the first 2 bites.
  • I reckon less flour could be use so that there is still much gravy to be seen, even though the fillings were not dry.
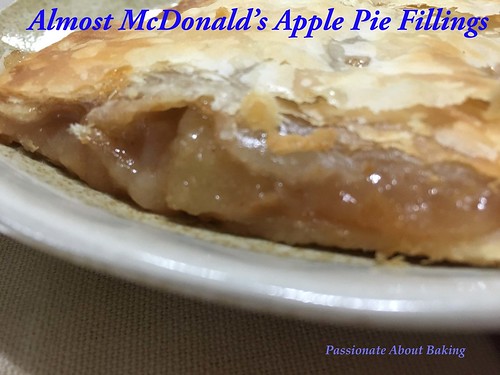
  • Overall, the taste was very close to McDonald's apple pie filings if sweet apples were used and fillings were more wet.

Homemade Coffee Extract

I've made Lemon, Orange and Vanilla extracts. I've also tried Pandan extract using the same method, but that failed on me. Maybe it was because I left it in the cupboard and long forgotten about it until the alcohol evaporated. So here I am, crazy about homemade extract, is my Coffee Extract. Here's how I made it.
extract_coffee
Recipe for Homemade Coffee Extract, adapted from Joy in Our Journey.
(Makes a approximately 250g)

Ingredients:
200g Vodka
75g Ground coffee beans
blender

filter bag

Method:
  1. Pour measured vodka into the blender.  Add ground coffee.
  2. Blend for up to 5 minutes in your blender; but don't blend so long that the mixture gets too hot.
  3. Line a jar or container with a cloth or other straining fabric.
  4. Pour blended coffee mixture into straining bag or fabric.  Squeeze liquid from bag or fabric. 
Coffee Extract doesn't need to be refrigerated, and can be stored indefinitely for your baking and cooking uses.  After you have followed this recipe, it's completely ready to be used; there's no need to store this for months until it reaches potency.  However, you'll want to store your Coffee Extract in a dark cupboard or closet.

Pain á lÁncienne Rustic Bread (Ciabatta)

After trying out the Classic French Bread, I moved on to another similar bread from Peter Reinhart's artisan breads every day. This bread has higher water hydration (80% hydration) and is more difficult to handle compared to classic bread. However, the crumbs were more holey and the bread was really light. 
bread_ciabatta09
Recipe for Pain á lÁncienne Rustic Bread (Ciabatta), adapted from "artisan breads every day" by Peter Reinhart.
(Makes 3 large loaves, or 8 small loaves)

Ingredients:
567g Bread flour
4g Instant yeast
11g Salt
454g Cold water
14g Olive oil

Method:
  1. Combine all ingredients, except oil, in a mixing bowl. Use the paddle attachment and mix on the lowest speed for 1 min. The dough should form a coarse shaggy ball. Let it rest, uncovered, for 5 mins to fully hydrate the flour.
  2. Drizzle olive oil over the dough. Then mix on medium-low speed for 1 min. The dough should become smoother but will still be very soft, sticky and wet. 
  3. Use a wet scraper to transfer the dough to a clean lightly oiled bowl. Cover the bowl with plastic wrap and let the dough rest at room temperature for 10 mins.
  4. Transfer the dough to a lightly oiled work surface. With wet or oiled hands, reach under the front end of the dough, stretch it out, then fold it back onto the top of the dough. Do this from the back end and then from each, then flip the dough and over it into a ball.
  5. The dough should be significantly firmer, though still very soft and fragile. Place the dough back in the bowl, cover, and let sit at room temperature for 10 mins. Repeat this process three more times, completing all repetitions within 40 mins.
  6. After the final stretch and fold, immediately cover the bowl tightly and refrigerate overnight or for up to 4 days. 
  7. On baking day: Remove the dough from the refrigerator about 2 hours before you plan to bake. Generously dust the baking tray with flour. Gently transfer the dough to a lightly floured work surface, taking care to degas it as little as possible.
  8. Dust the top surface of the dough with flour. Using a scraper, gently divide the dough into 3 square, taking care to degas it as little as possible.
  9. With floured hands, gently fold the dough in thirds, like folding a letter but without applying any pressure. Gently roll the folded dough in the dusting flour to coat it, then lift the dough and place it on the baking tray. Rest the dough seam side down on the tray. 
  10. Let it proof at room temperature for 1 hour or when increased to 1 1/2 times its original size.
  11. bread_ciabatta01
  12. Preheat oven to 230C with a baking stone. After 10mins, placed a pan of water into the oven and let it boil.
  13. Place the baking tray on the baking stone and bake at 230C with steam for 15mins. After 15mins, remove the pan with water. Rotate the pan and continue baking for at 210C for 10-12mins. The bread should puff up and the crust should be hard when tapped. 
  14. bread_ciabatta04
  15. Cool the bread on a wire rack for at least 45mins or completely before slicing.
  16. bread_ciabatta02 bread_ciabatta03 bread_ciabatta05 bread_ciabatta06
Similar to Classic French breads, I tried two separate time - one with baking on the same day and the other with overnight fermentation. Both crumbs turned out really good. Use this bread for sandwich and load them with loads of fillings as a meal. It's really good!
bread_ciabatta07
bread_ciabatta08 bread_ciabatta11 bread_ciabatta10

Brioche Loaf

After the success baking of Lavender Yogurt Bread from Alex Goh's book, I wanted to bake more from this new book I bought. So next was Brioche Loaf. The brioche turned out to be really fragrant and buttery. During proofing, the oil from the butter actually leaked out from the loaf pan. :p The dough was easy to manage and the overall result was really good. Even my family love it too. The bread remained soft even after a few days. 
bread_brioche09
Recipe for Brioche Loaves, adapted from "The Art of Making Bread" 无添加剂面包 by Alex Goh.
(Makes 2 regular loaves)

Ingredients:
Sponge dough
100g Bread flour
1/4 tsp Instant yeast
70g Cold milk
  1. Mix them together and knead to form a dough. 
  2. Cover it with cling wrap and leave to ferment for an hour.
  3. Keep it in the refrigerator for 12-16 hours. 
Main dough
380g Bread flour
120g Plain flour
10g Instant yeast
80g Caster sugar
8g Salt
180g Cold milk
2 Cold egg yolks
1 Cold egg
240g Unsalted butter, room temperature

Method:
  1. Put all the ingredients, including sponge dough, except butter, in a mixing bowl. Using a dough hook, knead to form a dough.
  2. Add butter in 2 additions and knead till smooth and elastic. Place a cold rag around the mixing bowl to prevent the dough temperature from rising too high. 
  3. Mould it round and palce in a bowl, cover it with cling wrap. Leave to ferment for 45mins.
  4. bread_brioche01
  5. Divide the dough into 8 portions, about 160g each and mould them round. Leave it to rest for 10mins.
  6. Flatten the dough, then make 3 fold. Flatten lightly and roll it up like swiss roll.
  7. bread_brioche02 bread_brioche03 bread_brioche04 bread_brioche05
  8. Put the 4 dough each into the rectangular regular loaf pan.
  9. bread_brioche06
  10. Leave it to proof for 45mins.
  11. Meanwhile, heat up the oven to 190C.
  12. Use scissors to cut the centre and place some butter in the cut portion.
  13. bread_brioche07
  14. Bake at 220C on the lowest rack for 26mins. Tent the bread after 13mins if the top turns dark.
  15. bread_brioche08
  16. Remove from the loaf pan immediately after baking. Cool completely before slicing.
  17. Toast lightly before consuming to give it a better texture.
  18. bread_brioche10